
This is a relatively simple project.I designed my plans based on similar bed frames found on sites like Restoration Hardware and Pottery Barn. The first time, I made this on my own and it took me two afternoons to complete, including the upholstery. As you can see from some of my pictures we made a second frame for another room. Mr. Handy tested my plans to build the frame and we noticed it was missing some pictures to help guide someone who has never worked with wood. I hope the newly updated post helps you easily create the Restoration Hardware style bed-frame for a minimal cost. 🙂 Together Mr. H and I finished this project from start to finish in under one day… and we took lots of breaks 😉 I drew out a plan by using the measurements of my mattress and the upholstered headboard that I made 9 or 10 years ago. I planned out the wood I would need and figured in the finished height of the bed with mattress on. So here is how I did it. Use these plans and adjust as you need for your mattress size.
King Size Bed Frame Materials & Cut List
Materials needed for King size frame:
- 4- 1x12x8′ pine boards for sides kiln dried ( I used the rough kind as it was being covered but if you wanted to stain you will need finished wood)
- 6- 1x4x8′ spruce or pine
- 3- 2x4x8′ spruce or pine for center support
- 18- 1x3x8′ spruce or pine for slats
- Brackets and wooden feet
- 2 1/2″ wood screws
- 2″ wood screws
- 1 1/2″ wood screws
- 2″ nail gun nails (optional)
- Wood glue
- Protective eye glasses
- Drill with proper bit for screws
- Wood drill bit for pilot holes on ends. 1/8″ worked for the screws I used.
- Chop Saw or Circular Saw * If you have all your measurements some hardware stores will cut the pieces to the size you need. However keep in mind that for this many cuts a busy Saturday is probably not in your favour 😉
- pencil and carpenters square or speed square ( This makes sure your cuts are square)
- Optional* Nail gun and compressor but really helps if you are making this by yourself to nail together in a couple of spots and then add screws and glue for strength.
Cut List for King Sized Frame:
- 2- 1x12x81″
- 2- 1x12x74″
- 2- 2x4x79″
- 2- 1x4x79″
- 4- 1x4x74
- 2- 1x3x74″
- 4- 2x4x8″ for corners
- 4- 2x4x10″ For corners
- 2- 1x4x24″
- 16-1x3x74″
- 4- 1x4x24″
I built the bed-frame in the room where it was going to be placed. You might be thinking oh no your floors.. Don’t worry, I was careful even though they were being resanded and stained the next month. You should consider making this in your garage or protect your floor with cardboard to reduce scratches. Double check your ceiling and door height especially if your bedroom is on the second floor and you need to do stairs… You don’t want to make this and then it not fit.
Please wear protective eyewear.
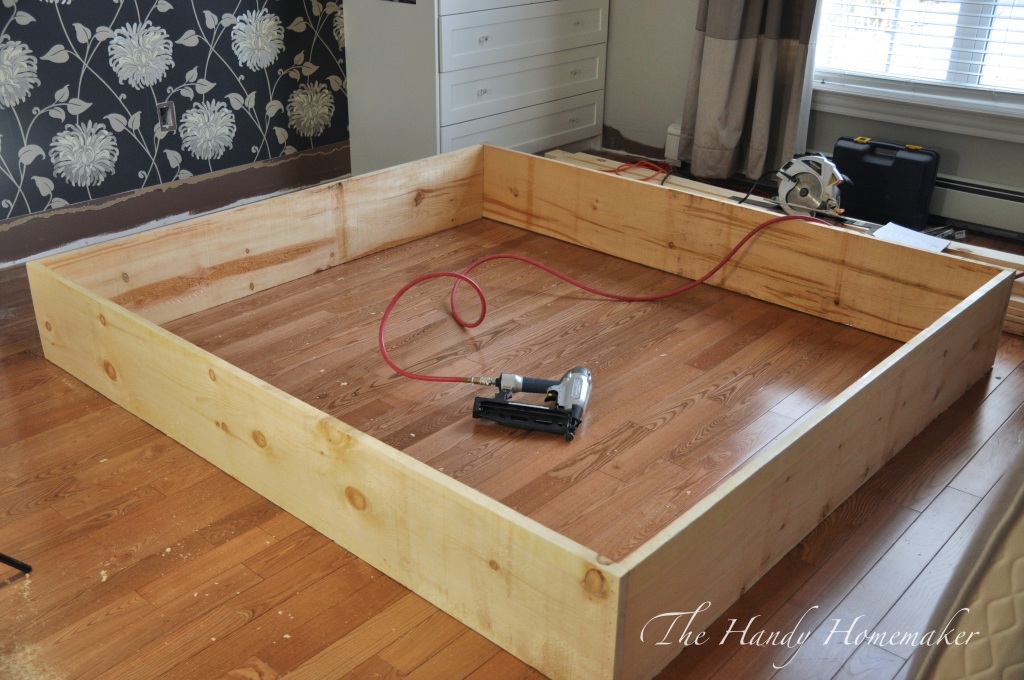
- Use carpenter’s square to square up the ends of the wood, then measure, mark, and cut all of your wood.
2. Use a two of the 1x12x81″ pine boards, these are for the sides (stiles) and two of the 1x12x74″ pine boards, these are for the ends (rails) The rough finish pine boards is actually 1″ if you buy smooth finished board you will have to adjust the length of this cut to make up the difference for the width.
3. Place the boards together and using a nail gun, tack together with the sides (stiles) placed on the outside of the ends (rails). Once tacked secure for strength with 4 – 2″ -2.5″screws per corner. I pre-drilled my holes first to prevent splitting. If you are making this to be stained use the kreg jig if you have one to join the corners. 4. Next add two of the 1x4x79″pine boards to the sides. Use an extra scrap piece 1×4 on the floor in each inside corner rails (This is to allow for the 1×4 and the 1×3 straps to sit flush with the sides once flipped over. Place the 1x4x79″ on each side and glue, and screw in place with a 1 1/2″ wood screws every 6 -8 inches.
 5. Add the 2x4x79″ to the inside, mark 28″ from the inside of the sides (stiles). Center the 2×4 to this mark. Again using the scrap 1×4″ to rest the 2×4 on while you screw in place.
6. Screw in place from the outside of the 1×12 into the end of the 2x4x79″ with three 2 1/2″ screws per end. 7. Use two pieces of 1x4x24″ across the center 2×4 supports, glue and screw in place.
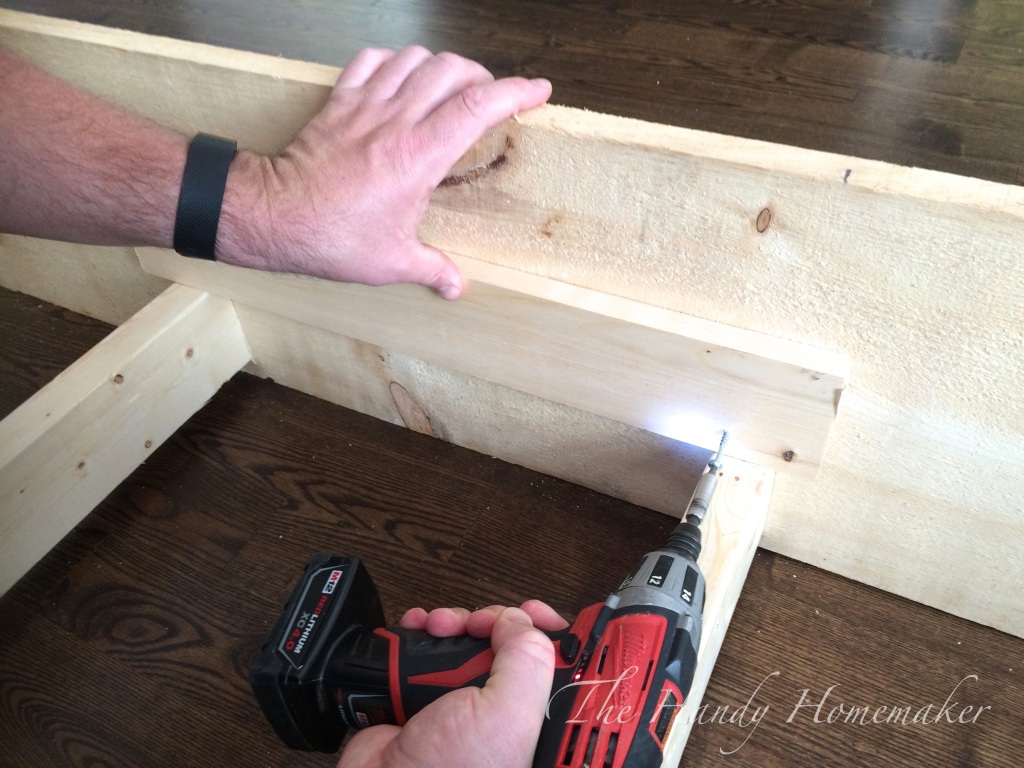
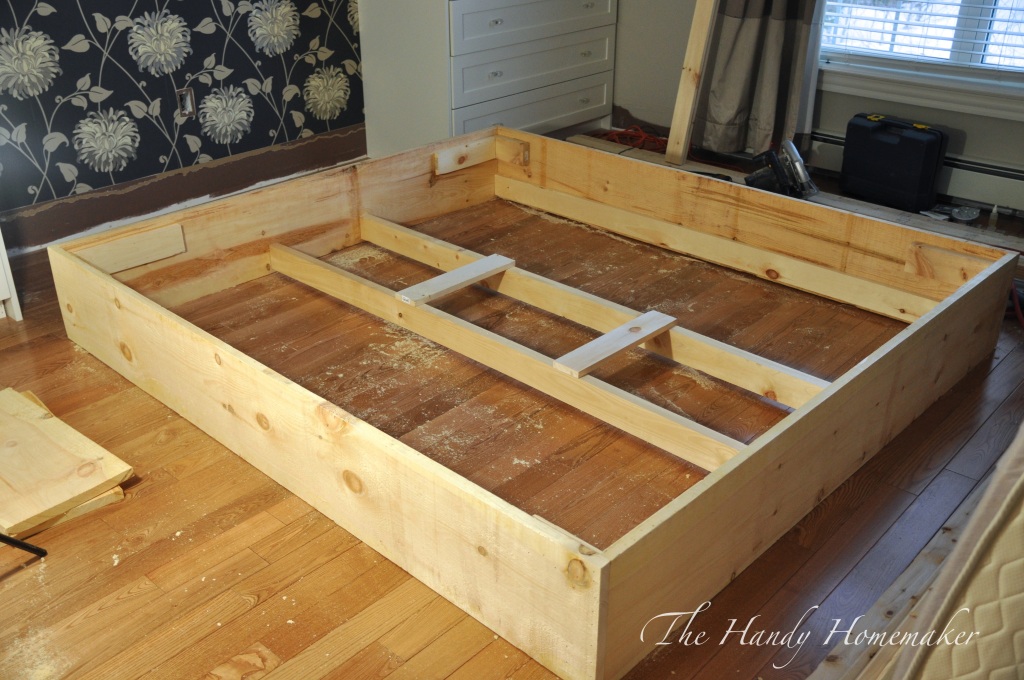 8. Place the two 1x3x74″ and two 1x4x24″ boards horizontally across the middle and screw in place. This is to help the 2×4’s from twisting in the center.
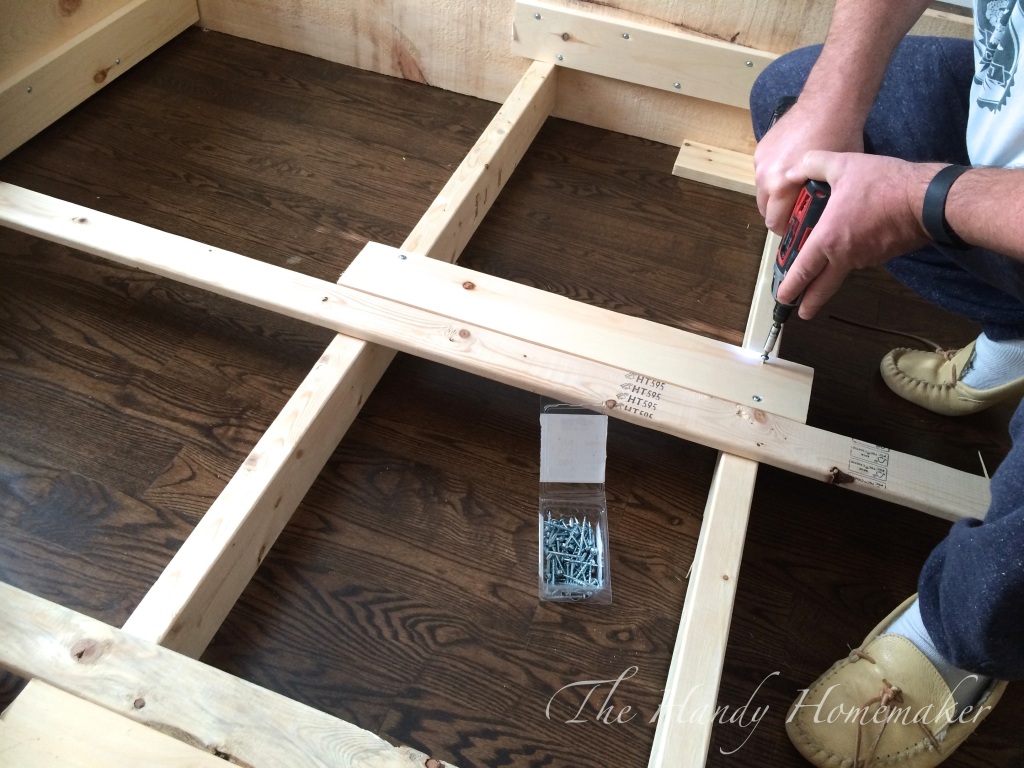
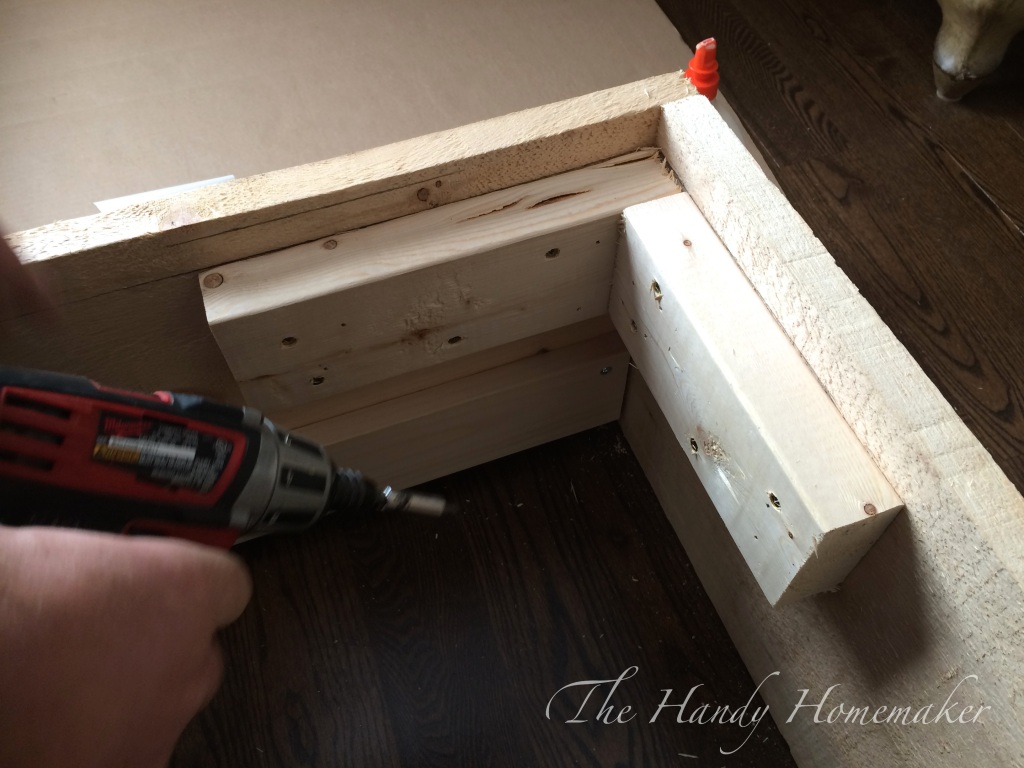
 9. Using the 2 pieces of 1×4 plus the metal corner bracket mark, mark the depth to make the bracket sit flush with the rails and stiles.
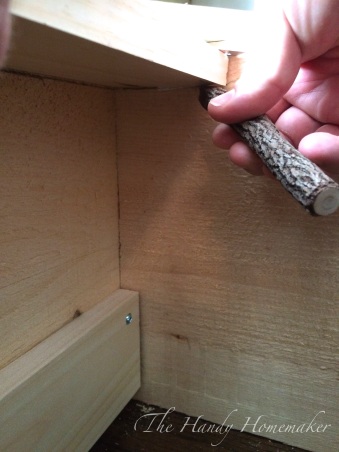
 10. Make a level mark with your square.
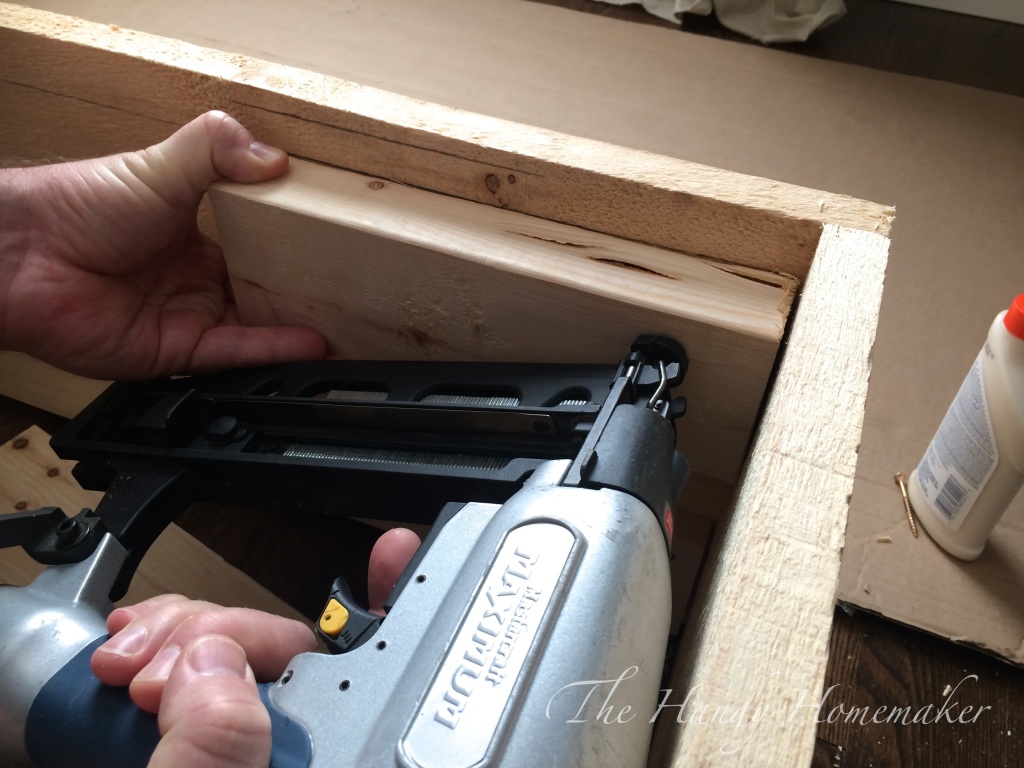 11. Starting with the 2x4x10″ place it under the marked line tack in place followed by the 2x4x8″ to each corner. Tack in place under the line with a nail gun and 2″ brad nails.
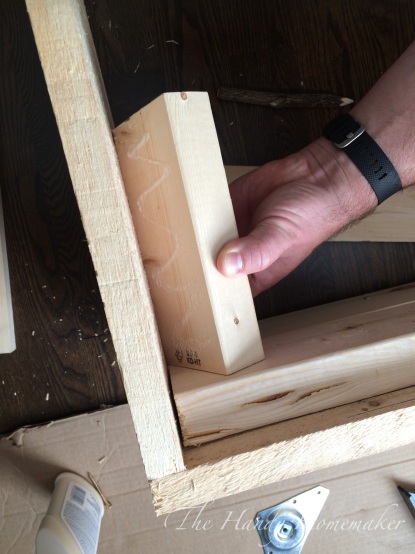
 12. Use glue and screw in place with the 2″ wood screws. Since I was upholstering, I added a few screws from the outside into the corner supports for added strength. ( I went a little overboard I think)
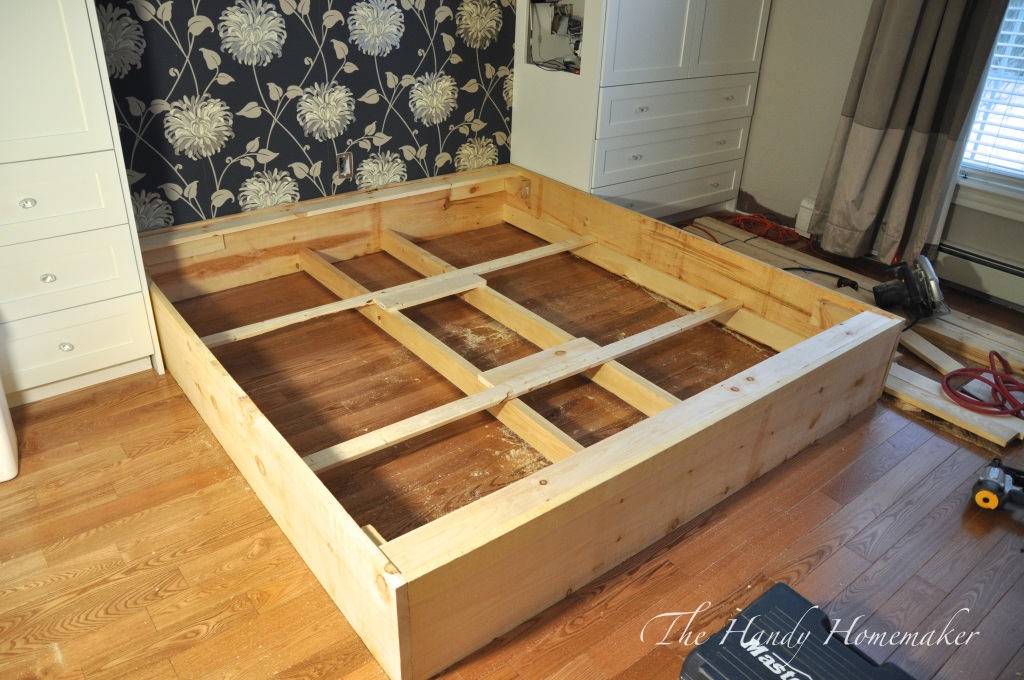 13. Add the 1x4x74″ lengthwise, place at the corners also along the outside edge of the 1x12x74″ (1 every 6-8″ is all that is needed.) I set the bracket in place when I placed the screws in the corners to ensure that they wouldn’t get in the way of the bracket screw holes.
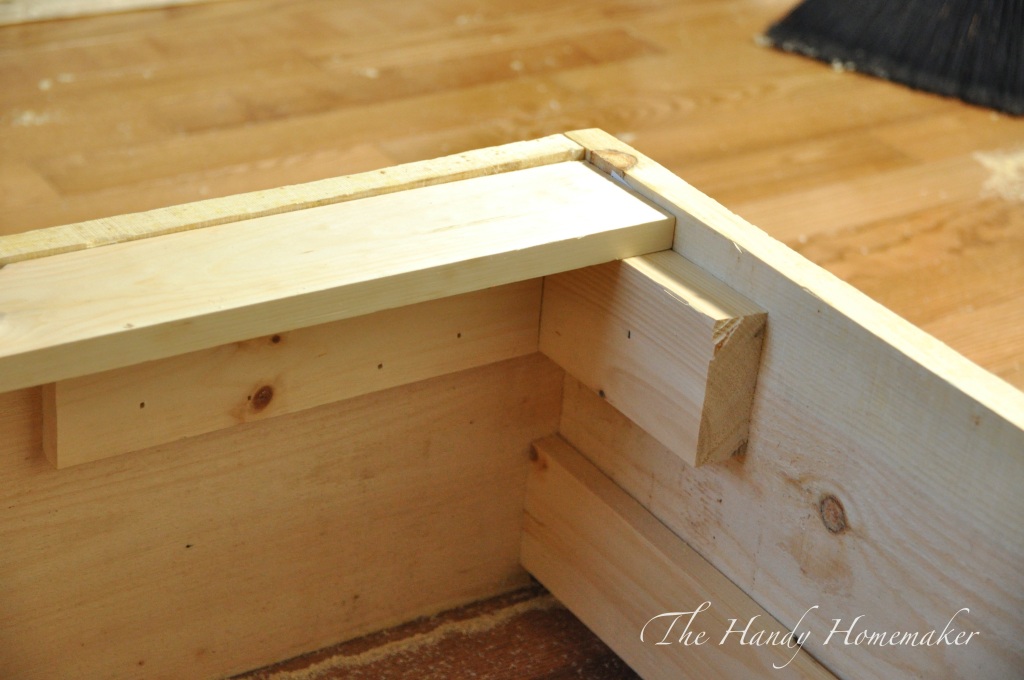 Close up to show how the corner is set to the correct depth to add the bracket for the leg.
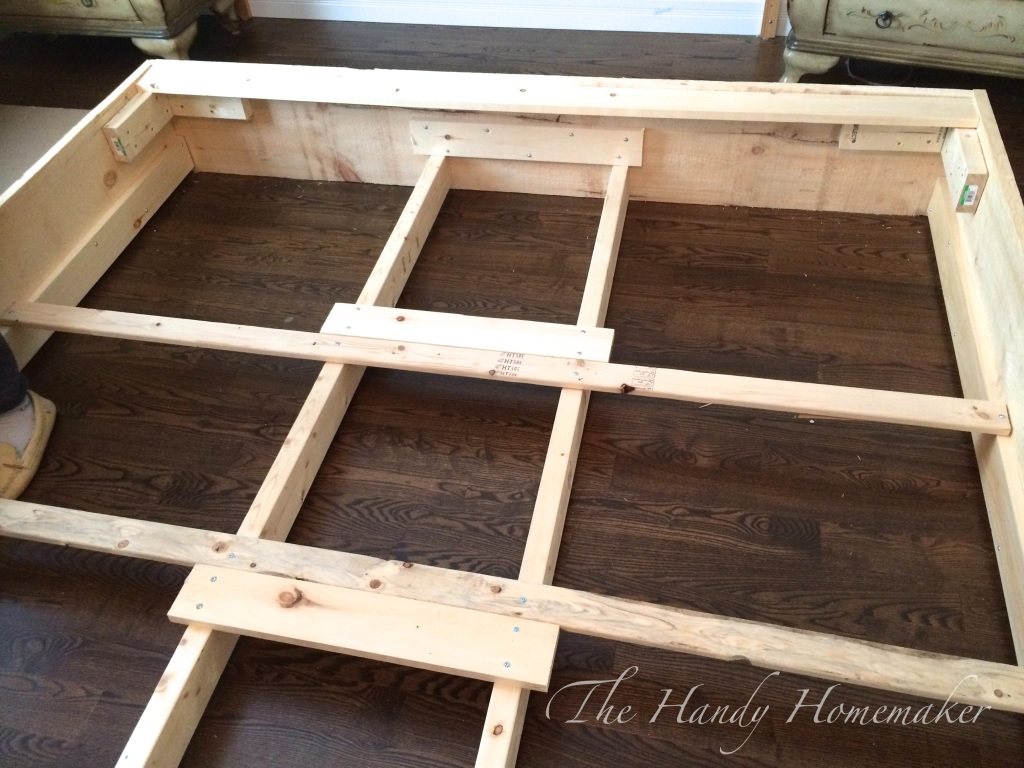 Okay we are almost finished… Ready for the Leg brackets.
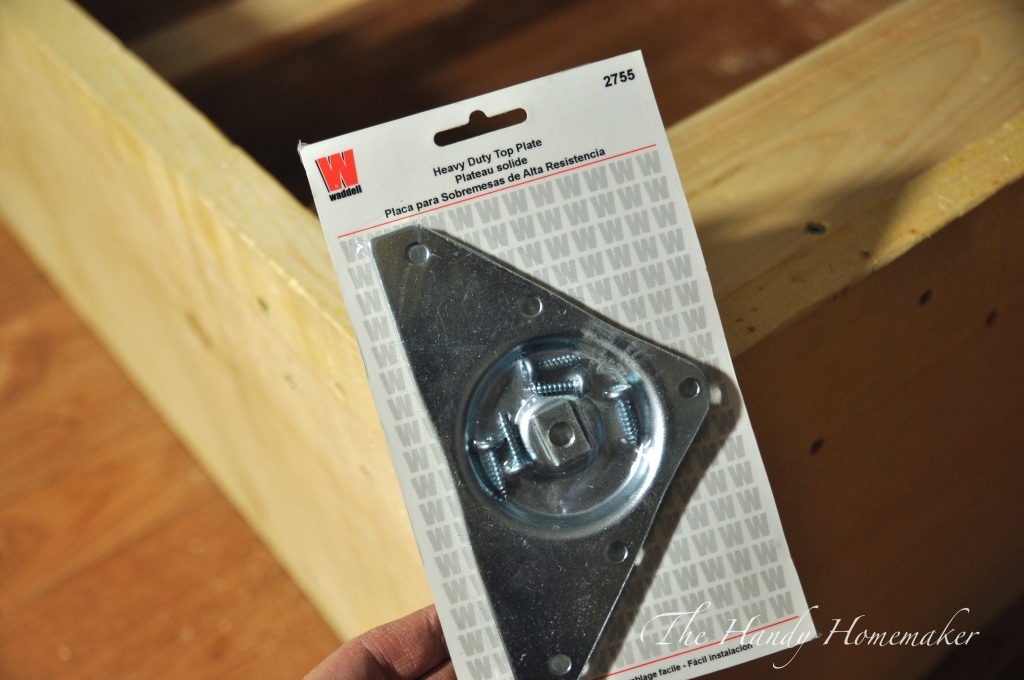 14. Add the leg brackets to each corner with 2″ wood screws The screws that came with the brackets are not strong enough imo…
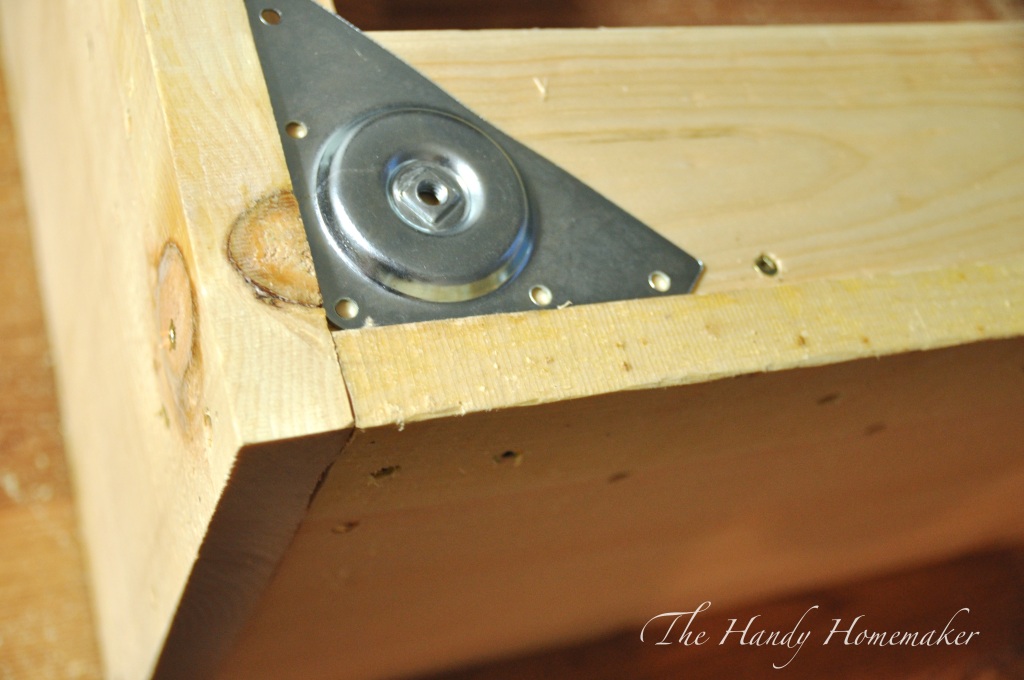 15. Center the bracket in the corner.
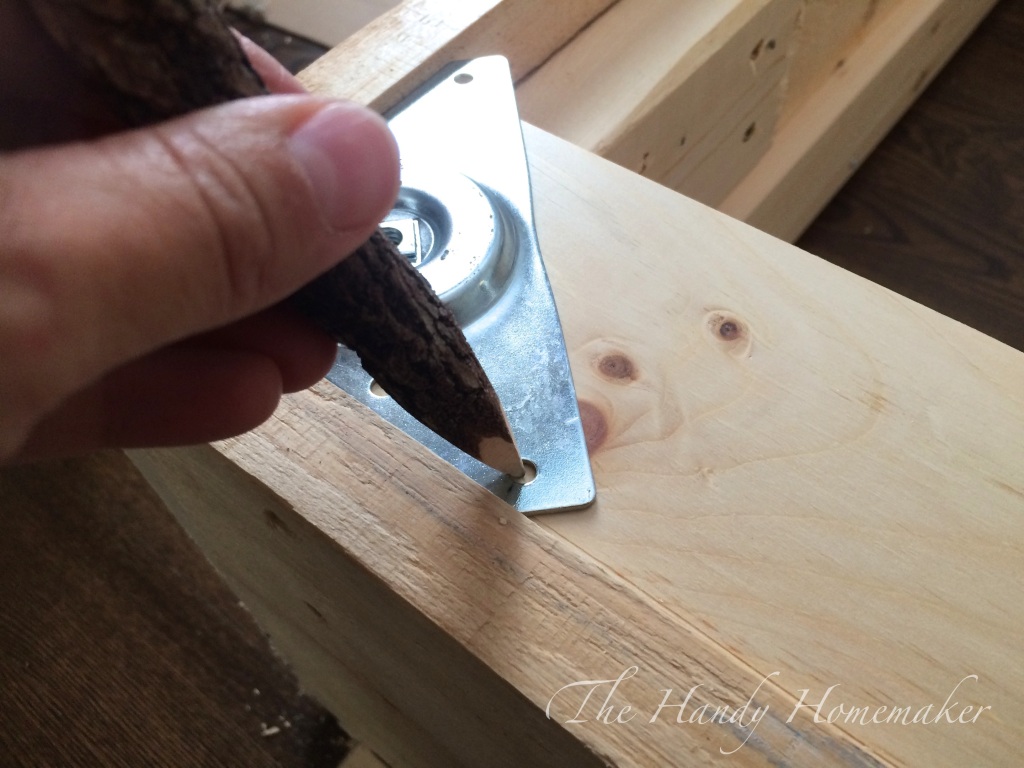
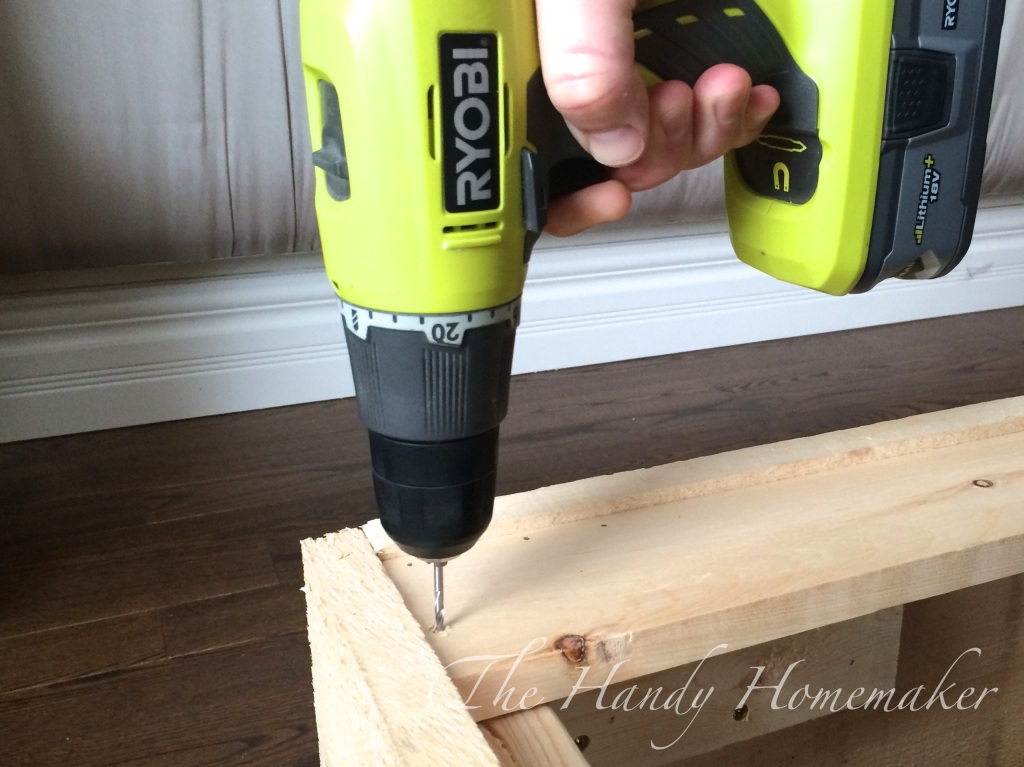 16. I marked the holes and then pre-drilled with a 1/8″ drill bit to prevent the wood from splitting.
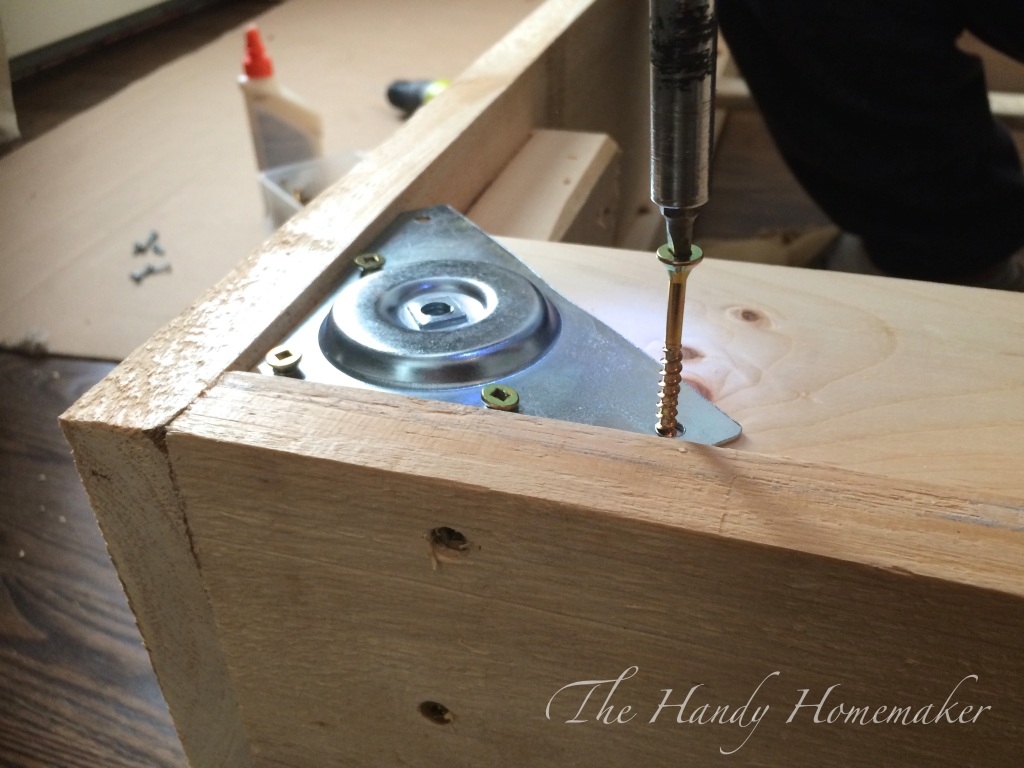
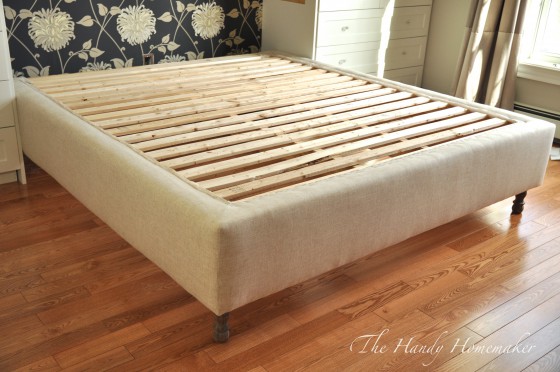
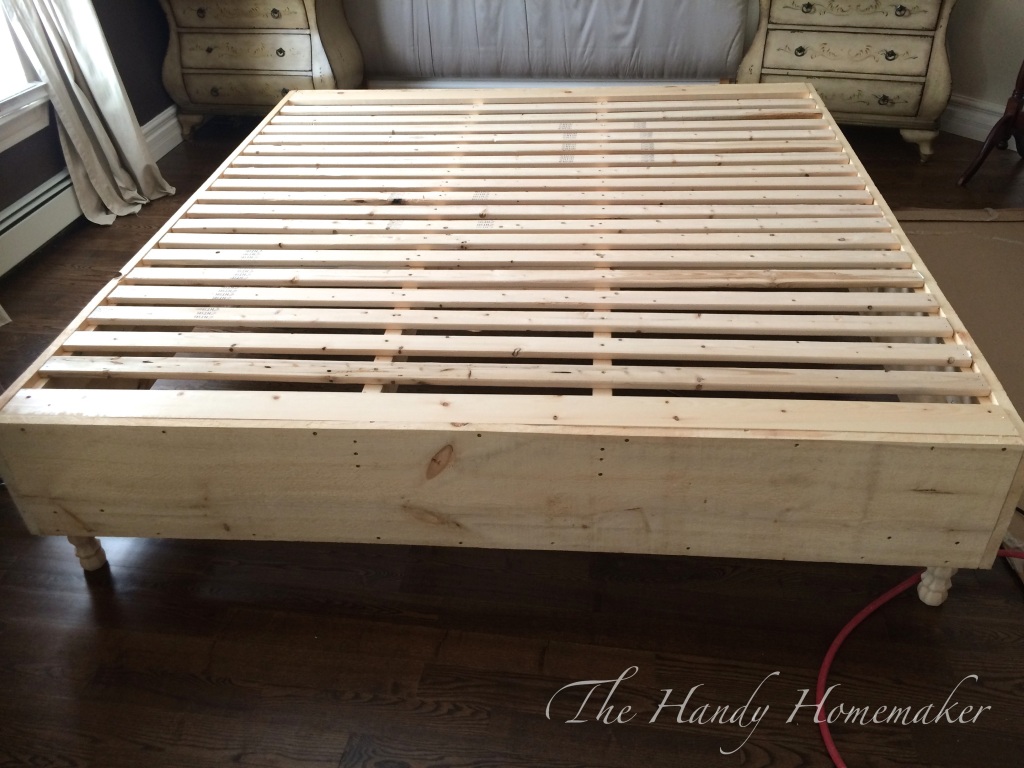
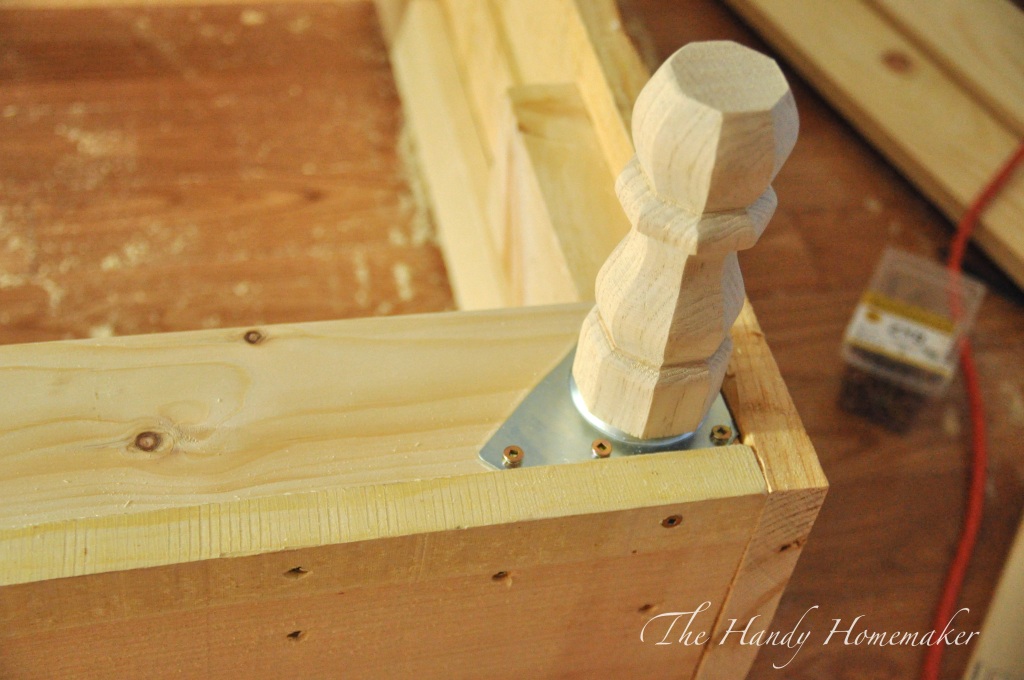 17. Add the wooden feet. Click here to see how I stained these legs. I removed the legs and stained before upholstering.
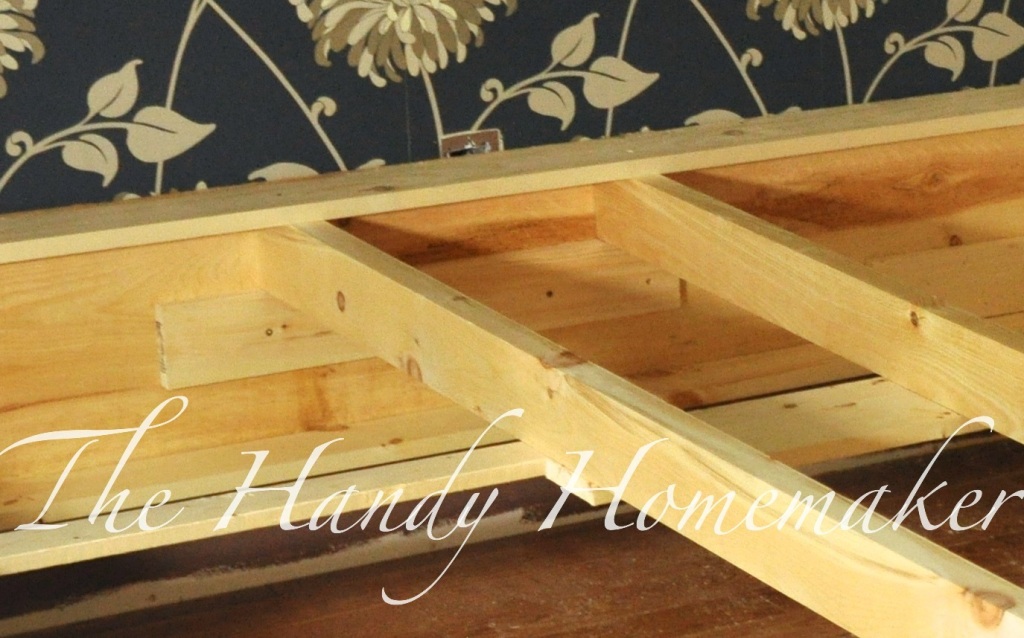 18. Flip over and add the remaining two 1x4x74″ one at the top and then the bottom of the bed frame just as you did the underside.
 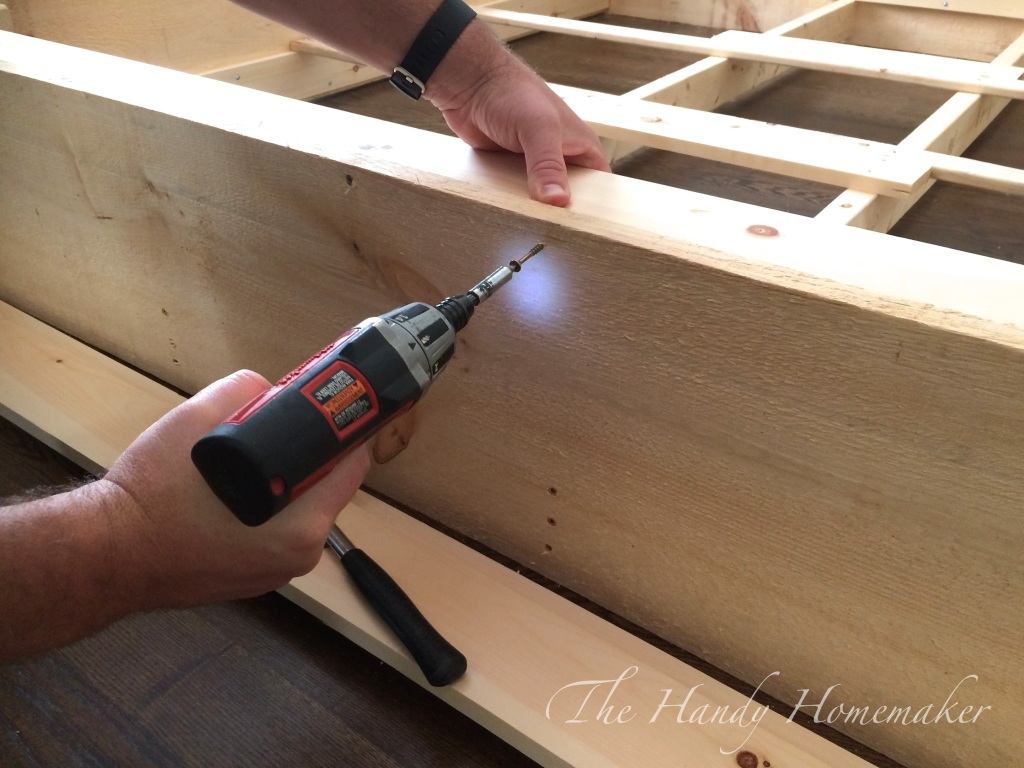 19. Screw in place exactly as you did the bottom 1x4x74″
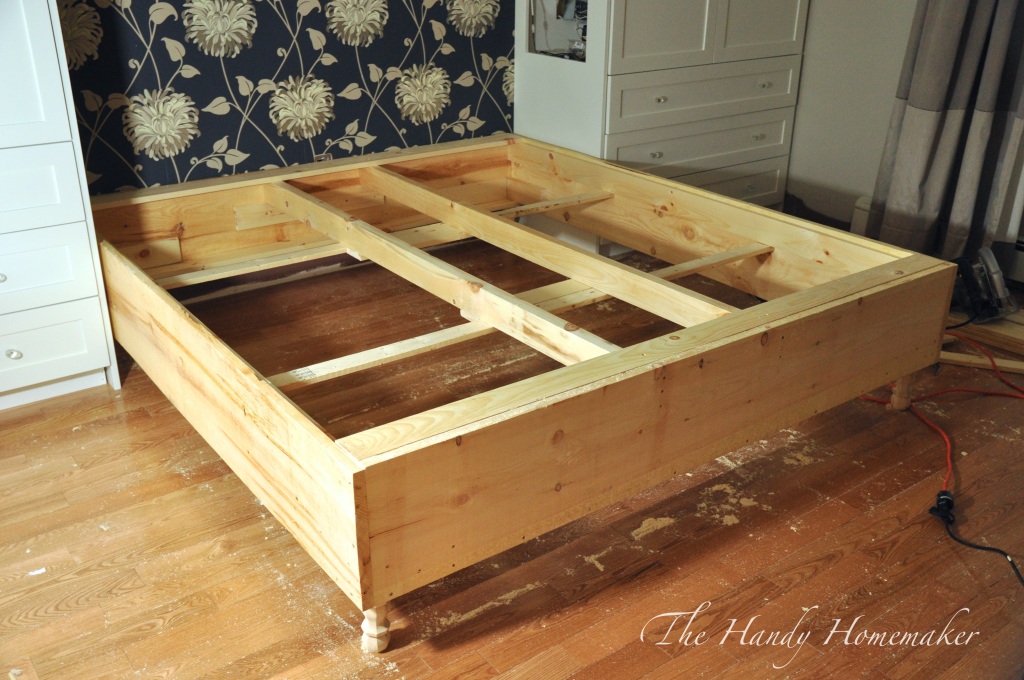
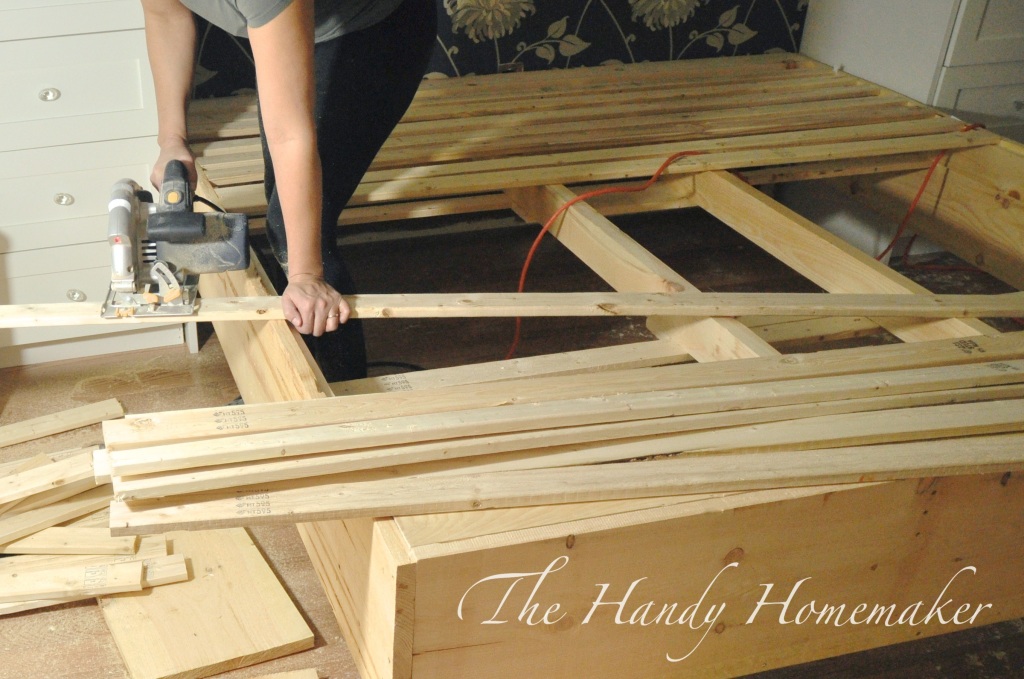
20. I forgot to cut my slats on my cut list the first time. Place the 16 pre-cut 1x3x74″ evenly apart along the length of the bed frame. I did not get too perfect here. Nail in place. I screwed the centers but nailed the ends with a nail gun as they started to split as it is too close to the end of the wood. If you don’t have a nail gun you will need to pre-drill each hole on the ends.
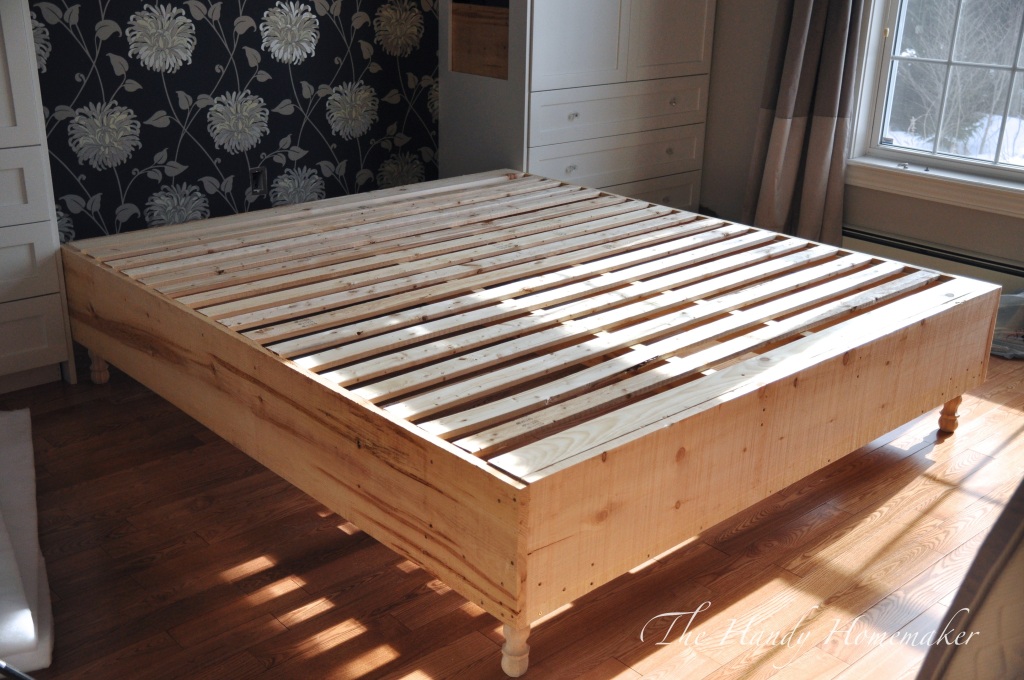
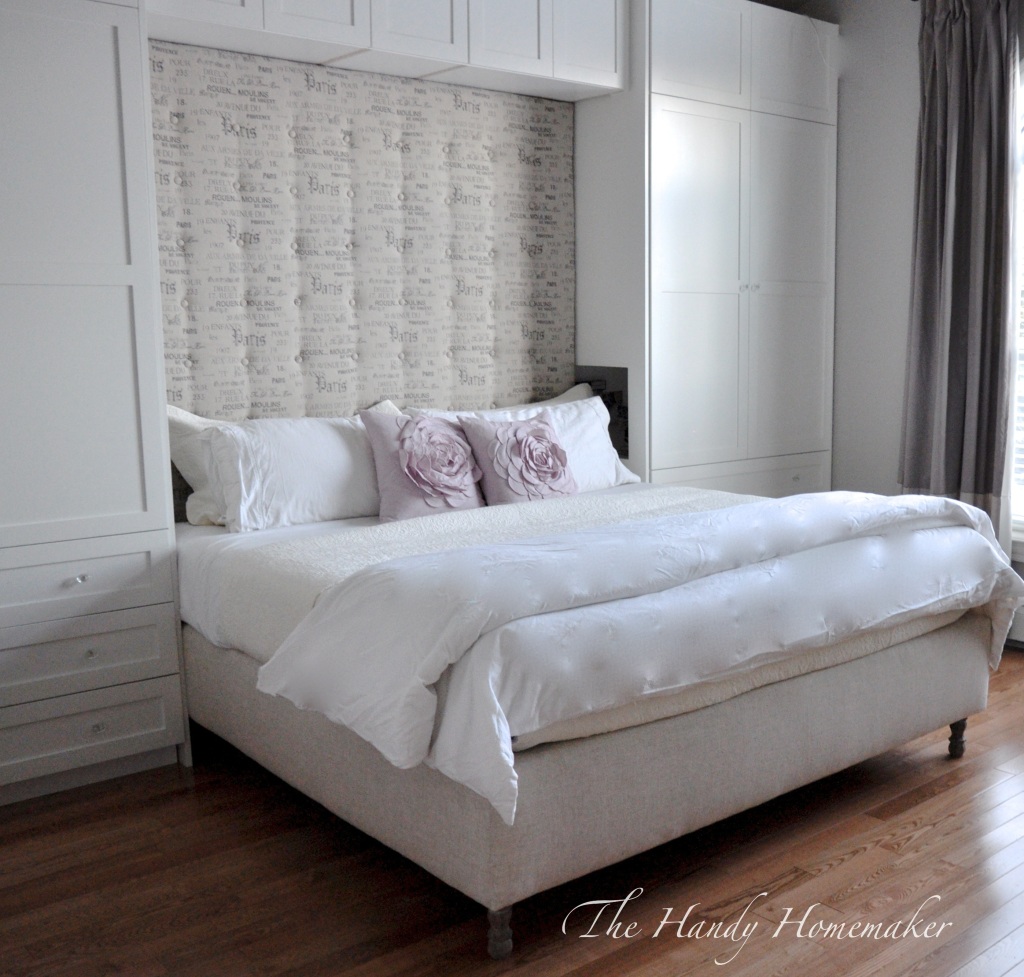
Finished and ready for Part 2 Upholstery.
Keep following for the finished product with a post for a DIY Upholstered headboard.


37 responses to “Upholstered Bed Frame DIY Part 1”
I just read your Blog on upholstered bed frame and looked at the ten steps,you are amazing you have so much talent I am in awe.You make beautiful decorated cakes and pastries also interior decorator and then turn your hand to carpentery,you are another Maratha Stewart.
LikeLike
Thank you so much Marion. I love doing all things. I find art in all things. xoxo
LikeLike
[…] Upholstered Bedframe Part 1 […]
LikeLike
I love this. I am gonna try an have my husband build us one. This is just beautiful. Very talented!
LikeLike
Thank you. Let me know how you make out following my plans 😊
LikeLike
I love this post. It’s just what I was looking for. I’m curious though, how much did supplies cost you?
LikeLike
Thank you Cara 🙂
For all of the wood, brackets, and wooden legs it came to $132.00 (Canadian) including tax (I purchased at Home Depot here in NS) I just used the cheap fir/spruce/pine that they sell. It’s all being covered. I already had the wood screws and glue, but you should probably add on another $20-25 for that if you don’t have those items. The cost of covering depends on the fabric you use. I bought that fabric on sale so I give an exact number, but I think it cost around $50.00 for upholstering materials (not including the staples for my staple gun) Let me know how you make out or if you have any other questions 🙂
LikeLiked by 1 person
just read your inspiring post on this upholstered bed frame. Is the finished size of the frame the exact size of the mattress? I was thinking of trying this in a twin size…….
LikeLike
Yes, this bed is exact same size as my king mattress. Once the fabric is on they look pretty seamless (minus the corners if your mattress has curved edges) but it isn’t a noticeable difference. Just take the size of your twin mattress and reduce the measurement to accommodate that size mattress. Hope this helps.
LikeLike
[…] you want a luxe look, this upholstered bed frame tutorial from ‘The Handy Homemaker’ is for you! Lots of photos make this tutorial a “no […]
LikeLike
[…] thehandyhomemaker […]
LikeLike
Wow! I really want to try this. I work at Home Depot so there is all kinds of cull wood that is usually 70% off, and since I’m going to upholster it it really doesn’t matter if it matches right? Do you have dimensions for Queen bed?
LikeLike
Hi! I came across this post and want to try it. I recently found a beautiful king headboard that I am planning on purchasing. It already has holes. Would this frame also be able to be attached to a headboard like this?
LikeLike
I am not sure what kind of hole placement it has. But you should be able to line it up, drill the holes and attached with Bolts, washers and nuts. Let me know how you make out.
LikeLike
👍👍👍👍👍👍
LikeLike
Wow, this is great! Are there any center support legs?
LikeLike
No there isn’t as the center support is very strong. You could add one or two if you like by adding support wood to attach the legs to with the same idea as the corners. However, I’ve now built 6 of these and we have had zero sagging at all. One of the mattresses is an expensive Temperpedic memory foam and the others are from wayfair that cost 10 time less (Lucid 10 inch memory foam mattresses). My husband and I both prefer sleeping on the Lucid brand that’s at our cottage. Oops sorry not sponsored haha. This is a very heavy frame when finished. Side note The last two frames I built so they could be taken apart. (Not upholstered finished like barnboard) Gluing only side rail supports and leg supports. Predilling the rails and screwing in place instead of nailing. A little more work but well worth it when we moved. Works perfectly taking apart and putting back together. I hope this helps. I’ve also sold two because a couple of friends begged me to make for them lol and they love theirs. Good luck
LikeLike
[…] thehandyhomemaker […]
LikeLike
[…] Tutorial: thehandyhomemaker.com […]
LikeLike
[…] thehandyhomemaker.com […]
LikeLike
[…] The Handy Homemaker […]
LikeLike
[…] sophisticated, classy look from The handy home maker is something to be considered in your DIY queen bed frame plans. You can use wood platforms to […]
LikeLike
[…] also selected a couple of great DIY bed ideas you can explore – a DIY upholstered bed frame here, an IKEA hack bed frame with storage here, and a pallet bed frame […]
LikeLike
Hi there!! I really love the look of this bed and would to make it! I feel like the mattress would move around however as the slats aren’t inset in any way. My thought would be that if the mattress could sit maybe about 3/4’s of an inch down inside the frame, then the mattress would stay in place. Would you have any suggestions on how to do this or should I just look to find another design. Also, the mattress that I would be making the frame for is 47 inches wide by 72 inches long. Thank you so much for your consideration in answering my question 🙂
LikeLike
[…] can have a look at this project here. It is straightforward, and it will not take even more than two days. And if you like, even a day […]
LikeLike
[…] thehandyhomemaker […]
LikeLike
[…] vous voulez un look luxueux, ce tutoriel de cadre de lit rembourré de bricolage de ‘La ménagère pratique‘ est pour toi! De nombreuses photos font de ce tutoriel un projet « sans échec ». […]
LikeLike
[…] See Instructions here → […]
LikeLike
[…] If you want to make your bed frame look bulkier this DIY upholster bed frame idea is perfect for you. Without spending much on money do it yourself. Just make a wood frame fist and then make it upholster with some fine fabric. Add some slats to support the mattress and finish. Stuff is pine boards for frame and slats, wood screws, nail gun, drill, chop saw, stain, and pencil. Grab more details here! […]
LikeLike
[…] με σκελετό κρεβατιού με επένδυση DIY από το ‘The Handy Homemaker‘ ειναι για σενα! Πολλές φωτογραφίες κάνουν αυτό το […]
LikeLike
[…] you want a luxe look, this upholstered DIY bed frame tutorial from ‘The Handy Homemaker‘ is for you! Lots of photos make this tutorial a “no fail” project. Don’t forget to look […]
LikeLike
[…] you need a luxe look, this upholstered DIY mattress body tutorial from ‘The Handy Homemaker‘ is for you! A lot of images make this tutorial a “no fail” mission. Don’t neglect to […]
LikeLike
[…] you want a luxe look, this upholstered DIY bed frame tutorial from ‘The Handy Homemaker‘ is for you! Lots of photos make this tutorial a “no fail” project. Don’t forget to look […]
LikeLike
[…] also selected a couple of great DIY bed ideas you can explore – a DIY upholstered bed frame here, an IKEA hack bed frame with storage here, and a pallet bed frame […]
LikeLike
[…] handy homemaker provides one of the most intuitive guides to a high-quality DIY bed frame that is upholstered and looks […]
LikeLike
[…] you would like a luxe look, this upholstered DIY mattress body tutorial from ‘The Handy Homemaker‘ is for you! A number of pictures make this tutorial a “no fail” undertaking. Don’t neglect […]
LikeLike
[…] you want a luxe look, this upholstered DIY bed frame tutorial from ‘The Handy Homemaker‘ is for you! Lots of photos make this tutorial a “no fail” project. Don’t forget to look […]
LikeLike