
These DIY Nautical Beach Bags came together rather quickly. I had searched for a Nautical style bag to use a beach bag/gift bag for an event last spring. I couldn’t find what I had in my mind and with that usually means I’m making it myself. I had a hard time finding a neutral style bag that either a man or a woman would want to carry at a beach resort.
The bags were a hit to everyone who attended the event. It also made it easier to spot everyone at the pool or beach when they had the beach bags by their seats. I found these Burlap style bags at Winners/Homesense and I bought everyone that they had. These are awesome ‘green-eco friendly’ grocery bags. The plastic lined (laminated) jute is great for easy clean up of water and sand that may get inside of the bag. Jute bags can also found online from various retailers. Of course, you could also make the bag as well out of Jute fabric. But that’s a post for another day 😉
Materials required:
- Jute or cotton canvas bag.
- Cardstock (or sheet of plastic) for cutting pattern out of
- Utility knife
- Fabric paint it the color desired (in a squeeze bottle as shown below)
- Small smooth foam paint roller
- Large plate or easel covered in plastic wrap
- Pen or pencil
- Scissors
- Optional* Bag/strap webbing tape in a coordinating color, lighter, sewing machine with matching thread
 Print out or draw a pattern of your choosing. To get even sides of the anchor I lightly folded the cardstock in half and drew half of an anchor on one side.
 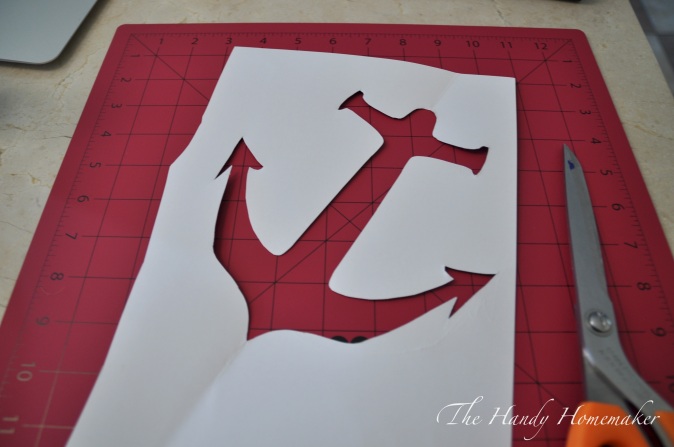 I then carefully cut the pattern our leaving all the edges attached and not over cutting. If you do this on clear hard plastic sheeting you will not be able to bend the plastic and will need to trace the pattern with a marker before cutting out with a utility knife. If you are making more than 25 of these I would suggest using a plastic pattern as the paper pattern edges will start to break down eventually.
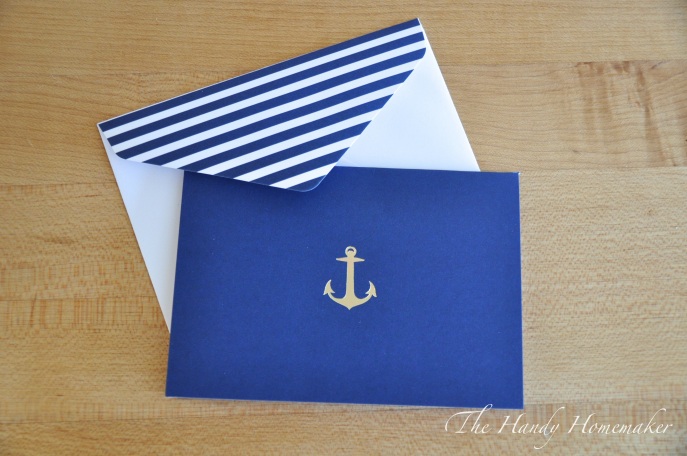 These nautical styled cards were my inspiration for the beach bags.
 If your beach bag is not plastic laminated you will need to place a thick piece of cardstock in the center to prevent the paint from bleeding through to the other side.
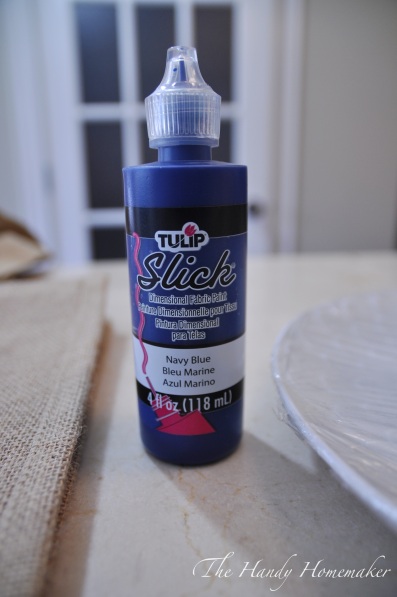 This is the fabric paint I used available from Michaels crafts. This 4oz bottle was enough paint to cover the anchor pattern and outline on 22 bags with some left over.
 Lay the bag on a flat surface place the pattern in the desired place on the bag. Use painters tape around the outside edges to keep the pattern in place while painting. I know I didn’t however, if this is your first time using a pattern and paint you may also want to test on an extra piece of fabric. Pour a small amount of paint on the palette and you are ready to begin.
TIP: I like to cover my paint palette (plate 😉 ) with plastic wrap for easy clean up once I am finished with a paint project.
 Start adding paint to the roller evenly, keep rolling the roller back and forth gently until the paint is absorbed into the roller. Do not have excess paint on your roller. That can cause excess paint to go under the pattern. You could also use a Temporary Pattern spray adhesive on the back of the pattern to help keep it in place and prevent bleeding.
 A you can see there is no excess paint to the roller.
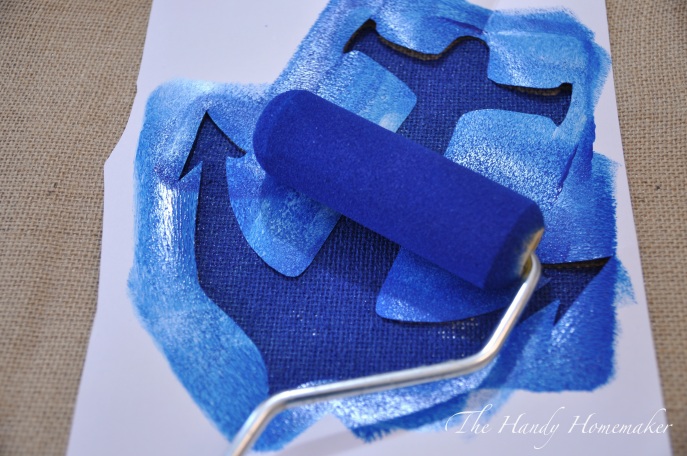 Gently press and roll the foam roller over the pattern until the paint covers all the exposed fabric on the bag. Gently lift and remove the pattern.
 Let dry for to the touch as per the directions on the fabric paint you are using.
 Once dry, outline the pattern with the fabric paint. This corrects any small bleeding of paint or unevenness caused by the texture of fabric like jute.
  Let dry overnight.
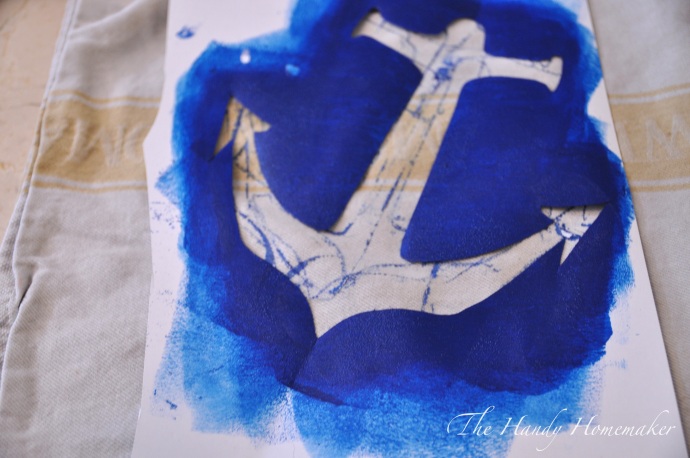 TIP: I place the pattern between two old tea towels and pressed it smooth in between painting each bag. This removed excess paint and ensured that when I place the pattern down on the next bag that I wouldn’t transfer paint where I didn’t want it.
Decorating the handles:
As an extra touch I purchased bag/strap webbing in a coordinating color to add to the bags existing handles.
 This webbing can fray on the ends so to prevent it from happening I took a flame to each end of the webbing.
 Because webbing can stretch a bit when attaching to the handle I cut the handle lengths once they were sewn in place. Using a sewing machine set on a straight stitch, sew close to the edges on both sides of the webbing to attach to the handle.
 Once you get both side sewn down, cut the webbing to the spot the bag handle reaches the top of the beach bag.
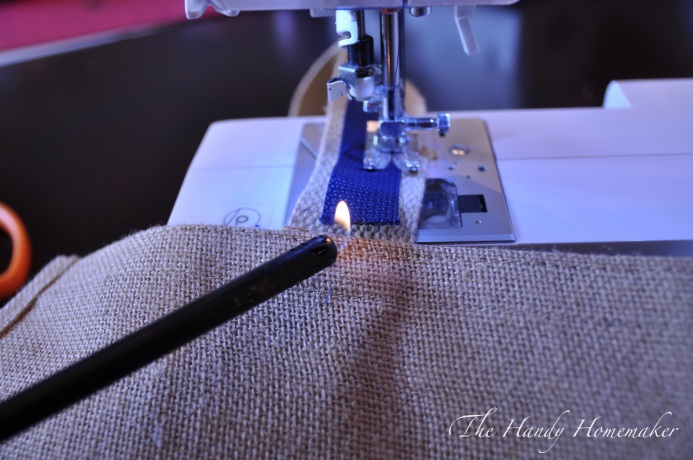 Use the flame of a lighter to quickly scorch the end to prevent future fraying. Sew the last remaining section down.
Destination wedding or event:
Here are a few ideas of what to put in a bag for a destination event.  I made little medical kits for every bag. I thought of things I need or wish I had remembered when I travel. These “Medical Kits” contained, antibacterial wipes, hand sanitizer, bandages and band aids, alcohol pads, bug repellant pads, bug repellant wipes, advil, kleenex, SPF lip protection, tums, and cough drops.
 My son made these labels for me to place on each bag.
 When you buy an avery label product they offer the template to download for you to design. He copied and pasted a medical cross and changed the color to blue and added in the text. Copied and pasted the pattern within the template. Print a sample test page before printing on the labels is highly recommended.
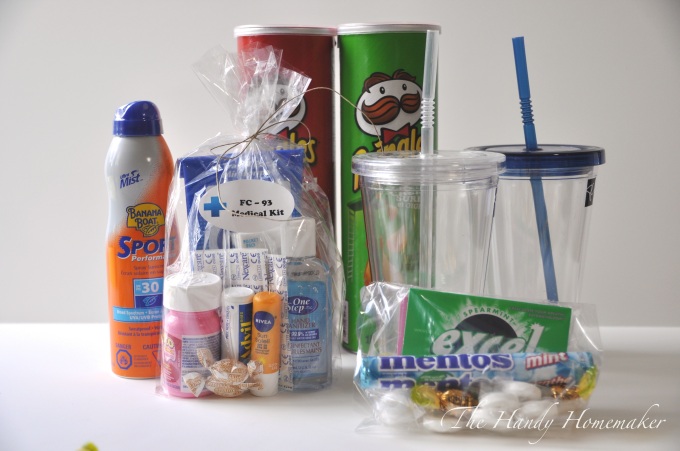 Here a few more items that I packed for each destination gift/beach bag. Sunblock of course!! If you run out of sunblock on a destination vacation, be ready to shell out some cash, they charge a premium for SPF!! Insulated cups work great in hot weather to keep water or drinks at the pool icy cold. Fill small bags with treats, like candies and gum. Who doesn’t want chips for a late night snack, or poolside. You of course may be able to buy these at your destination but if you have room in your luggage buy them and take with you. These snacks can sometimes cost a fortune.
For destination trips, I plan to head to the gift shop or local market/shops to pick up a few local gifts to add to the bags. This means if we are going to Mexico, I like to buy gifts by local artisans once arriving. Or I will call ahead to the resort and have our resort vacation representative help me arrange a few gifts to be ready once I arrive. These helps to add to an amazing experience and lasting memories for your guests.
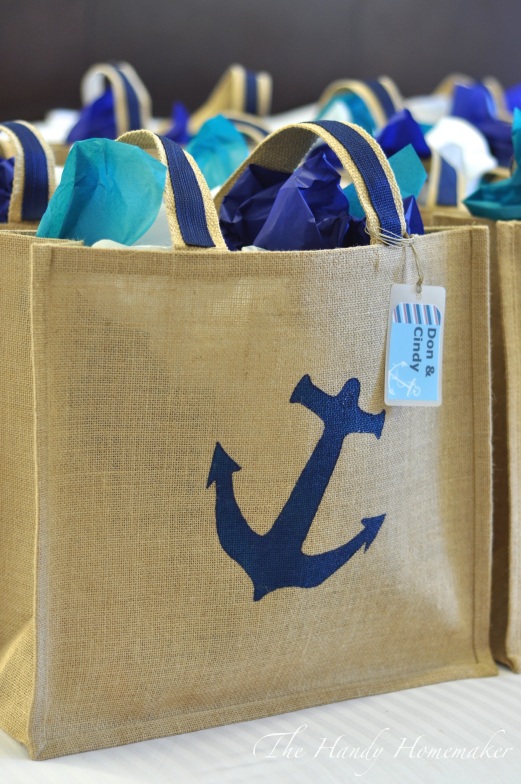 The laminated bag tags I attached to the bags made sure no one mixed the bags up while laying poolside 🙂
Here they are ready to be delivered to the guests upon arrival.


7 responses to “DIY Nautical Beach Bag ~ Perfect for a Destination Event or Wedding”
I love it! I’ve been planning to paint on burlap soon. Thanks for the tutorial!
LikeLike
Your welcome. Good luck with your upcoming project 🙂
LikeLike
Another great DIY project! Love the Nautical theme!
LikeLike
Thank you gf, I’m loving all things Nautical as well!
LikeLike
LOVE these! 🙂
LikeLiked by 1 person
I love the bags…I was one of the lucky recipients!! Thanks!!!!
LikeLiked by 1 person
Thank you Lakeside Dreamer. I’m glad you liked it ❤️
LikeLike