
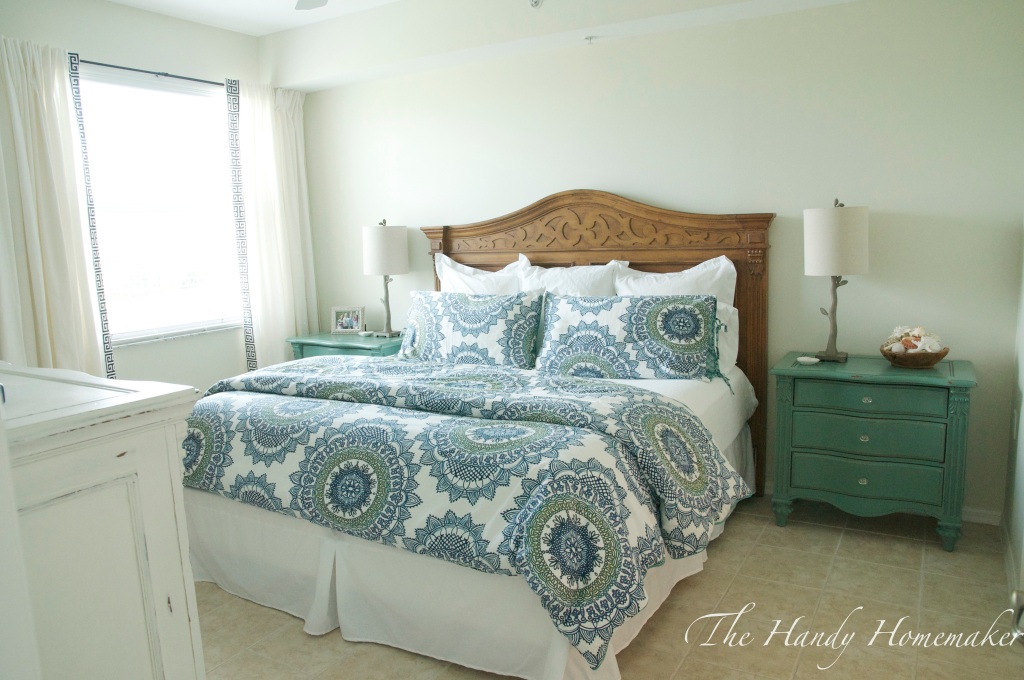
This winter I updated this bedroom and I’m so excited how it has turned out, I wanted to share how easily it was to do. To finish decorating the room, I will add artwork, an area rug, and make an upholstered headboard. I will post pictures when I do. I used milk paint to refurbish the night stands and dresser. I love working with milk paint and I wanted to show you how I mix it and how easy it is to paint with. Really… you just paint it on, you don’t have to be perfect at painting to use it. I will tell you that it can be unpredictable. I have never had a piece completely chip off but I have seen a few online where the chipping was a little excessive due to the piece not being properly prepared to take paint. I am not sure how my brain would manage if that happened. I wanted these pieces to have an aged look. This look is easily achieved with milk paint and a little sanding after the paint is dry. The best bonus with milk paint is that you can work inside without the fear of VOC’s, and it is non toxic.
Before After
After
Materials needed:
- Miss Mustard Seed Milk Paint in desired colors
- MMS Milk Paint Bonding Agent
- Water
- Clean mixing containers
- Small measuring cups
- Small Whisk
- 2- 2.5″ All Purpose paint brushes
- Sanding block
- Sand Paper 220-320grit
- Damp cloth
- Protective coat ( I like Minwax polycrylic)
- Optional* primer
- small amount of oil – hemp oil or olive oil (as I was out of hemp)
- Optional* New hardware of choice I purchased the glass hardware from Ebay
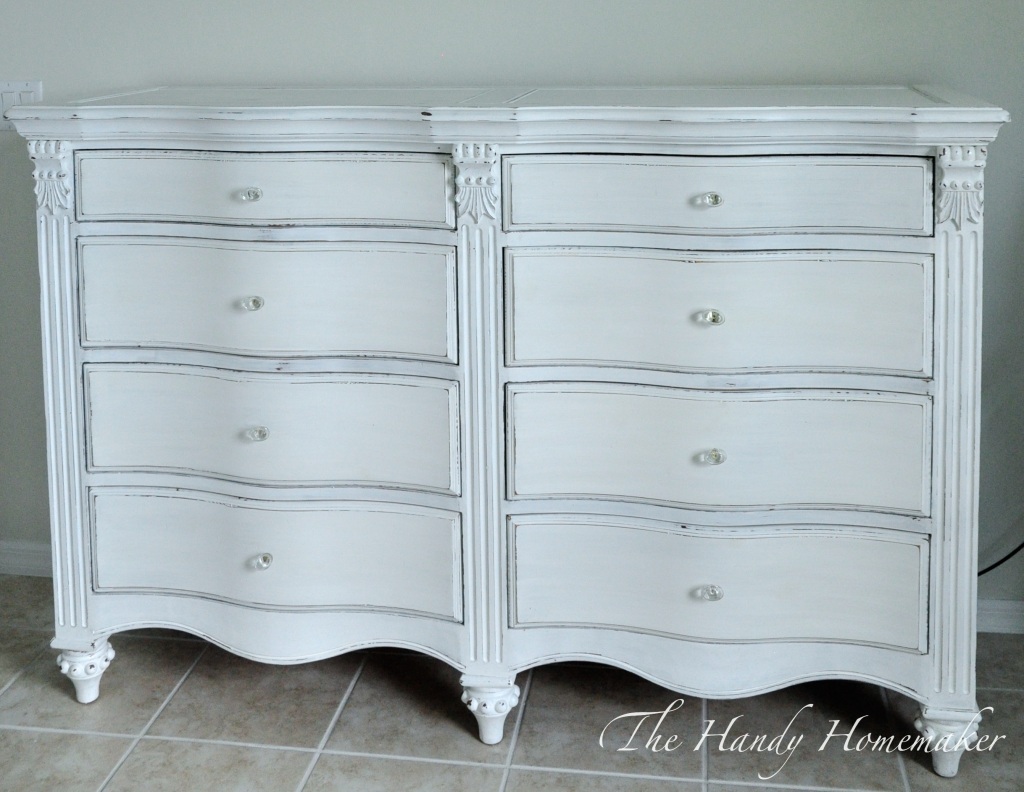
Dresser Before After: I love the look of ironstone milk paint with the vintage style glass hardware on this dresser
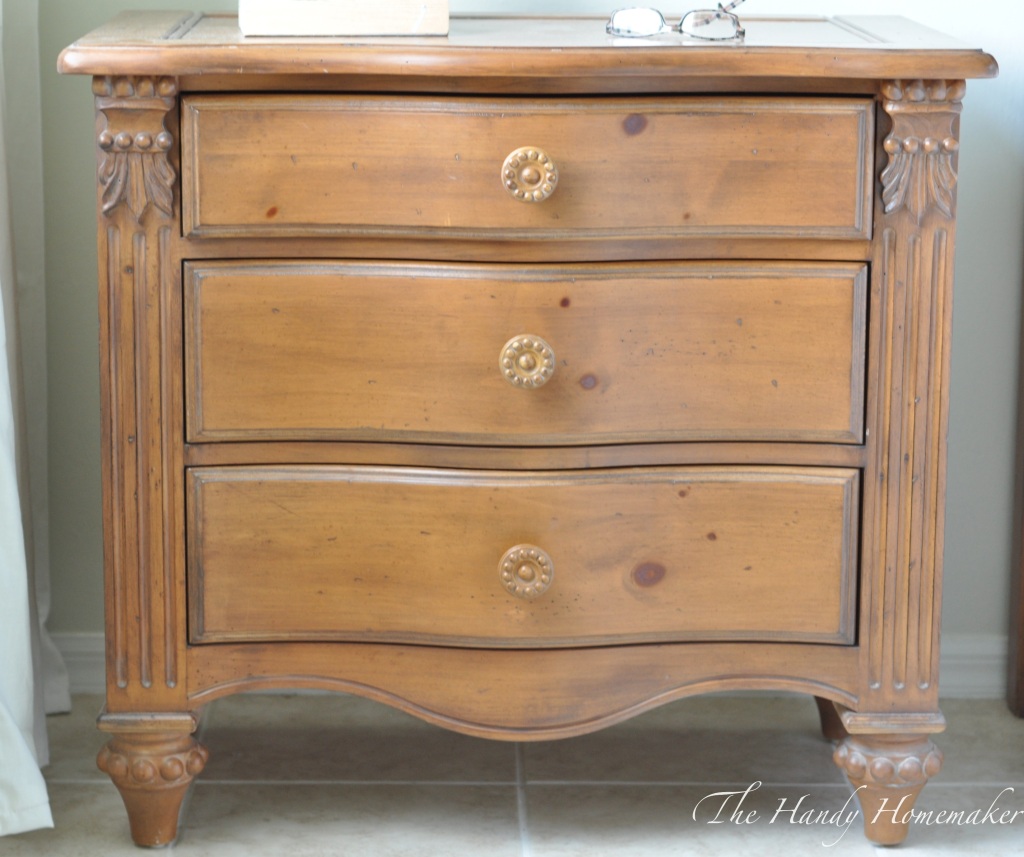
 Night stand before
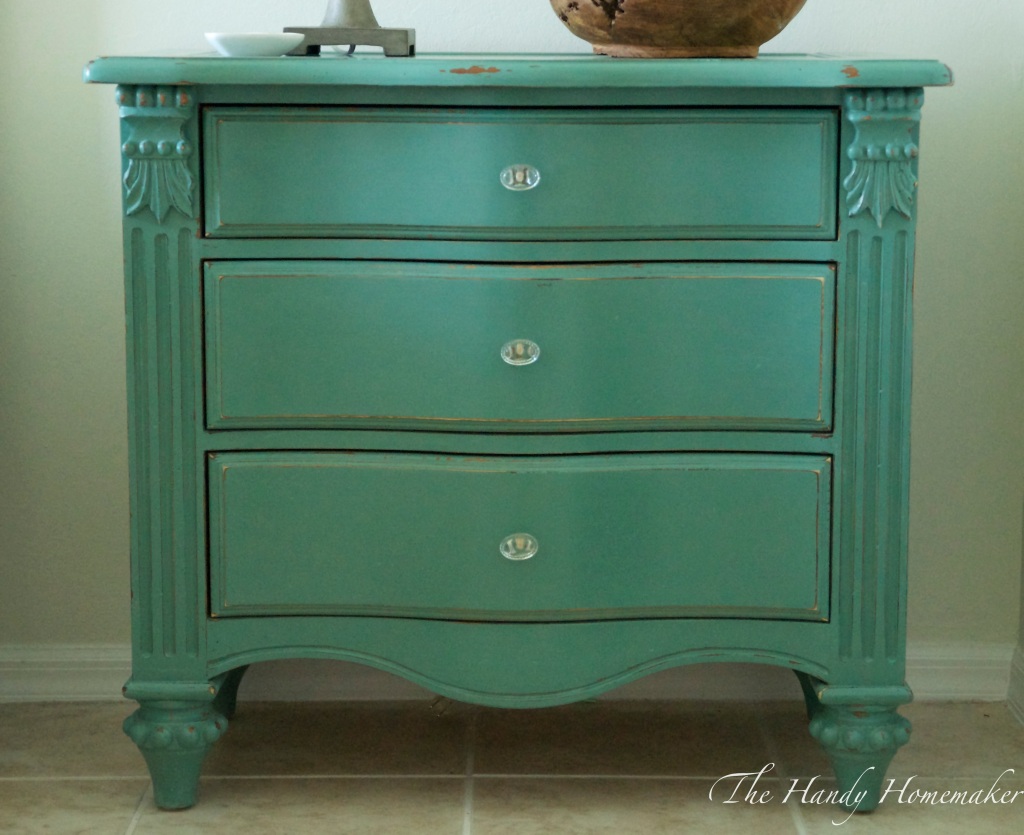
 Night stand After
Directions
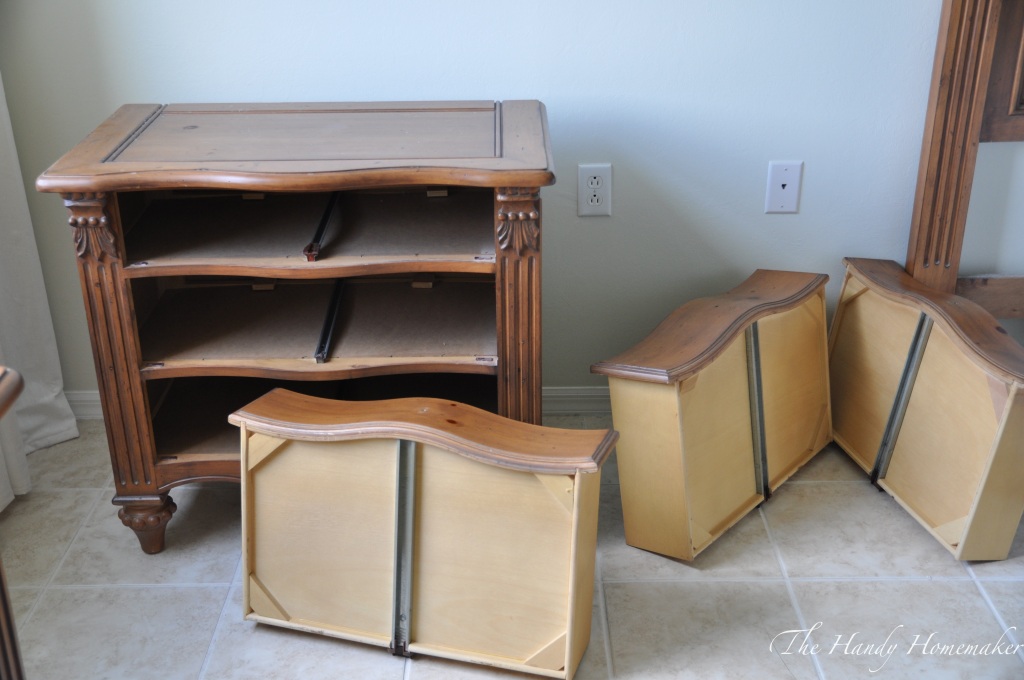 Clean any dirt and residue with a soap and water mixture. Dry thoroughly. Remove the hardware and the drawers.
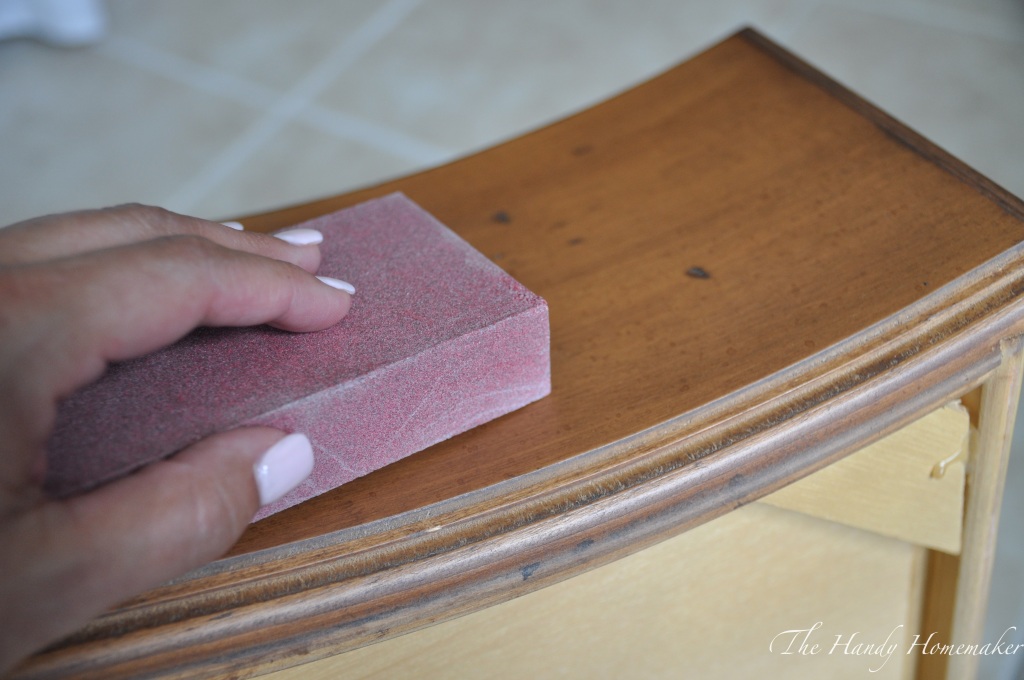 I like to lightly sand the complete surface of the furniture wherever it will be painted. Sanding blocks work great for small areas and creases. This helps rough up the surface for better adhesion and to assist in any residue that may be left on the wood. ie: furniture polish or wax
 Sand the drawers, a light even sanding is all that is necessary.
 Sand the side table
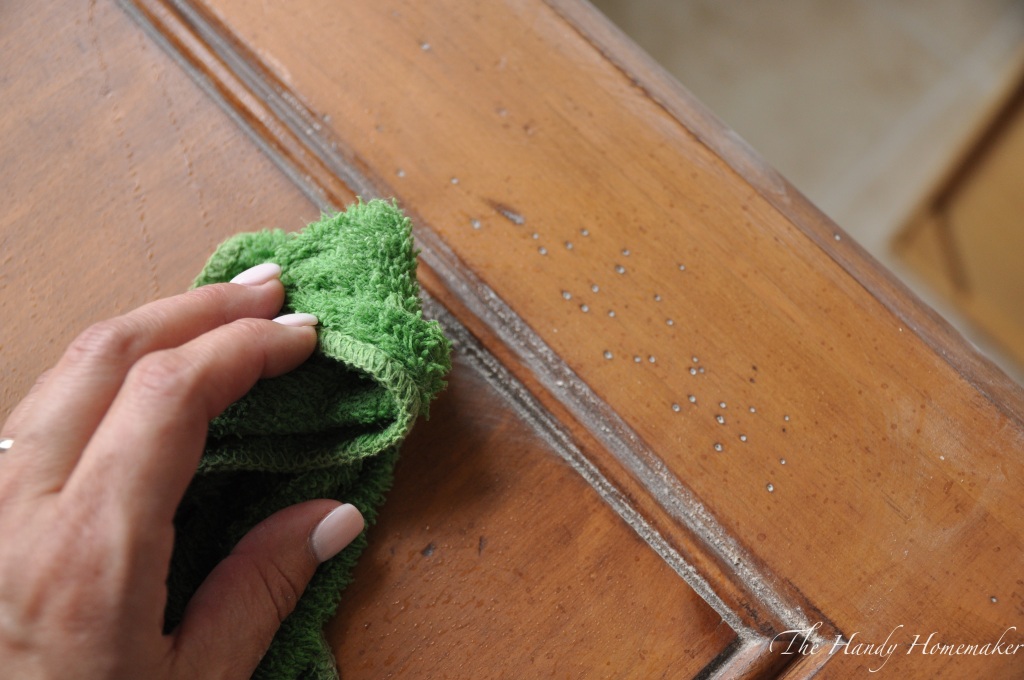 I like to vacuum the ridges and use a damp cloth to remove the sanding dust from the furniture. Let completely dry before starting to paint. I didn’t take pictures of this step however if you are painting pine, you may want to use a primer to keep the knots from bleeding through once painted.
I added a few dots of oil in a couple areas on the sides of the dressers. These areas I wanted the paint to chip away. I didn’t go overboard just 2 or 3 small dashes of the oil and then wiped the excess away with a cloth.  I took a couple paint chip samples to my friend Kathy from The Painted House and we mixed 2 parts Lucketts green with 5 parts Kitchen Scale to come up with the perfect color to match the bedding and my sample.
 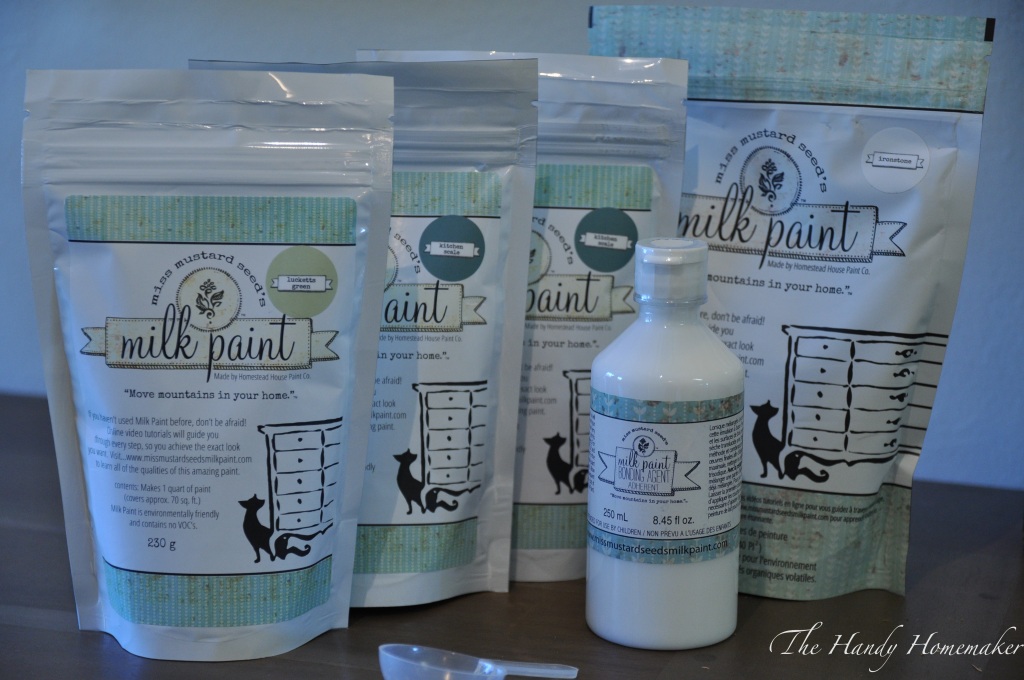 Here is the bag of goodies I got from her shop. Now it’s time to get to start mixing up the paint.
 I want an aged look but I don’t want the paint to get very chippy. I want as much adhesion as I can over the varnished wood. I used this bonding agent in the mixed milk paint.
 Measure the dry milk paint powder into a mixing container. I like to place my paint in a covered container or a mason jar once completely mixed.
 Give the paint a whisk to mix the two colors together or remove any clumps.
 Premeasure the water as to the directions on the package. Slowly add 1/3 of the water to the container and mix the paint until most of the lumps are gone.
  Once it looks like a thick but combined paste add the remaining water and continue to stir until completely combined.
 Add the premeasured Bonding agent to the paint mix in until completely combined.
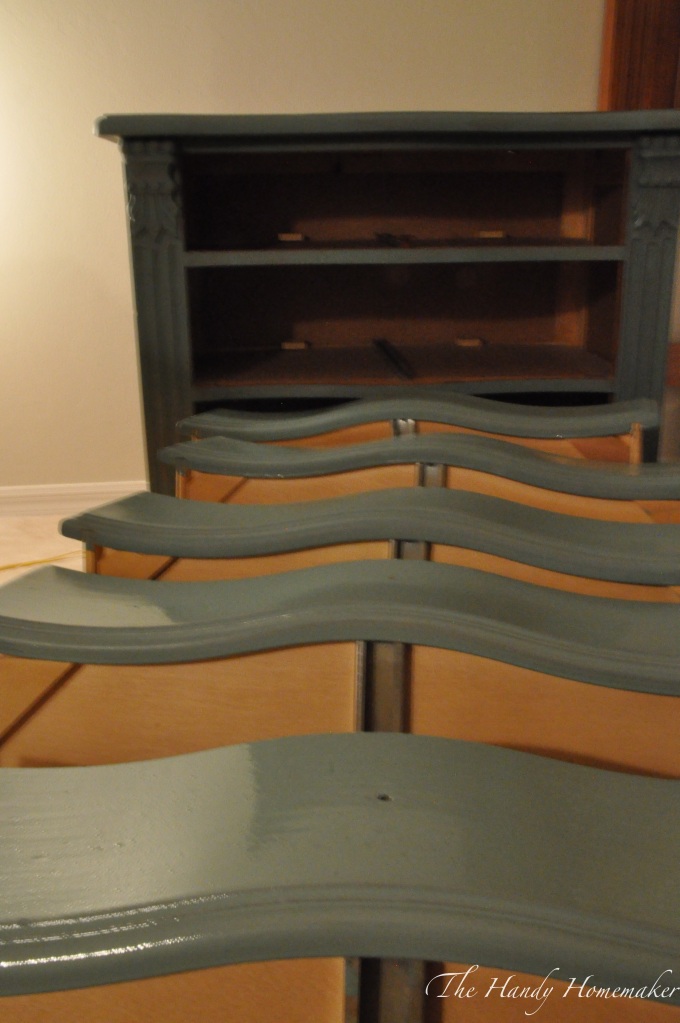 It was late in the evening when I started painting and I forgot to take pictures of the pieces and how I added the primer to the exposed pine knots. I didn’t prime the entire dresser, just the knots I could see. The lighting was terrible for taking photos, which is why the paint color looks so different once I did remember to take a picture. (After I brushed on the first layer of milk paint) I love milk paint because you don’t need to be perfect at painting. if you have a run or a bubble in the paint, it can easily be fixed with sanding once dry.
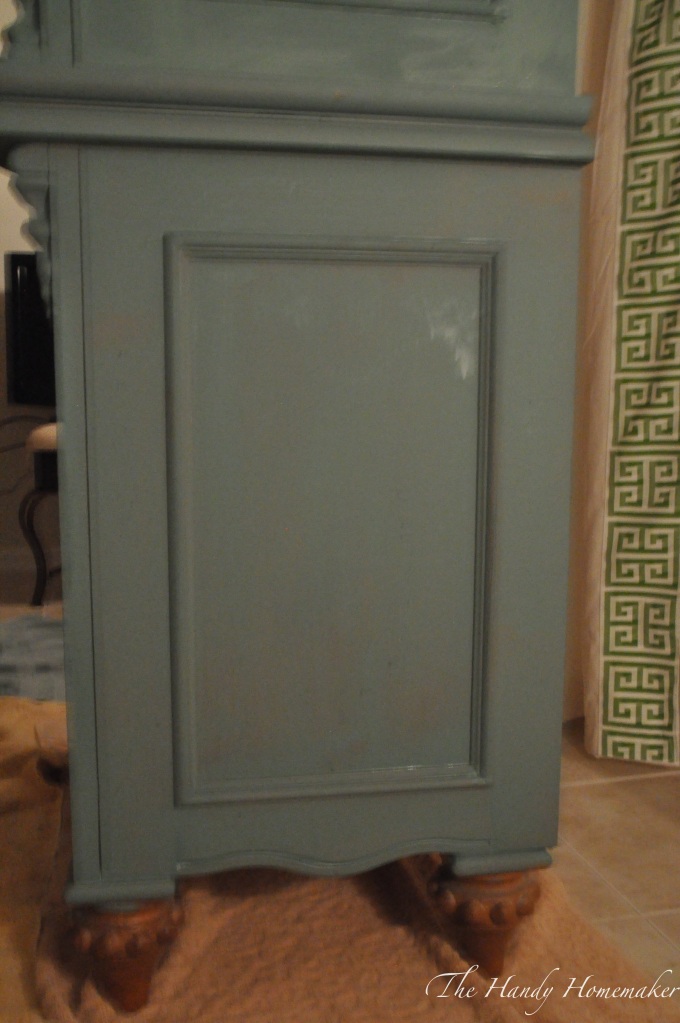 This shows the paint as it is drying. It does not give complete coverage on the first coat, and maybe not on the second. But that is why I love using this paint to get an aged look in a piece. as with other paints you need to sand to get a thinned paint look in spots. You can add another layer of paint if you want a completely solid coverage. Let the paint dry completely and then give a light sand with a sanding sponge to remove any defects, bubbles, or runs in the paint. This allows for a smooth final finish.
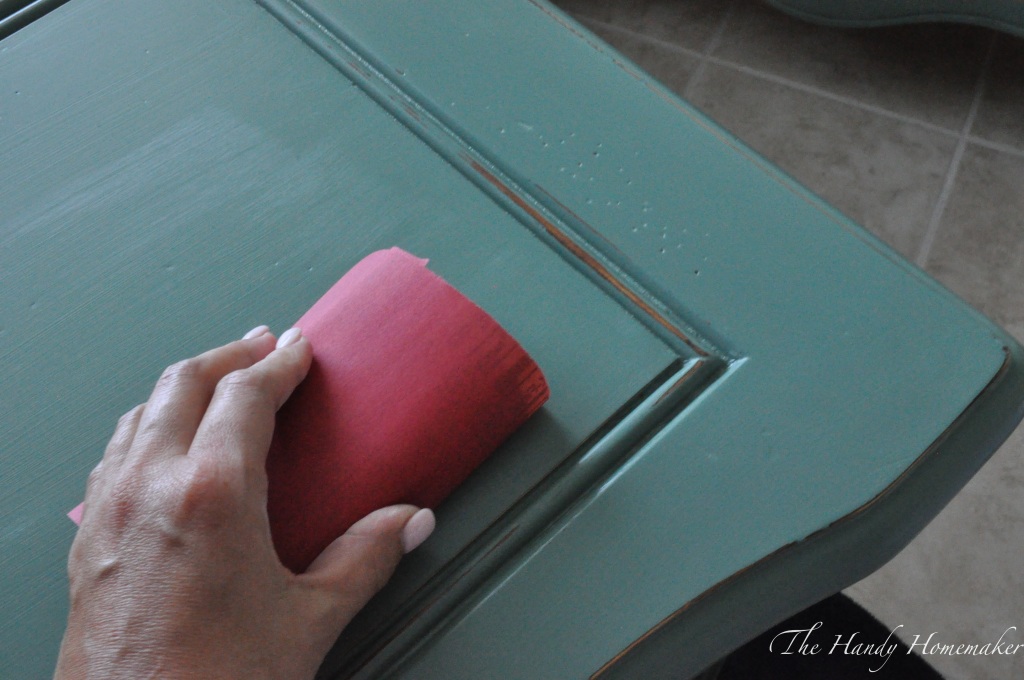
 Once the desired layers of paint are dry. Start sanding to distress with a sanding sponge or sand paper. This can be a little nerve racking after you just finished painting the piece. Just think of areas where natural wear and tear on an piece of furniture would happen. The edges, the feet, the edges of drawers, near the hardware. Start sanding slowly and a take as little or as much paint away as you like. Remember you can always add another coat of paint if it’s not quite what you pictured in the end. This is a spot where I wanted to paint to chip off. It flaked off as I was sanding. The chipping was only in the areas where I added the oil.
 I sand through the paint and into the wood in some areas
 320 grit sanding paper helps thin and smooth the areas and edges of any chipping that may have happened or that you created with the oil.
 I wrapped the 320 grit sand paper around the sanding sponge block before giving a gentle sand on the entire piece. This is not a sand that takes an hour. Just a quick and gentle sand to help with the finish coat as I am adding a sealer to protect the pieces.
 It also helps remove any brush strokes.
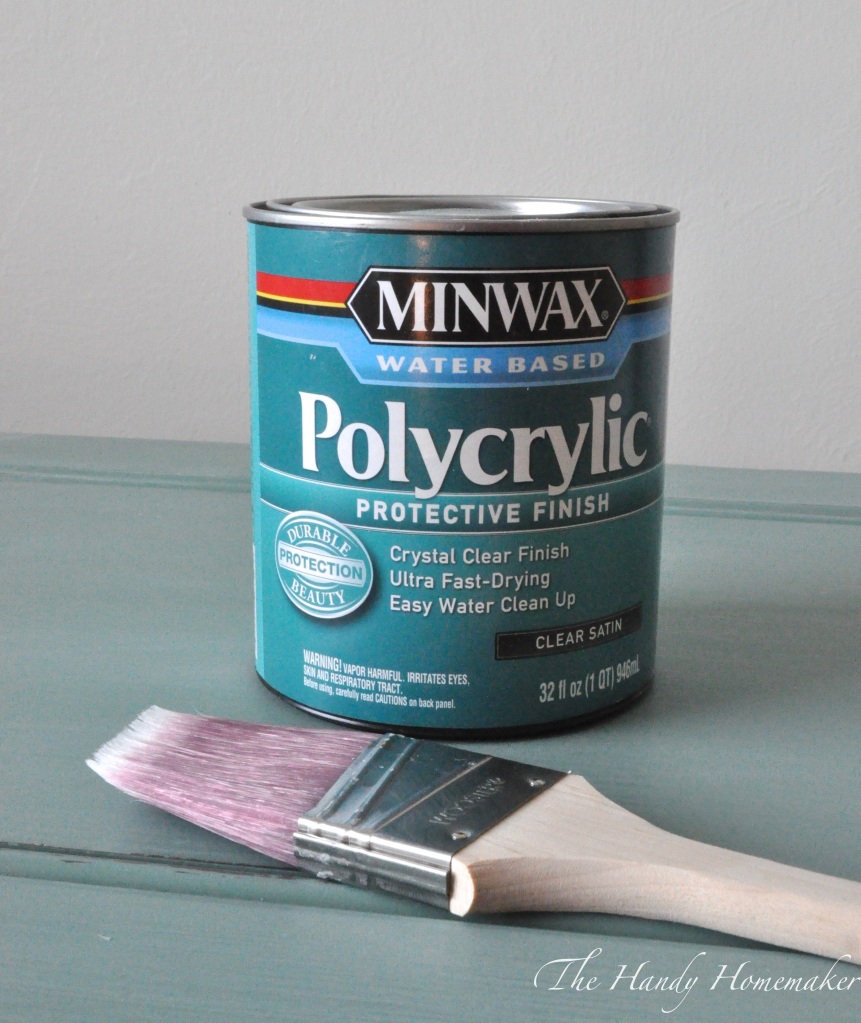 Thanks to my friend Kathy for introducing me to this water-based Polycrylic protective finish. Before this, I had been using an oil based sealer. This sealer also comes in a spray, which I really like when you are working on a piece in an area you can spray in. However if you can’t use a spray, the key with brushing this finish is to put enough sealer on your brush, slowly brushing with an even stroke across the piece and then do not go back over it. If you do this will make a milky sheen in spots that is more noticeable especially on darker colors. You can always add a second coat if necessary or if you notice spots that you missed. Once dry, gently sand with a 320 grit sand paper and then add another coat of sealer.
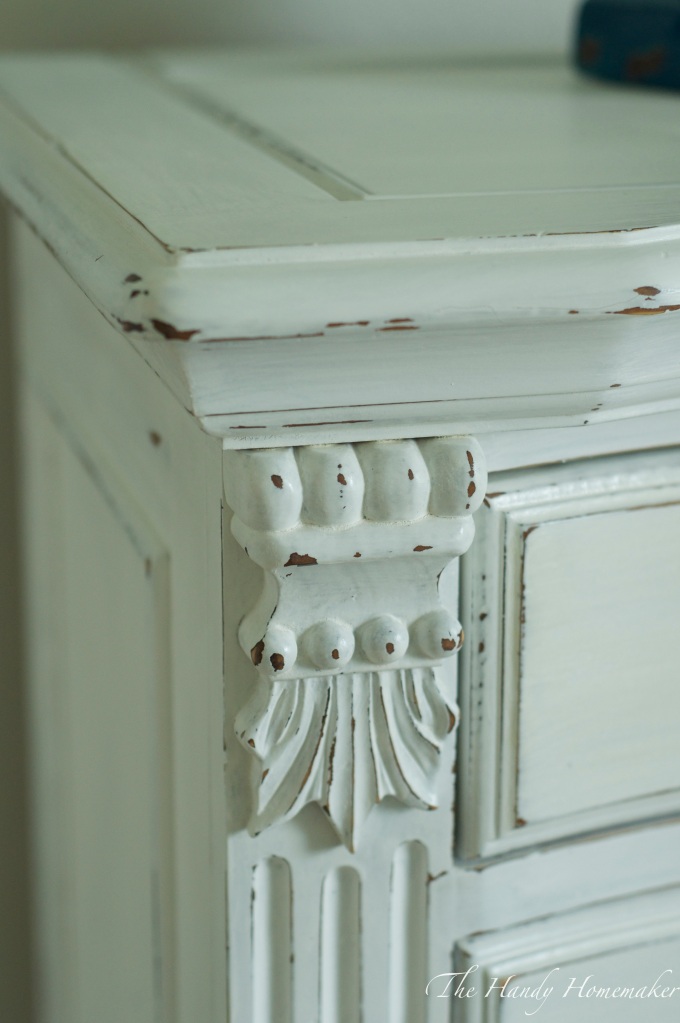 Here is the finished dresser with distressing up close.
 Love the new vintage style glass hardware.
 A few chippy spots really add to the “vintage distressed look”
 Distressing and areas where I kept the paint looking opaque.
 I love how these side tables turned out


 Wall paint – Benjamin Moore- Ballet white OC-9, Side tables – Miss Mustard Seed Milk Paint kitchen scale/lucketts green (see below for custom color recipe), Dresser MMSMP – Ironstone, Lamps – Homegoods, Bedding – Anthology Bungalow Teal- Bed Bath and Beyond, Curtains- Ikea -Ritva with custom sewn greek key pattern edging.


5 responses to “Bedroom Makeover: How to Paint furniture with Milk Paint”
Amazing job! Love the distressed look! So glad to find your blog…. and a fellow Canadian blogger! Would love it if you shared any of your posts at our link party on my blog please 🙂
LikeLike
These pieces turned out beautifully and I love the look you achieved with the glass knobs. MMS Milk paint is definitely my preferred choice when redoing furniture.
Dorene @ Seasonal Chapters
LikeLike
This is a great makeover and tutorial my friend, great job!
LikeLike
Thank you FPM. ❤️
LikeLike
how long did you wait for the milk paint to dry before applying the polycrylic? I tried this and it actually started removing the milk paint from the piece. I had waited at least 24 hours.
LikeLike