*Always use caution when using candles or heating. Never leave unattended. Never leave melts sitting with candle going with out intended immediate use. Depending on your melter or candle size, the wax can be hot. Please use caution using this tuturial.

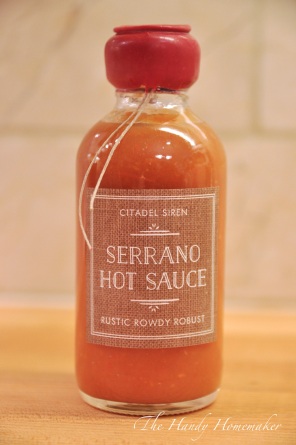
Small jars of my hot sauce recipe sealed and stamped with bottling wax with a sisal rope to aid in removing the wax when opening.
Many years ago I wanted to find sealing wax for invitations for a murder mystery party I was planning. I wanted to seal the envelopes with wax and a stamp for that unique effect to go along with the theme of the event. I went to every store available to find this product. This was well before online shopping was widely available for purchasing anything you could think of. I wasn’t giving up on my idea and since Michaels stores weren’t prevalent in Canada yet, I went to the library and found a book that said that letter wax was originally made with beeswax, and then eventually mineral pigments were added for colour. I had a few different colours of beeswax candles that I melted and this worked pretty good with my sealing stamp that I had found among Nanny MacDougall’s crafty possessions.
Eventually I had an idea to seal my jars of homemade vinegars, condiments, and bottles of wine by dipping them in the wax. Beeswax didn’t work quite how I wanted it to. It was too crumbly and a pain to remove. After many mixes and messes, trying everything from colored beeswax candles, cheese wax, and paraffin wax, I remembered trying to clean up the large round balls of melted glue stick that dripped on Mr. Handy’s grandmothers craft table. I used a small pot to melt the glue sticks. After testing a few batches with every combination of glue and wax I had, I came up with this recipe. A glue stick style wax which is a flexible sealing wax for mailing through today’s postal systems is now able to be purchased at specialty craft stores.
Fast forward 20 years later and I am still using the same recipe. It never fails me. Why not just buy wax now since it’s now available in specialty stores and online? IMO this type of wax doesn’t work that great for dipping and sealing bottles and it’s expensive to use for this type of project. The only place I could find bottle dipping wax online for this type of product is Mexico and costs plus shipping are expensive. I had all of my ingredients at home, but if you don’t, everything needed can be found at most dollar stores. Yes, even the candle melter.
 The combination of the wax and the glue sticks allows the wax to seal and stick to the item, yet release without crumbling completely apart. I have used this for such projects as sealing envelopes, gift bag decoration, seal for pirate’s treasure maps, sealing ribbon to gifts, parchment paper letters, wedding invitations, decorative bottle sealing wax on bottles of hot sauce, homemade ketchup, homemade vanilla, my soap and lotions, and when I bottle homemade wine. I really love the look it gives my homemade gifts and as do the recipients. First, I have shown the bottle dipping how to in detail, followed by a few pictures on how to use as sealing wax for envelopes etc.
Materials Needed:
- 15 crayons (45 grams)
- 30 low temp glue sticks (90 grams)
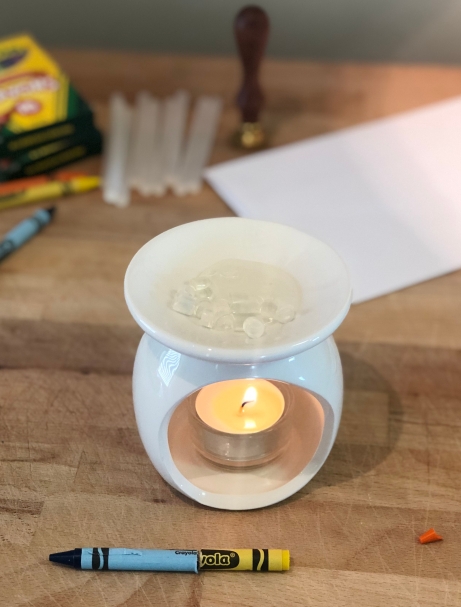
- small old pot (filled 1/3 with water), electric candle burner (temp 140-240°), or glue stick melting pot (won’t need mason jar)
- small wide mouth heat proof jar (mason jar) (250 ml)
- disposable wooden stir stick (popsicle stick)
- utility knife (x-acto with new blade)
- Oven mitts
- wax stamp
Place the pot of water over low heat to bring the water to a simmer. Do not put your heat up too high as this could lead to splashing water, or too much heat for the jar which could cause it to crack.
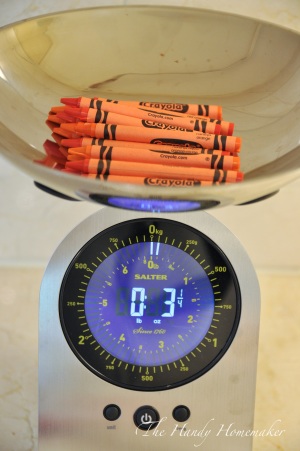 A small glue stick and a small crayon weigh about 5 grams each. I sometimes weigh them out if making a large batch for wine bottle dipping for instance.
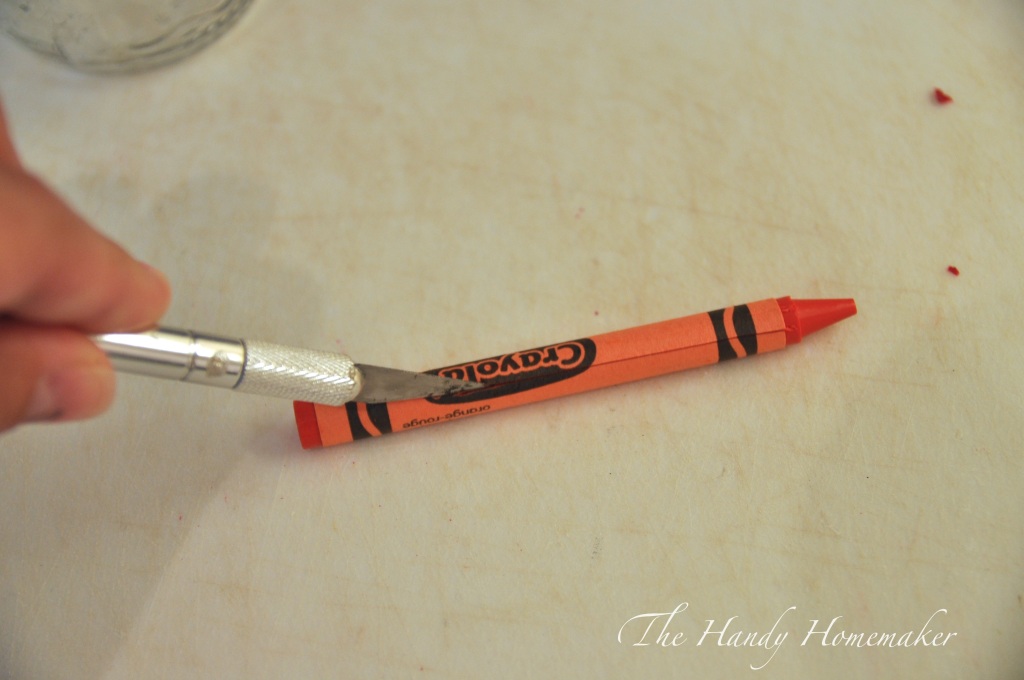 Use the utility knife to cut down the length of the crayon to remove the label. Trust me this is easier than trying to peel them without cutting first.
 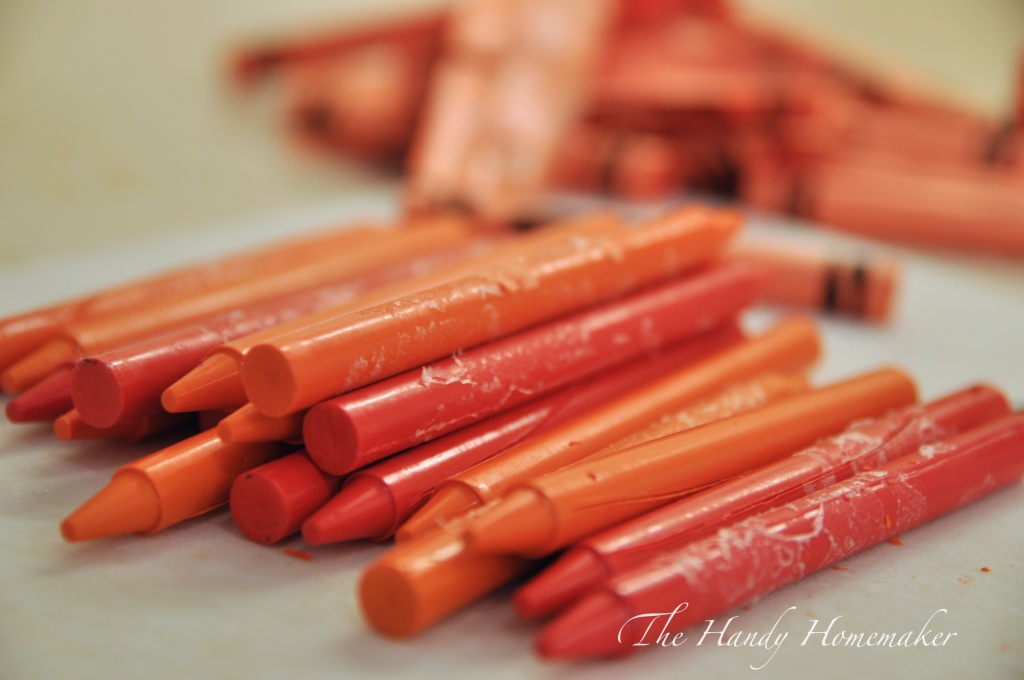 All the labels are removed.
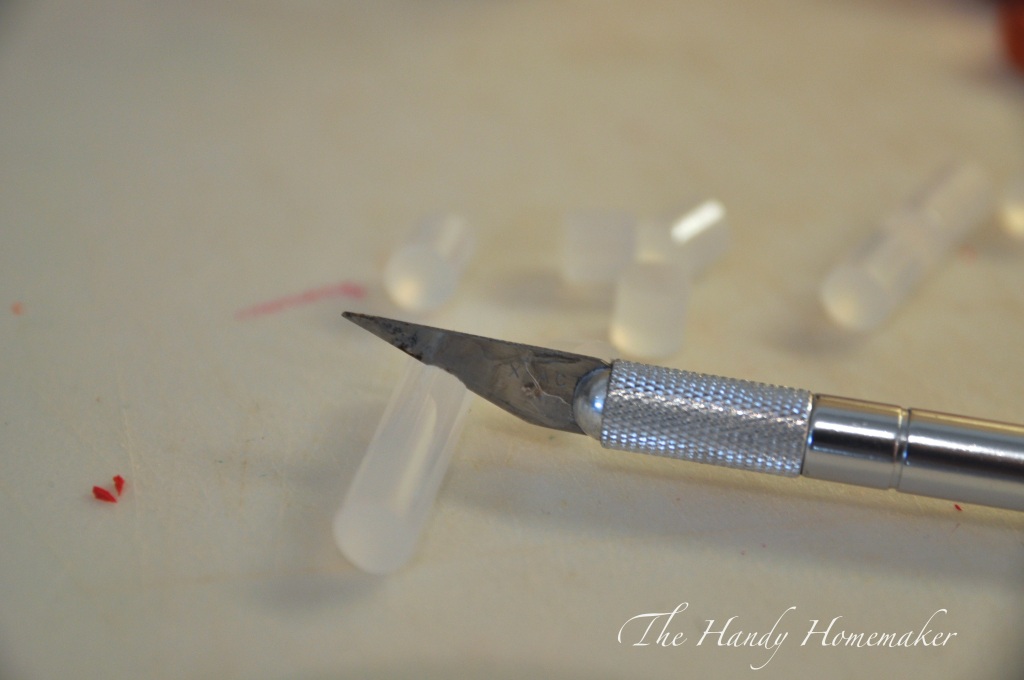 I use a cutting mat/board and the utility knife to cut the glue sticks and the crayons into 1/2-1″ pieces.
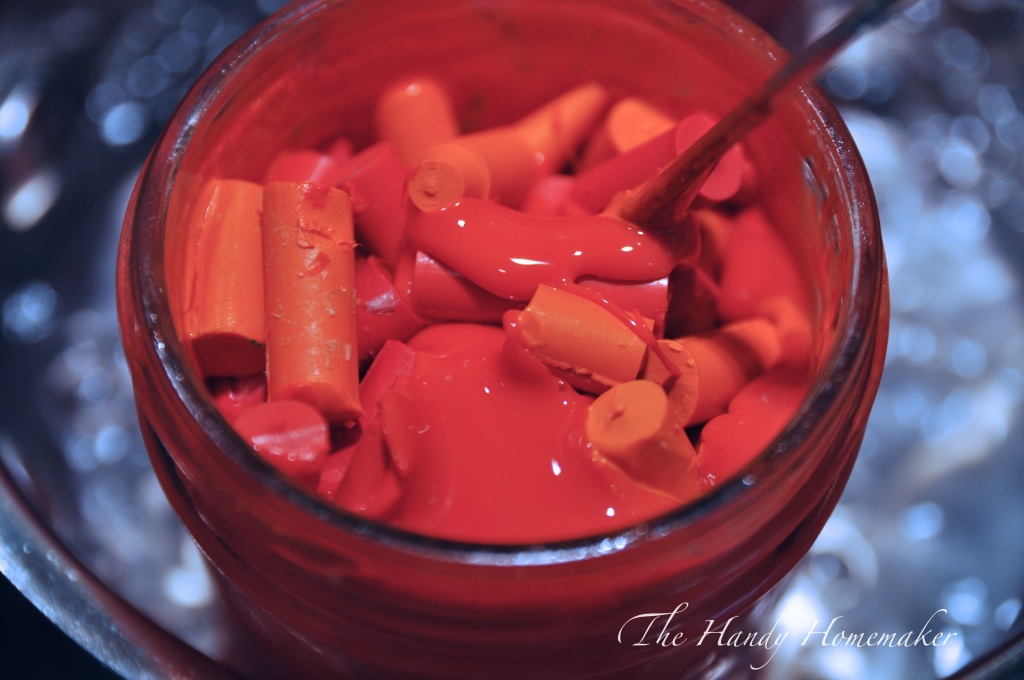
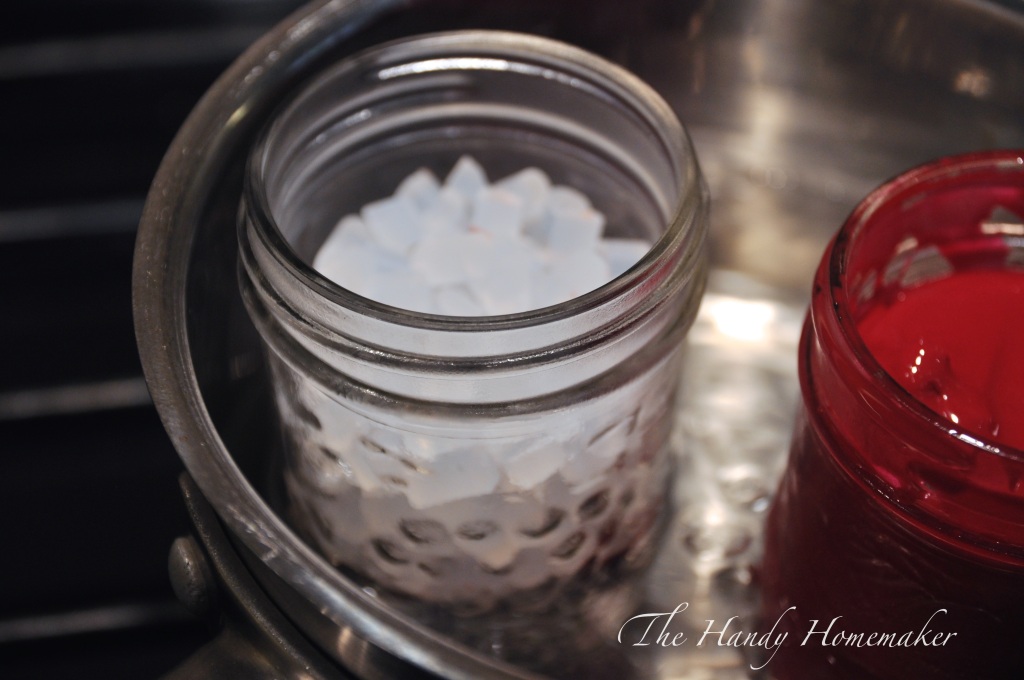 Place the glue stick pieces into the small mason jar and then place into the pot of simmering water. You can see here that I am working on two colors of the sealing wax at the same time. Do not
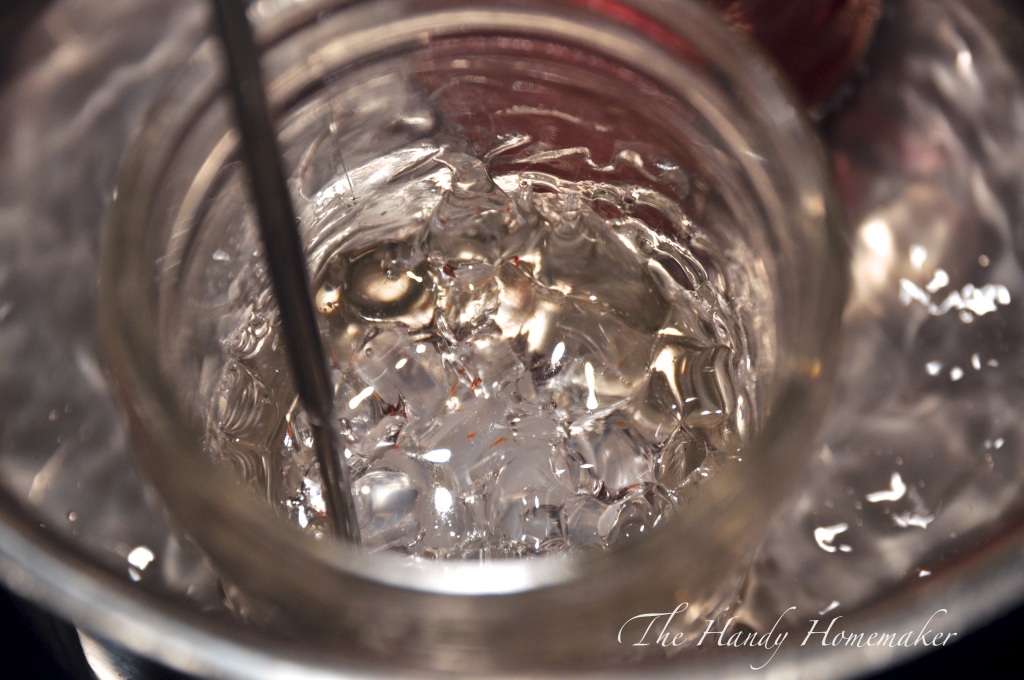 I find it easier to melt the glue sticks pieces slowly first, stirring every few minutes to aid in the melting.
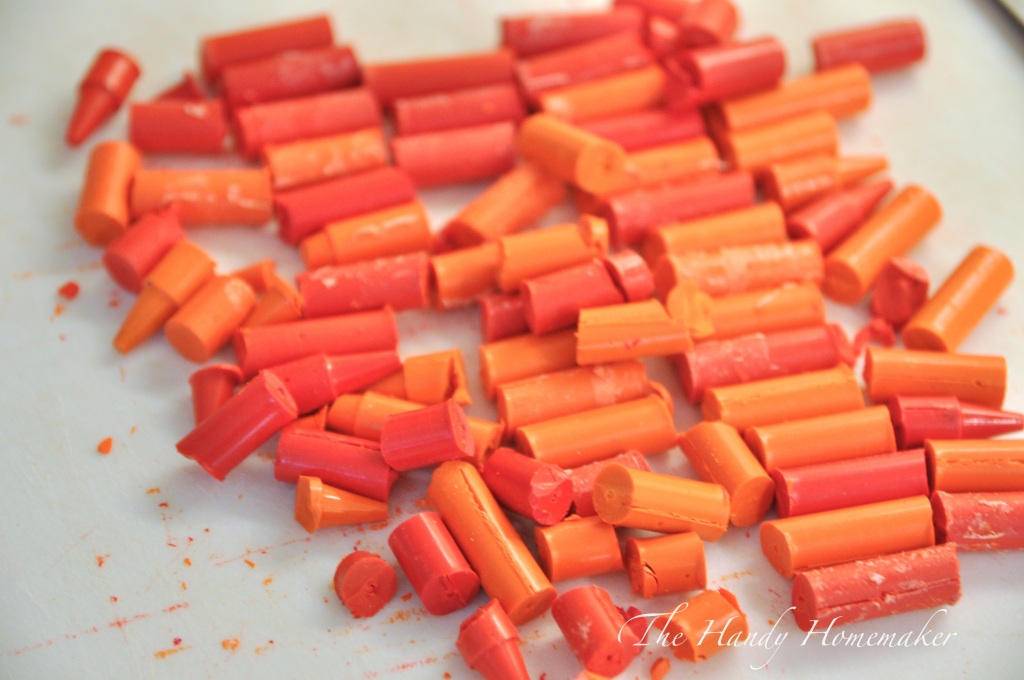 Once mostly melted start adding about 1/4 of the crayon pieces and stir to melt into the melted glue stick.
 Repeat until all the crayon is added as it will fit into the jar as it melts.
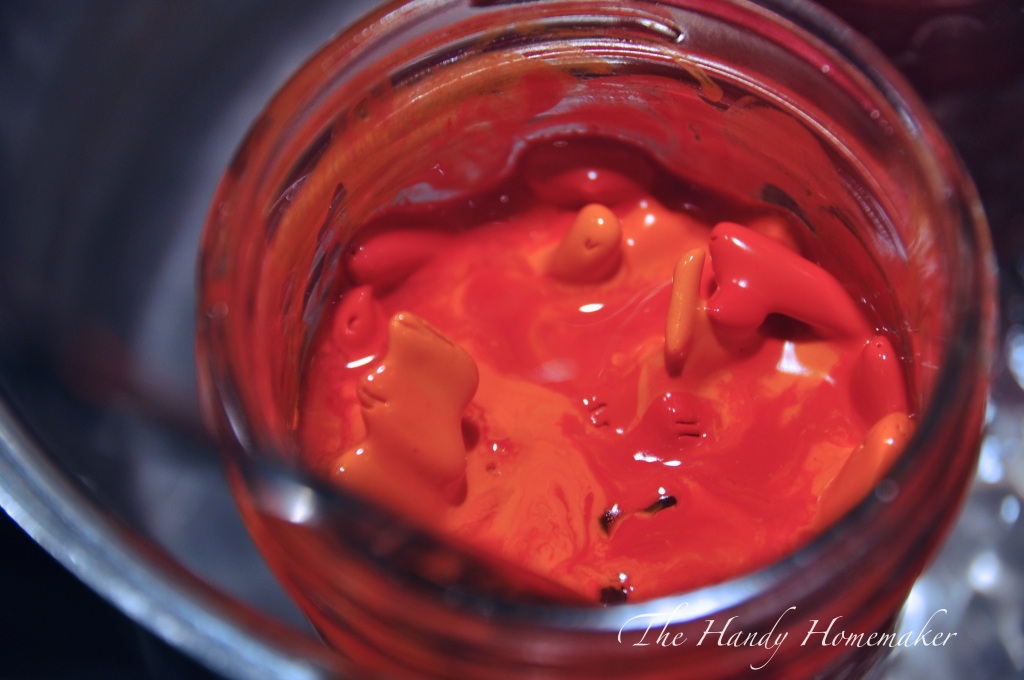 Gently stir in every couple of minutes until completely melted.
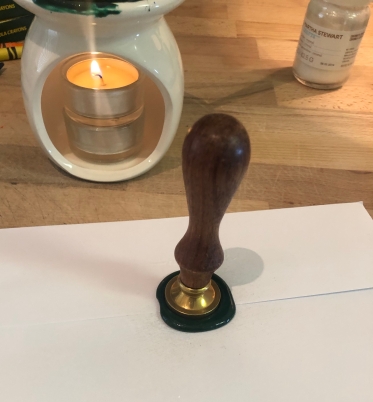
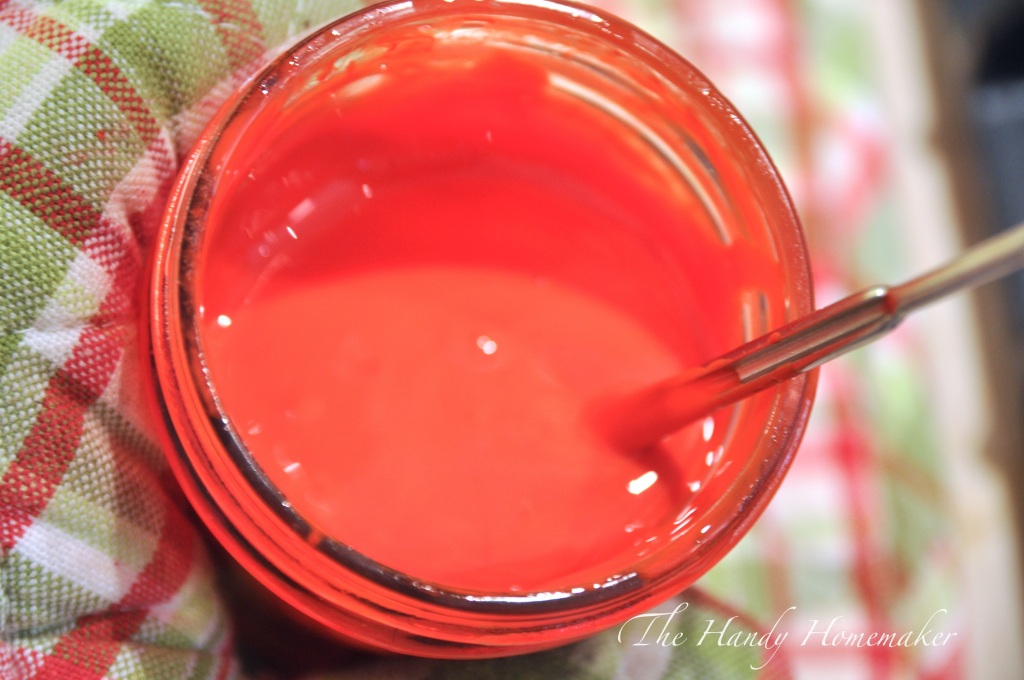 The melting wax is now ready to use. I like to keep the jar either sitting in the gently simmering pot of water, or remove the jar from the pot with oven mitts and set on the electric candle burner to keep the wax from hardening while using. Use a small spoon and carefully pour the wax where you would like it and press the metal stamp in and release quickly.
How to Use Wax to Decorative seal Bottles

Materials Needed:
- Homemade bottling wax
- A bottle with cover, or a corked wine bottle (Link to the 4 oz bottle I am using)
- Optional: Shrink bands to cover the lid
- heat gun or blow dryer
- filament tape
- sisal rope or 1/4″ or smaller ribbon
- scissors
- wax stamp


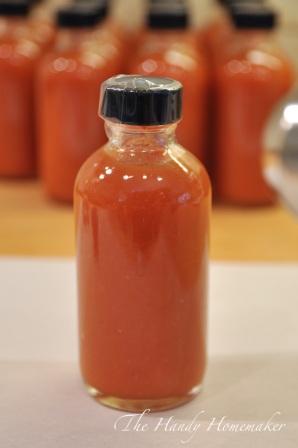
 This is optional, however I prefer to shrink seal my covers on my bottles of homemade hot sauce, or vanilla
I then cut 12″ strips of jute string

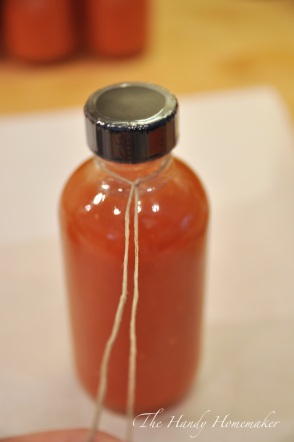 Wrap and tie the string around the neck of the jar
 Cut a small piece of tape (filament tape)
 1/4″ wide
 Pull both strands of the jute rope across the top of the jar cover
 Tape the rope in place as pictured
 Place another small strip on the other side of the cover to hold the string close to the cover
 When the bottling wax is ready and flows in a thick smooth ribbon slowly dip you jar in the wax
 Press the jar in the melted wax to the base of the cover and then slowly remove the jar from the wax. Be careful this wax is hot. Also it will cool quickly so have your stamp ready.
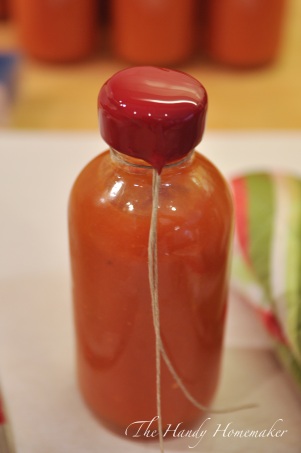
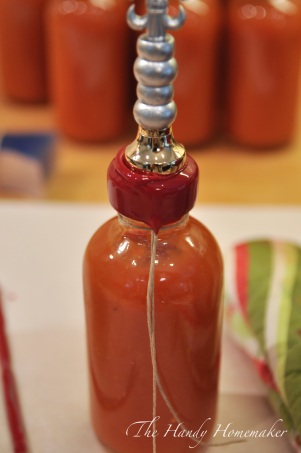 Quickly set the jar on a counter and gently press the stamp into the top of the wax, wait for 10 seconds and then pull the stamp from the wax. Set aside and let cool.
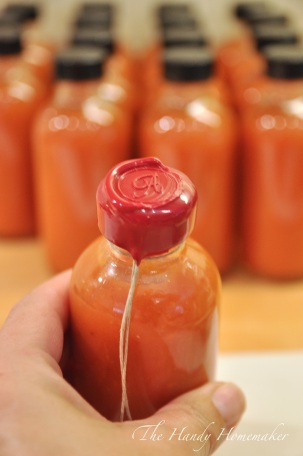
 Finished. Now to open the jar just pull the strings to break the wax and it should be able to be removed in two pieces.


*Always use caution when using candles or heating. Never leave unattended. Never leave melts sitting with candle going with out intended immediate use. Depending on your melter or candle size, the wax can be hot. Please use caution
How to use as Sealing Wax:
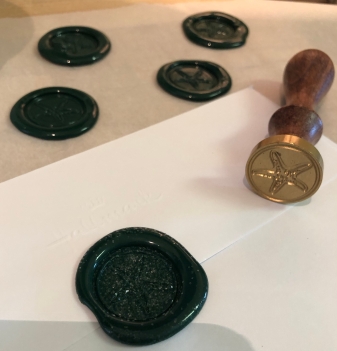
This recipe will make 5 to 6 wax seals. Adjust recipe for desired amount. I like to make extra stamps on sheets of parchment. Once dried, store in containers. They can be hot glued in place where ever you choose to use them. Or you can not bother stamping just let blobs harden and reuse at a future date.
All the materials needed were bought at the dollarstore except for the wax stamp.
- 2 small low temp glue sticks
- 1 crayola crayon (you can use other brands but the pigments are not always the best)
- candle melter
- tealight or votive candle
- lighter
- spoon
- wooden sticks
- wax stamp (inexpensive bought online, etsy, amazon etc)


Cut Glue sticks into small chunks for melting in a warmer. Scissors or a sharp knife works easily.

Use the equivalent to one crayon. You can use any blend of the crayon to make other colors. ie: I am making fir green colour here. A half white and half pink crayon makes bubblegum pink.
Poor video quality but you get the drift.
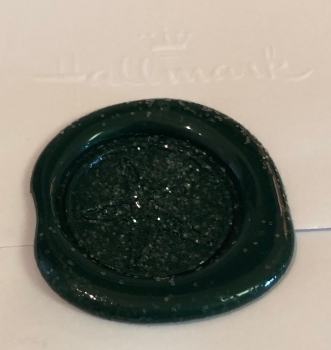
Almost ready. Just wait another minute and it will be more fluid. Use the spoon to pour a small dime sized amount onto area you want. I like to use glitter to jazz up special items like these Christmas cards but that is optional.


Easily Clean up the Candle melter and the spoon. Let cool and peel off the wax. I add these pieces to the leftover pieces I store for each colour. They remelt just the same. A magic eraser takes off any remaining residue.


67 responses to “How to make Bottling, Sealing or Stamp Wax”
Thank you… great instructions
LikeLike
It all looks so wonderfully easy, and beautiful! I would like to seal 18 wine bottles – I am just not too sure from the above on quantities (I am not that good with recipes!) – how many crayons and glue sticks would one need to coat. for example, 1 wine bottle? Approximately?
LikeLike
thank you for ur instruction
LikeLike
You’re welcome 🙂
LikeLike
Idk if you tried this on a smaller scale but would it work if I kept the 2 to 1 ratio for of glue sticks to crayons I’m wanting to jus seal something I wrapped and don’t want to make that much wax
LikeLike
Yes it should work perfectly. Let me know how it works out.
LikeLike
Thanks a million. I live in Sydney Australia and could not afford to go and buy the sealing wax, I use seals on envelopes to make my marketing letters a bit more interesting. Works brilliantly. Rob – Merry Xmas and Happy New Year
LikeLike
Thanks for the message Rob. I’ve used this to seal invitations, and Christmas cards also. I’m glad it worked for your needs. Merry Christmas and Happy New Year to you.
LikeLike
How do you use this method for letters? Is there a good way to store this melted wax in smaller quantities (like sticks) to be reheated later for a one-time correspondence use?
LikeLike
I melt the wax use a spoon to pick up the wax, and pour the wax in the area I need it as per the pictures. I have only used this for bulk envelopes, etc. So storing this way works for me, or I just melt small batches in the melter.
I have poured leftovers onto parchment and cut into small pieces for easy remelting (store in ziplock or containers). Thanks for visiting.
LikeLike
Find silicone ice trays/chocolate molds that are long and thin like for ice that goes into water bottles. The molds must be silicone. Pour the sealing wax into those to cool and voila you have sealing wax sticks that you would buy in the store.
LikeLike
Can you please give me some idea of how many bottles ie wine bottles a single batch of wax mix will cover. Thank you
LikeLike
Hi Denis, Sorry for the delay in a response, not sure why I am just seeing this message now. I honestly have no idea how many bottles it would cover. Many variables at play, it depends on what type of bottle you are dipping, how far down the bottle neck you are dipping ect. I make large batches in a few colors and store in the mason jars so they are ready to melt and use again. I never took the time to count how many bottles this will cover. Please let me know if you do. Thank you for visiting. Hope it all worked out fine for you.
LikeLike
Is any sealing wax not used reusable by just remelting it? I’m wondering if it’s okay to make up a large batch and keep it for use from job to job?
LikeLike
Yes, this is exactly what I do. Works like a charm.
LikeLike
Your jars with the wax seals are gorgeous. Do you only use Crayola crayons or have you tried other brands as well?
LikeLike
Thank you. I have only tried it with crayola, but I can’t imagine why this wouldn’t work with other brands. Let me know how you make out if you use another brand. 🙂 thank you
LikeLike
Tried it with dollar store some brand or other. They don’t draw as smoothly or evenly as crayola, but work fine for sealing wax. Just used it to seal envelopes.
LikeLike
FanTAStic!! Much thanks!!! Im personally offended at how much sealing wax prices creep up and up every time an influencer somewhere brings it back in the spotlight. LOL
I used to purchase organza bags of 500 assorted pieces for 3 bucks!!
I’ll never buy another piece of sealing wax again!
Heck, I might even make it and sell it mySELF at half cost! Less than!
I’ll need to take my grandson for an ice cream for throwing a fit when I tried tossing all his crayons he NEVER touches anymore. Got the Crayolas!
And pat mySELF on the back for hanging onto the accidental size foot long and too big around glue sticks I purchsed in a 100 bulk lot and havnt gotten around to melting/pouring them to the smaller size.
I now have approx. 5,409,899. glue pellets to make.
[Insert impish grin]
Thanks for that.
Love from Montana!
LikeLike
I was just reading your comments and making sealing wax and how much you have and I can’t stop laughing. That’s adorable.
It’s great to learn all this because I’m tired of holding my glue stick over a match and letting it drop onto the envelope and then watch them all catch fire.
LikeLike
Do you think that beeswax could be substituted for the crayons?
LikeLike
I’m really not sure. Please let me know if you try it and it works 🙂
LikeLike
Hello
Tried your method on my 2oz glass shave oil bottles, looks great but it was absolutely impossible to cut through it with attached jute twine…
Thanks
LikeLike
I imagine the jute twine broke before it would cut the wax. Thanks for the update. I will remember that for my next bottling project.
LikeLike
Are these really stiff or are they pretty flexible? I considered using these on some mailed invitations and don’t know if they would make it, or if i would have to place it inside a second envelope before mailing. What is your experience?
LikeLike
Hi!
Will this glue-crayon mix work as a wax for envelope seals? or I should better use just the crayon wax for this purpose?
LikeLike
Yes it will. I have used it twice for this purpose and they survived the mailing system in Canada and the US.
LikeLike
I used it for envelop sealing, worked great
LikeLike
Have you tried putting the jute under the shrinkwrap? Just curious.
LikeLike
Do you think this could be done with just a candle warmer? I would like to do it with kids and won’t be near a stove.
LikeLike
I am not sure if it would get warm enough. Let me know if you try it and it works. Thank you
LikeLike
is there any option instead using crayon? because its hard to find one colour crayon that much 😥 maybe colouring powder or something?
LikeLike
I’m not sure. I haven’t tried it with anything else. Please comment if you find another option.
LikeLike
Michaels stores sell candle making dye
http://www.michaels.com/fuchsia-pink-liquid-dye-by-artminds/10475419.html
LikeLike
crayons usually go on sale this time of year, for back-to-school, you can find a box of 24 for .25 to .50 each. buy 15 boxes for $3,75. or, you could buy just 5 boxes and use the red, the red-orange and the dark red together, that’s 15 crayons total if you need to make a batch this large. then you can do the same thing and bundle the greens, the blues, the pinks, the yellow-orange, etc.
LikeLike
Try using any kind of dye like RIT dye. you will need to grind the dye down to make it more smooth before adding it to the glue.
LikeLike
Thank you for your tip. The purpose of using crayons with the hot glue is for the user. The glue would not break, tear, or spread properly in the applications I use it in without the wax. When I can’t find, or make a specific colour with my technique above I use mica and white crayons or a crayon closest to my desired colour and add mica to the wax/glue blend to reach my desired colour. Mica is much less messy to use than dye. It also adds a beautiful shimmer to the wax.
LikeLike
I used this recipe, but heated my crayon and glue stick pieces together in a steel ladle over an oil can burner (one that is used in catering to keep food warm. purchased at the Dollar Tree). This worked SOOO much faster than water bath method (which I tried first). You have to stir a little more frequently, but it cuts the melt time by at least 70%. And, with a rubber spatula, you can very easily remove all wax residue from the utensil.
LikeLike
Also, because i was only making the wax for future envelope stamps, I poured the melted mixture onto parchment paper, allowed it to cool, then chopped it up into very small pieces with a large knife to be easily melted over a candle later on.
LikeLike
[…] Full Tutorial: How to Make Botteling, Sealing or Stamp Wax by The Handy Homemaker […]
LikeLike
Thanks for this great tutorial. I am trying to use this method to make sticks of sealing wax for letters. Are you using mini glue sticks? Are they for the high melt temp guns or low temp? I am having a hard time getting the right consistency to get it out of the glass container or pourable at all, I think it’s my glue sticks.
LikeLike
Thanks so much, excited to try this for my homemade vanilla! When you say “glue sticks” do you mean hot gun glue sticks? I assume so based on the pictures but just wanted to check. Thanks!
LikeLike
Yes that is exactly the type of glue stick. I have used this for my vanilla too. It really elevates the look of the jars.
LikeLike
WONDERFUL Post.thanks for share..more wait .. …
LikeLike
Hi, just wanted to say THANK YOU for sharing this recipe for stamping wax I appreciate it.
Sincerely, Shawna from Washington State, USA
LikeLike
Your so very welcome. Have a wonderful Holiday ❤️
LikeLike
Reading this in 2019, thank you so much. I just ordered my first set of waxseals from China but I found out that in my country, the wax that is especially made for waxseals is so expensive. I’m gonna definitely try this!
LikeLike
Just wondering if you know the diameter of the hot sauce lid you have and the size of your stamp? I’m a sauce maker and I’m ordering a custom stamp for my limited runs of sauce but I don’t want to buy the wrong size. This looks so great! thank you for posting.
LikeLike
Good Morning, sorry for the delay, I am away on holiday. I don’t know the diameter off the top of my head but if you click the link to the bottle company, they should have the diameter listed on their site. My stamp came from Michaels so I am not sure. Without having it in front of me, I would guess 3/4″.
LikeLike
Just wondering if you know the diameter of the hot sauce lid you have and the size of your stamp? I’m a sauce maker and I’m ordering a custom stamp for my limited runs of sauce but I don’t want to buy the wrong size. This looks so great! thank you for posting.
LikeLike
If I set candle wicks in this mix like a candle would I be able to use it as a sealing stick? Or pour into a ceramic pour cup and pour it out?
LikeLike
Hya Mina!
I just came across your site while searching Pinterest 📌 for diy sealing wax, and wanted to thank you for the tutorial! I’m a few years shy of 40, and have decided to begin sending snailmail letters 📮📬💌📝 to my 92 y/o Grandmother. She has always loved writing and receiving letters, and I thought it would be a pretty touch that Grama will appreciate to wax seal my letters! I’ve been eyeing different options for purchase online, but it’d make it even more meaningful to make the wax myself… and save my pennies for the gorgeous seals!!!😆 As an added bonus, I can tell Grama that I got the wax recipe from a fellow Maritimer (I grew up and went to school in Bedford NS, before attending university at Acadia and MTA and landing in Amherst NS… but damn, do I miss Hali – please tell it hello for me!!)!!
Thanks again!
💝✌⚓🇨🇦
LikeLike
That’s awesome. I don’t know why but I just got this notification. I’m happy you found me. Come visit Hali. I’m sure it misses you ❤️
LikeLike
Hi! I found this post on Pinterest and I just had to thank you for making this tutorial available for everybody.
Sealing wax is really expensive in my country (so are crayons, but not as much!), so this is going to help me a lot in my business! Now I need a tutorial on how to make my own seals…
Thanks again!
Maria from Uruguay
LikeLike
Can you use candles instead of crayons? I would try it, but I don’t have enough materials to risk it. By the way,thank you for this tutorial. It was really helpful.
LikeLike
I am not sure if candles will work the same way but I would assume they would as it’s a similar wax. Let me know if you try it. Thanks for checking out my page.
LikeLike
I too want to know about using candles. I have a bunch that I’d like to use if appropriate.
Thanks DD
LikeLike
Nice I don’t know if I would ever make it but nice to know how. thank you Great job…
LikeLike
What is the purpose of the fillament tape? Could it be regular tape? How does it change the “unwrapping” process without the shrink wrap? I’m a massage therapist and for Christmas I’d love to make a small batch of diffuser waters to sell or give as gifts to special patients. Thanks!
LikeLike
This is amazing! What kind of bottles do you use?
LikeLike
Awesome! Thank you so much sir/ma’am! I have a friend who would really like getting a sealed wax, but they’re so expensive 😀
LikeLike
Awesome post with awesome info : – )!
Can I substitute the glue sticks for other kinds of glue – like that white ‘school glue’, PVA glue I think it’s also called.
Does anyone know if that Would work?
Would any other substitute for the glue sticks work?
LikeLike
I’m wanting to seal a large “memory jar.” The top is probably 5” in diameter. Would it be okay to heat the glue sticks/crayons in a cooking pot on the stovetop? I have a non stick pan to use. Ideas?
LikeLike
Ps…I should know better than to read comments. I broke myself of that habit when MySpace was a thing .
I know…just dated myself HARD. Lol
About the comments……
READ THE ARTICLE PEOPLE!! Don’t just look at the pictures and skim over!!!
EVERY question is explained FULLY!! Many even having its own sub section!
Sheeesh!
LikeLike
Thank you so much for your comments Julie. This cracked me up. This post has gotten so many questions many that I haven’t approved to be on here because they are not nice about it either 🙃 But that is the nature of the internet. For every 10 great people you get a few “fill in the blank” people 🤣
LikeLike
I found this tutorial in October 2021. I tried it today, but had a hard time finding bulk low temperature glue gun glue sticks. I decided to try the “all temp” ones and it worked like a charm! Now I have something to do with all those leftover crayons I’ve been hording for years. LOL
Also, for anyone interested, I did find some silicone ice molds in the shape of sticks and it worked well to create a log shape for the wax to harden in. I also tried melting it and creating a wax seal and it worked great.
I found that decorative metal buttons worked great for my stamp instead of having to buy one from the store. Happy sealing!
LikeLike
Thank you for these tips! Especially excited about using the metal buttons!
LikeLike