 Each year I plan the Christmas party for my husbands office. The event has about one hundred guests and I try my hardest to come up with a new theme for the party. Two years ago I came up with a “Snow Globe” theme and it is still my favourite.
 I tried my hardest to find a snow globe for the centerpieces. I couldn’t find anything like this idea I had in my head, if you can’t find it, make it! Fourteen snow filled globes to be exact.
Here is what they looked like on the table setting. Swoon.A guest from each table gets to take home the centerpiece. Which makes my job a little more stressful special, when I am deciding my theme. These would make a wonderful Christmas dinner setting for your home during the holidays.
As a child I had always been fascinated with these beautiful glass balls that seem to be filled with magic. My snow globe was one that had the north pole inside. As I would shake and watch the glittery snow, I would imagine that these shimmering flakes were the wishes that every child in the world sent to Santa himself. I had a very vivid imagination as a child, and I still try to carry that with me today.
One of the other specialty items I incorporate into my events is a decorated cookie for each place setting. It really gives each table a pop of the holiday cheer. I have organized this event for ten years and now many of the guests express their excitement that they can’t wait to see what I am planning for them each year.
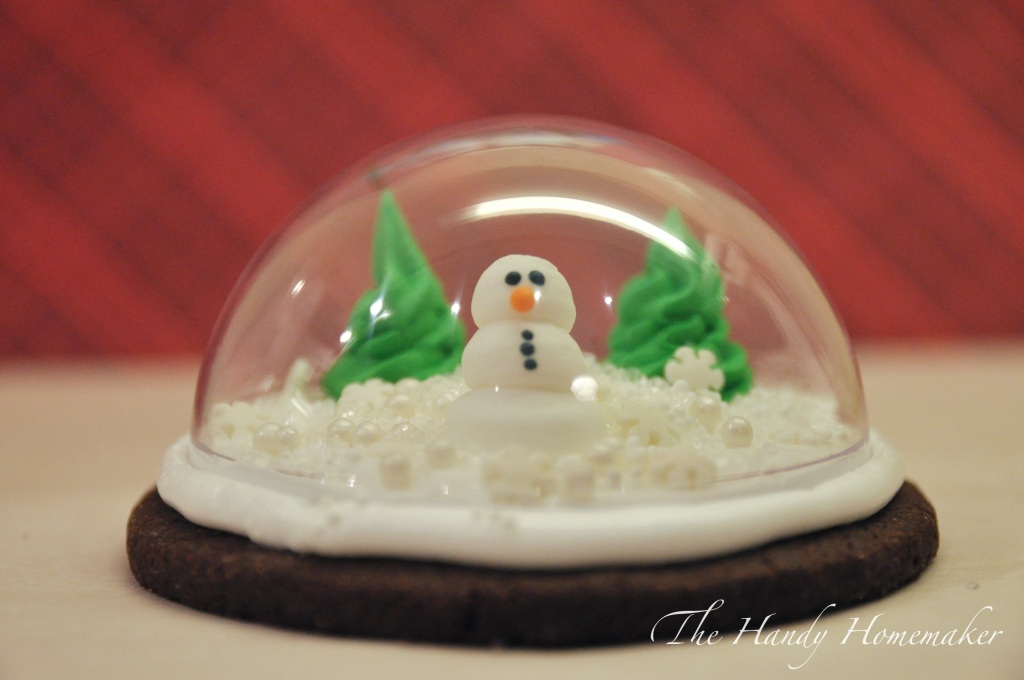
To go along with the snow globe centerpiece, I decided to make snow globe cookies. Aren’t these adorable! Seriously do you see why this is my favourite event theme.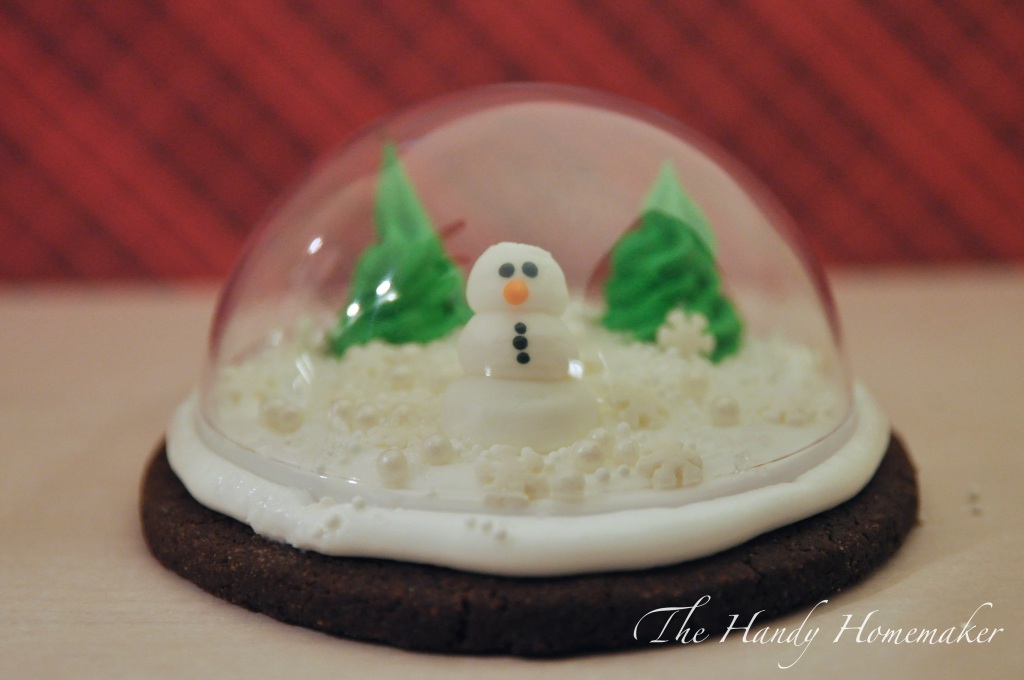
Materials needed:
- 3D Royal Icing Transfers made with stiff royal icing snowman and christmas trees THESE NEED TO BE MADE IN ADVANCE. I recommend the day before.
- parchment paper
- Clear Plastic christmas ornament domes (2 pieces) covers two cookies
- Sugar cookies cut with round cookie cutter slightly bigger than the dome
- Royal Icing
- snow flake candies (confetti) various sizes of small ball jimmies/sprinkles, clear sugar sprinkles
- Icing bags
- medium/large round icing tip to make applying the thick royal icing a little neater.
How To:
Follow the youtube video about to see how I made these transfers, Don’t be too fussy. You can see I wasn’t. It’s an icing candy, remember. Pipe onto parchment paper and let dry overnight.
 Start with a cooled cookie. I used chocolate sugar cookies to match the dark stain on the base of my centerpieces, however, use any cookie dough you choose. I suggest you use a recipe that stays relatively uniform and flat during baking
 Start piping from the outside edge in towards the center. It doesn’t need to be perfect, just cover the cookie. Your objective is to have a snowy base to attach the trees and snowman and snowflake candies to.
 Now that your icing is piped start adding your 3D icing decorations. Don’t ice a bunch of cookies at once. You need to add the trees, snowman and candies while the icing is still wet as royal icing crusts over pretty quickly.
 I put my dragees, jimmies, and sugar sprinkles in small bowls to make it easier to control sprinkling.
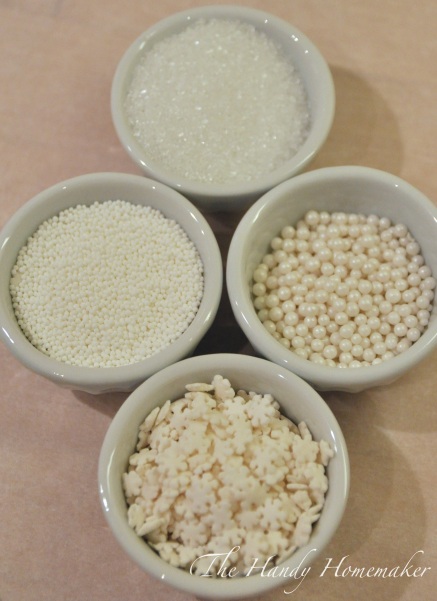 I put everything I need within reach.
 Hold the dome over the cookie without letting it touch the icing. Use this as your guide for placement of the 3D Snowman and trees. Gently press two christmas tree candies into the icing. Just enough to make the trees stick in place.
 Next add your snowman using the same pressure. Don’t push to the bottom of the icing to meet the cookie. These should just gently indent the top of the icing.
 Now start adding a desired amount of the candies to represent the snow.
 I started with a few snowflake candies
 Next the snowball type
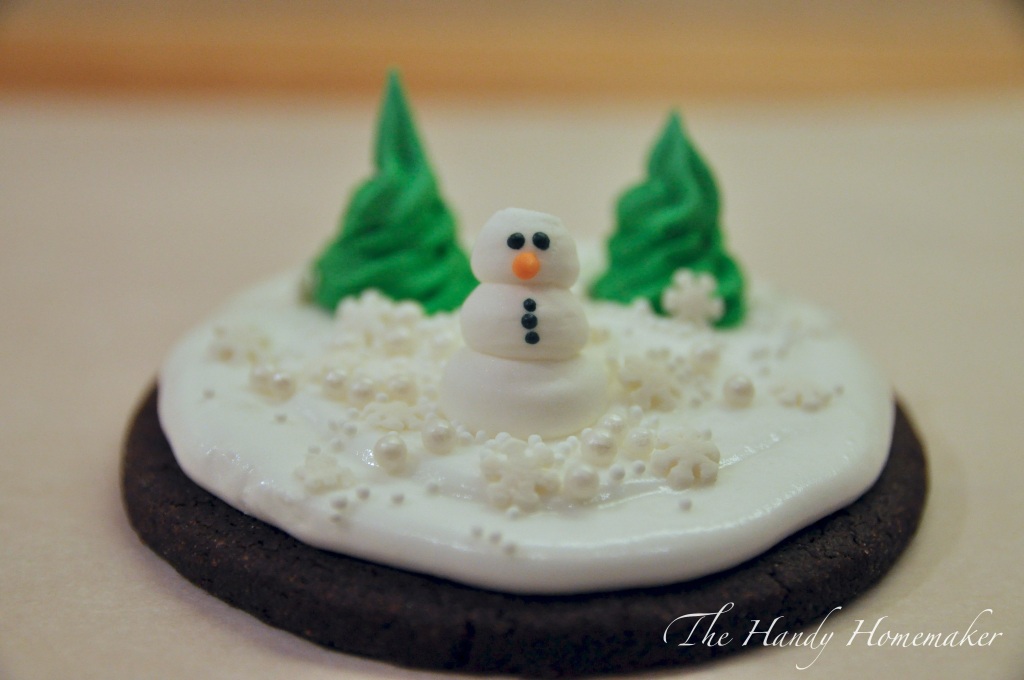 Then mini ball candies (white pearl style)
 Now here is the dome tops. If yours has the little plastic hanger attachment you can use scissors or small pliers to clip it off. Or you can leave it in place if you want to hang these on a tree.Place the dome over the cookie, centering as you lower it into the icing. Gently press into the icing just enough to make sure all the edges of the dome are pressed into the icing.
 Now let dry overnight on sheets of parchment
 I wrapped each snow globe cookie in a cellophane bag and tied a red plaid ribbon to seal.
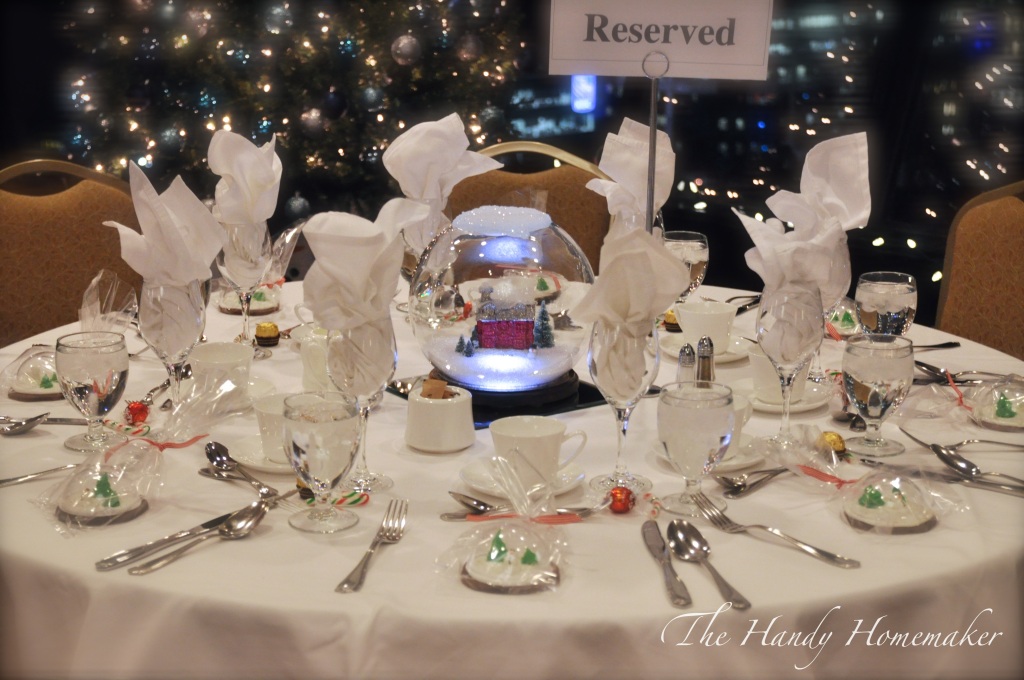 Here are the tables as they are being set up. Looking good! Leave a comment below if you would like to know how I made these awesome snow globes


6 responses to “A Snow Globe Christmas Event – 3D Snow Globe Cookies”
Love this idea! What a beautiful table, please share how you made your individual snow globes.
Thank you, have Blessed holidays
Grace
LikeLike
I have a post on those in my drafts. I’ll try to put a few notes on to explain how I did them. Thank you. Merry Christmas
LikeLike
Very nice your table setting is lovely you are imaginative artist ..Love you 3D snow Globe Cookies.. Merry Christmas to you and your family.🎄
LikeLike
Thank you so much. Merry Christmas to you and yours Marion 🎄😘
LikeLike
Thank you so much Marion. I always love your kind feedback. Merry Christmas and Happy New to you and Paul.
LikeLike
The centerpieces are great! I couldn’t find your tutorial – are there instructions somewhere? Many thanks
LikeLike