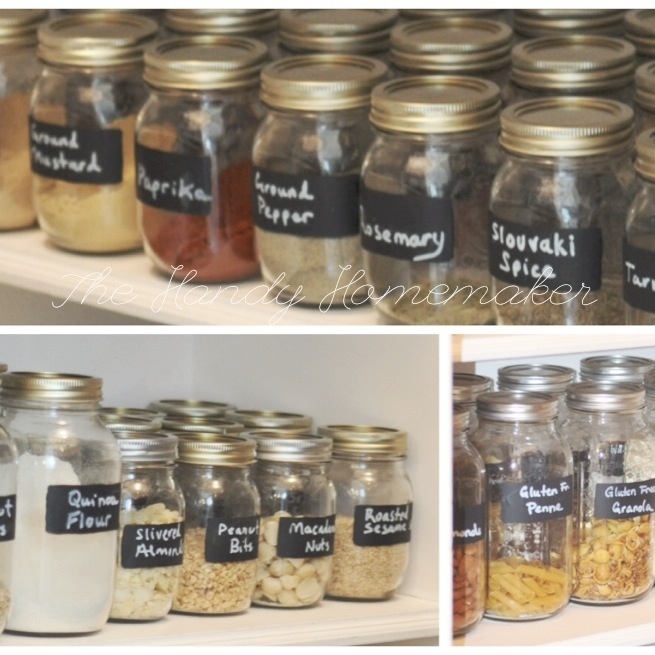
I have seen lots of different jars in stores with chalkboard painted labels on them, they are quite expensive and not in the sizes that I needed. After making mini chalkboards to sit by each chafing dish for an event I was hosting. I decided to label bins in my storage room, in the process of painting those, the thought arose that this would be a great way to relabel and store my spices. I went chalkboard paint wild and couldn’t be happier. The jars keep everything fresher longer, including crackers and cereals that seem to be stale because someone didn’t close the bag inside the box properly. Keeping my kitchen panty organized is much easier now.
Chalkboard Paint Labels How To:
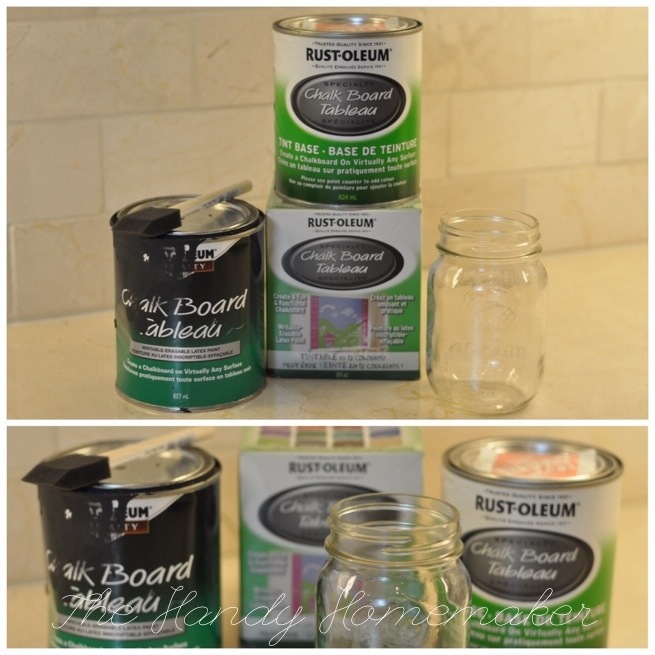
Materials
- Covered Jars in the desired size.
- Foam paint brush 1 inch
- Chalkboard paint – I’m using black but you can get chalkboard paint tinted to various colours (Home Depot)
- Chalk or Chalk marker (Michael’s Craft store)
As you can see, I have used this can of Black Chalkboard paint previously. I have had it for about 5 years. I have used in to make various crafts and projects. A little goes a long way so this will last for many projects if stored as directed. If you use the chalk marker, they don’t erase like they say they will. Immediately after you write something, you will be able to wipe off with water and start over, but not after they sit over night. You will need to repaint over the label to change or correct. Regular chalk works great but can wipe off over time. I’ve tried to find chalk pencils but could not source them locally.
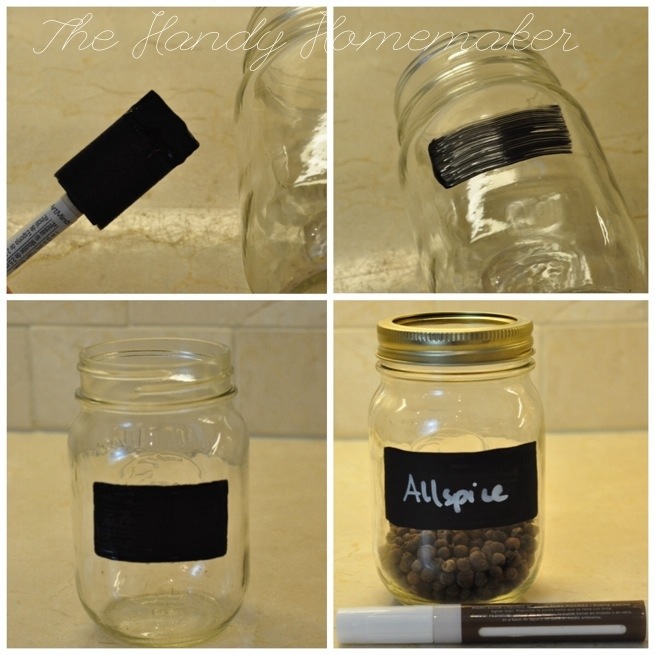
- Clean and Dry your jars if they are going to be used for food.
- Dip your foam brush in the chalkboard paint, wipe off extra you will need to do three light coats
- Free hand your label shape,* keep the other bottles near so you can eye the same placement when painting labels on multiple bottles
- Let paint dry to the touch. Repeat painting with the foam brush as neat as possible. If you want to make these jars as gifts you can try to use Frog tape (the special bleed proof paint tape, I have not tried this tape) I tried to tape off the label with painters tape. It took quite a bit more time and then bled under the tape, making a mess. Much quicker to free hand.
- After you have your three coats of paint. Let dry overnight
- Write the contents on the label using chalk or chalk marker
- Fill as desired and put the cover on tightly.
Tips:
You will be surprise how easy the foam brush makes your rectangle on the last coat. I didn’t care about perfection, but if you do, there are other ideas you can try out there. I wanted to used what I had on hand.
NO DISHWASHER. These jars can be washed, rinsed, and wiped dry by hand. However, If you let them soak in the water, I cannot guarantee they won’t lift off the glass. I put a few in the hot water in the sink, washed, rinsed, and dried and all was fine.
A friend suggested you may be able to paint label sheets with the chalkboard paint and use, but i have not tried or researched. You will most likely not be able to immerse those in water for cleaning. As well, you can purchase chalkboard contact paper online and cut out the desired size and stick on although I have never used this product, and waiting for two weeks to receive supplies through our postal system wasn’t an option. Contact paper I would think would be hand washable, but not sure if the glue would lift.


Leave a comment