Gingerbread House Centrepieces
During the month of November and December like everyone, I have many things on my plate. One of those “to do’s” is helping plan my husband’s office Christmas party. Over the years I have made many floral centrepieces, all of which are given away to a lucky person at each table. Each year I get as excited as the guests to see what I am going to come up with next. Thankfully I took a few pictures of the houses and how they were wrapped for presentation on the table. I unfortunately did not take pictures of the matching snowmen and christmas tree cookies that I placed on every place setting. This would look fantastic on a small scale as well for your home, for your holiday dinner, dinner party, or children’s holiday party.
I have a gingerbread house cutter set and usually make my gingerbread dough. Since I was making 14 I decided to buy ready-made packages of the gingerbread houses from the Bulk barn. They were not in kits, and did not come with candies and icing just the cookie gingerbread house ready to be put together. I used my Royal icing recipe and special candies for the theme I was working with. I had to transport these and didn’t want to wait for the royal icing to set, so I made a hot caramel/sugar glue to stick these houses together. CAUTION* YOU MAY NOT WANT TO TRY USING HOT SUGAR GLUE IF YOUR ARE WORKING WITH CHILDREN OR IF YOU ARE UNSURE HOW TO DO SO. This is molten hot candy and will burn you if you get it on your skin. (It has happened to me) Royal icing sets up rather quickly and may be your better option if you have time and are only making one or two.
- Cut out cardboard for base and cover with tin foil. Tape on the bottom
- Start by glueing the sides of the house together with Royal icing. You can use a piping bag or a knife. If your unsure of your placement, don’t add icing to the bottom of the house yet as you may need to adjust to center the house once it’s put together.
- After all side are glued together let set for about 15 minutes or longer. The longer you wait the icing will be harder. But if you are gentle you can start the roof after 15 min.
- Glue one side of the roof by adding royal icing along the top of the roof line on the sides of the gingerbread house. Place the roof on. Repeat for the other side.
- Let dry for 15-20 minutes
- If you did not glue the house down, carefully center the house and then pipe icing around the base of the house to make a snow-covered base. (Sliding the house slightly gets icing under the base and will help it adhere it to the base)
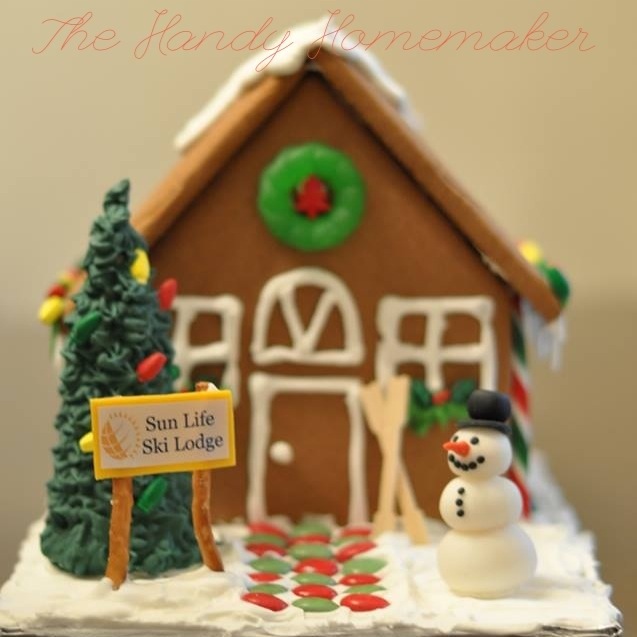
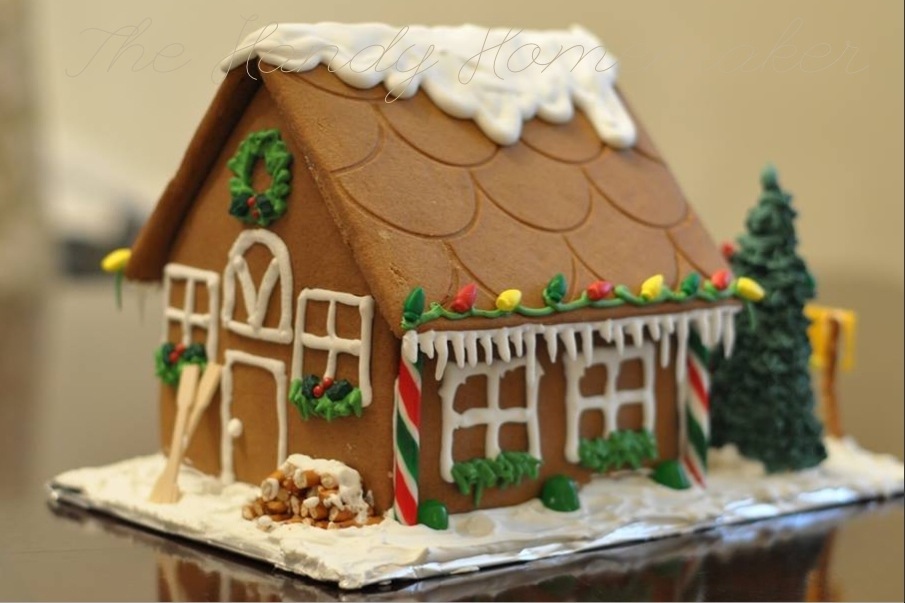
- You can decorate to your liking by adding candy wafers to the roof or river rock candies for a walkway .
- Let dry overnight and enjoy.
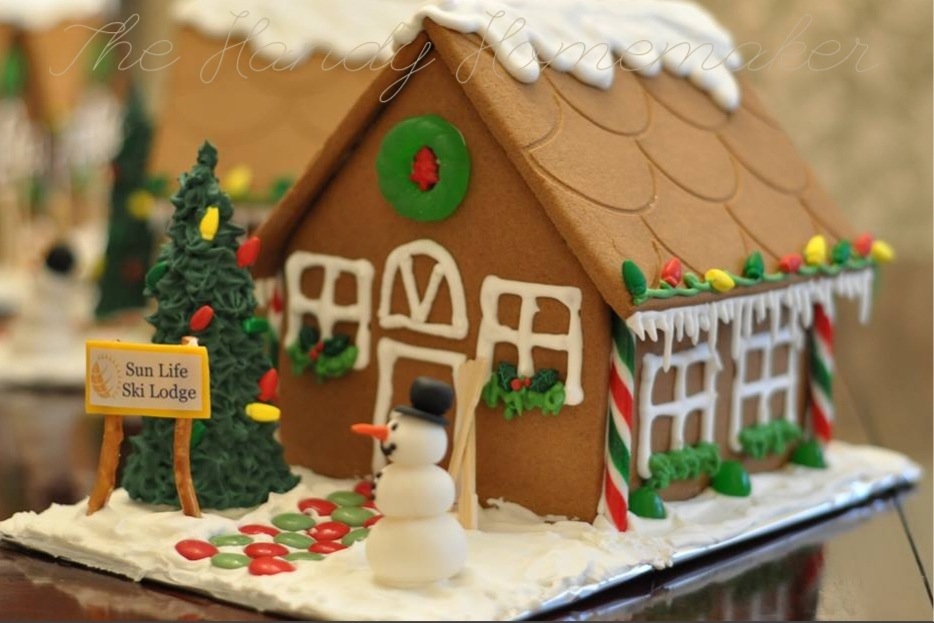
I used pretzels to make the log piles, royal icing to make the snow-capped roof, gummy wreaths, little christmas bulb candies for the strings of holiday lights, jube jubes, Candy canes, m&m’s for the walkway, holly berry candies for the windows, trees made of ice cream cones covered in green royal icing, and fondant snowmen and sign.
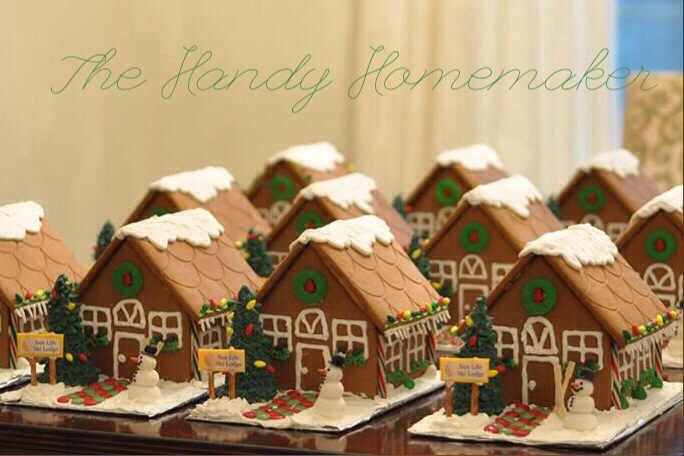
As you can imagine I was very happy when I completed all 12 houses. Worth every minute of the work for this event.

For transportation purposes and since this centrepiece is edible, I covered with cellophane wrap with a beautiful bow. With the tea-lights on the table you didn’t really notice the wrap.
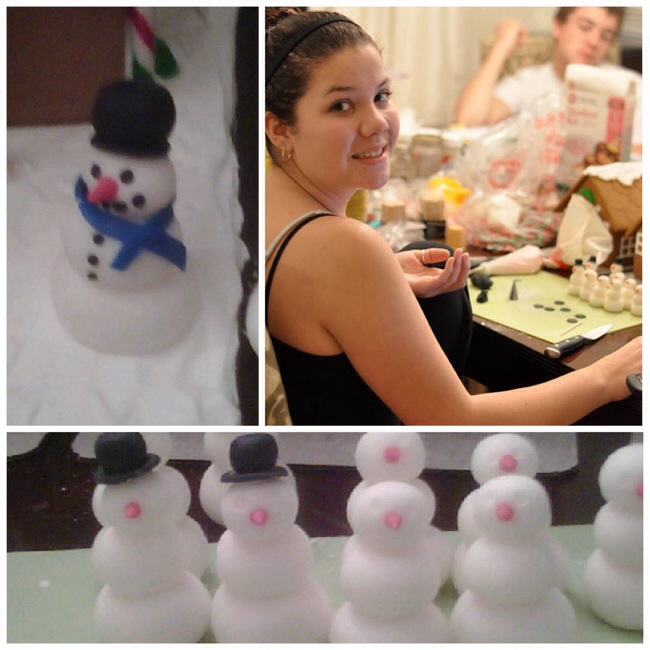
Always great to have a little help from my two talented teens. Making of the fondant snowmen.
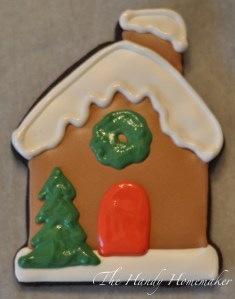
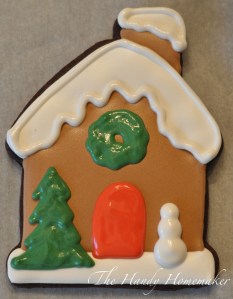
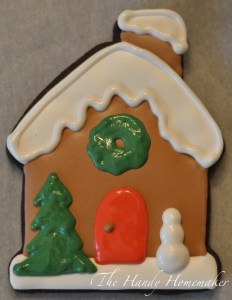
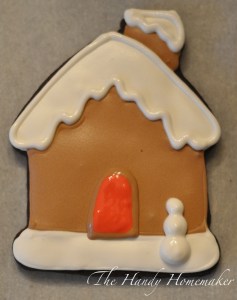
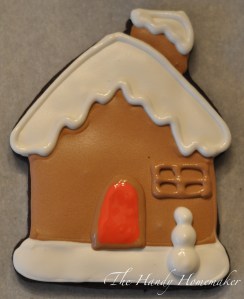
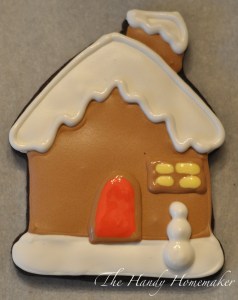
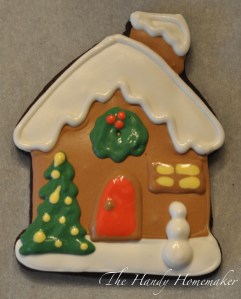
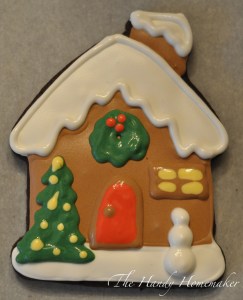
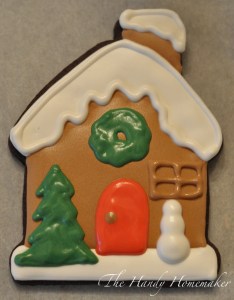
Gingerbread House Cookies with Royal Icing
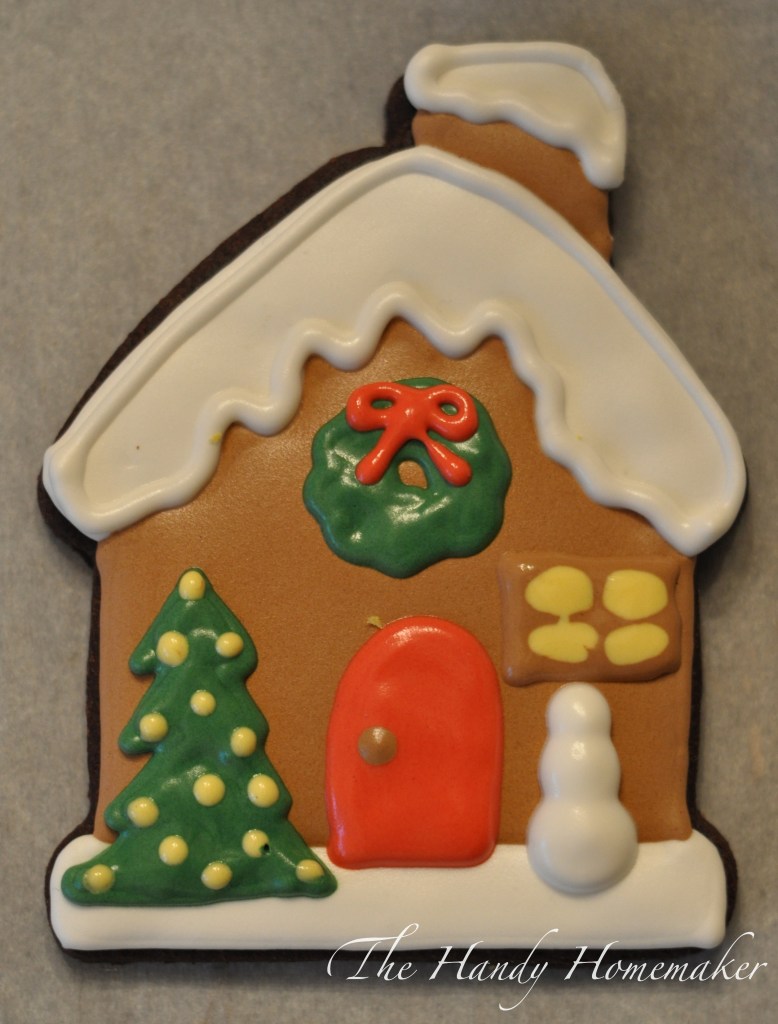
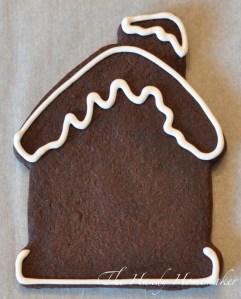
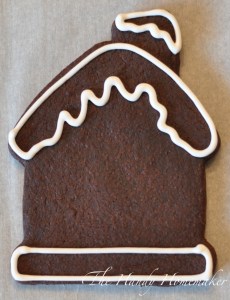
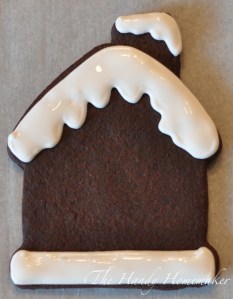
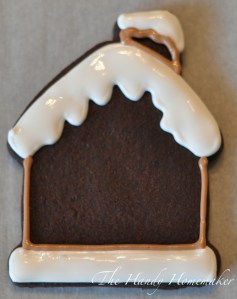
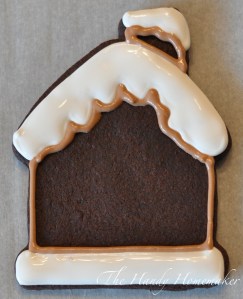
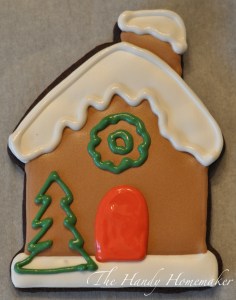
Thank you to my sweet daughter on these cookies. She always gets nervous when helping decorate cookies for others. I like to remind her that we don’t need perfect icing technique. I don’t try to make sure they are identical, I aim for similar. I takes away the stress of ‘perfection’. They are to be eaten remember. The most important thing is that they taste delicious. That is what people remember.
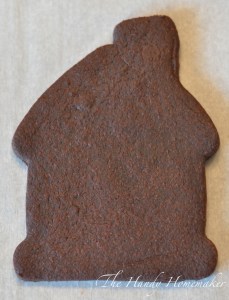
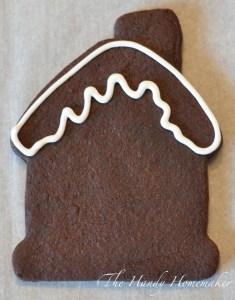
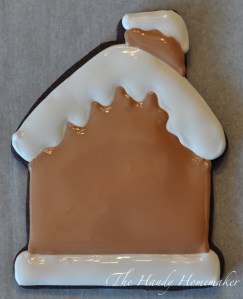
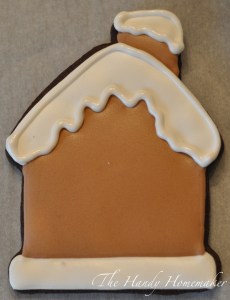
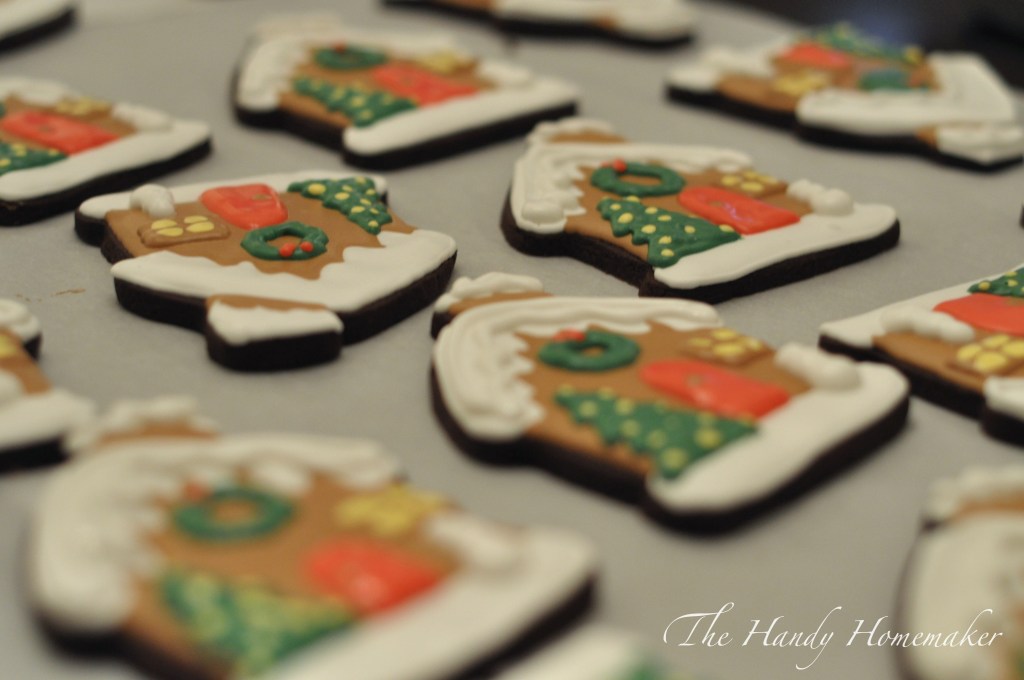
Here is a photo guide of how to ice a gingerbread house with Royal Icing. I give the icing 10 minutes to let the icing slightly set up before adding a new color. or next step of the cookie to keep the colors from running in to each other. If you are doing multiple cookies, work on one cookie, then move to the next cookie, when you finish go back to the first cookie to start the next step ie: filling in the brown of the house.
Building icing layers requires drying in between coats of icing. I use a fan near my cookie to help aid in the drying. It also gives the cookie a sheen like layer on top of the icing.
Once finished, let the cookies dry overnight.


Leave a comment