
I just love these adorable little cookies. The kids and I made sugar covered royal icing cookies quite a few times when they were little. It seemed to be all the rage to sugar fruit and candies for the holidays. It seemed like a waste of fruit to me, so we made all kinds of colored sugar to cover royal icing fruit cookies, angel cookies and gingerbread men cookies for our Christmas tree ornaments. That was it. Lights and sugared royal icing cookies. It was beautiful. I hosted a few holiday events after that and did the same and the guests loved looking for thier name on the Christmas tree full of gingerbread cookies. Each cookie was wrapped in cellophane and ribbon ready for each guest to take home with them.
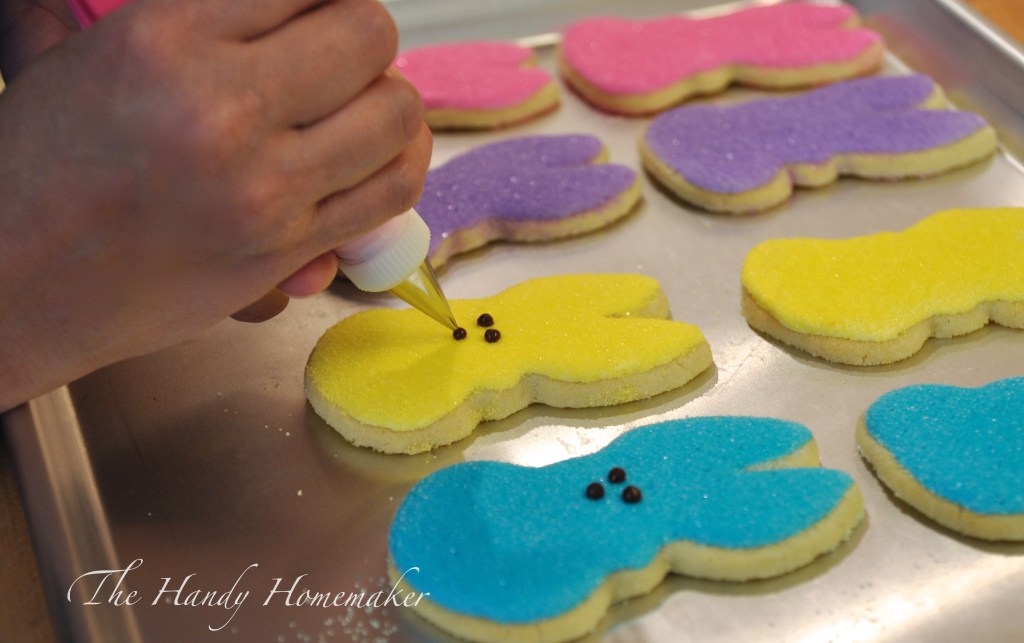
These are easy cookies for someone new to cookie decorating or baking with your children. The main thing about these cookies is that they need to set for 10-12 minutes to let the icing start to set up. The icing will still be wet but not so wet that it will either dissolve the sugar or allow it to sink into the icing. Once sugared, pipe on the chocolate eyes and noses and let dry overnight for optimal drying.
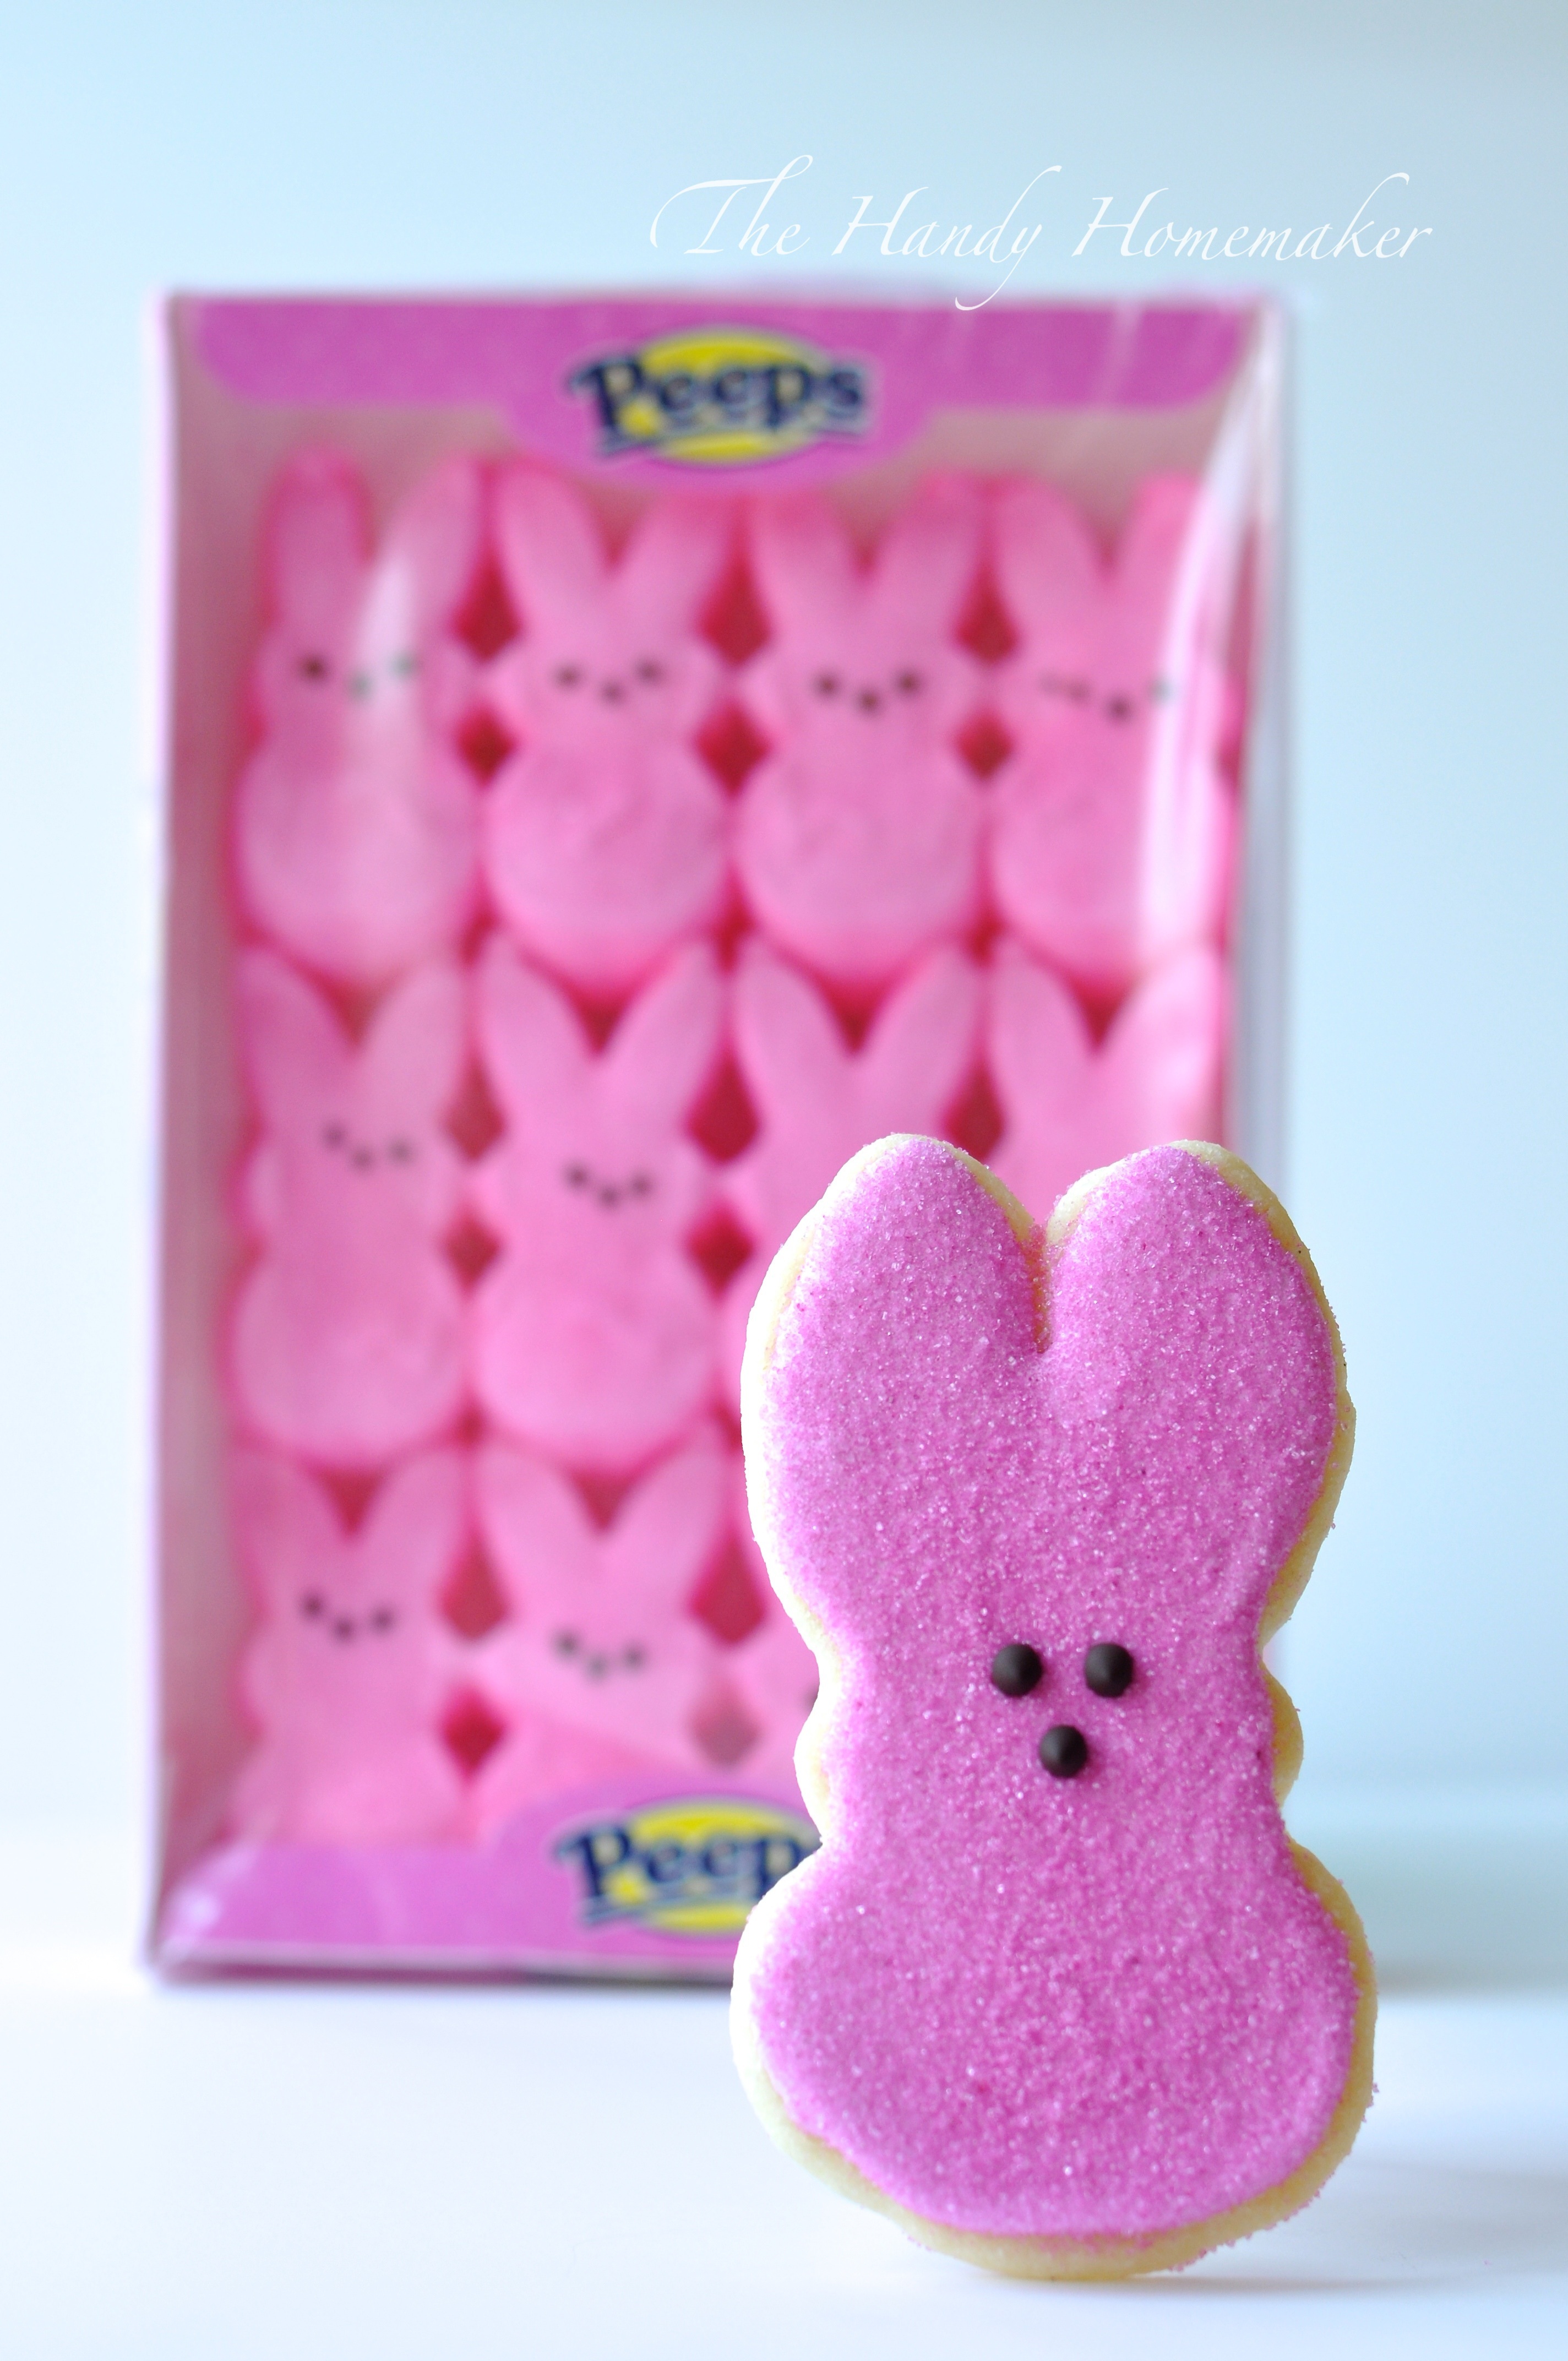
This was a bunny head that I pushed the side in with a heart cookie cutter to make head indents that look like peep marshmallows.

I used the same food coloring for my 20 second Royal Icing that I used to make my sanding sugar. (I will post a DIY video on making your own sanding sugar) Less expensive and you get the exact color you need.
Ingredients:
- Royal Icing
- Gel Food color
- Wilton Squeeze Bottles
- Spray bottle with water (Used only for baking)
- Bunny and Chick cookie cutters
- Sugar cookie recipe
- Parchment paper
- Colored sanding sugar – Here a DIY sanding sugar post on how to make your own.
- Chocolate chips for melting
- Piping bag with wilton tip #1


- Prepare and bake sugar cookie recipe as per instructions on recipe. Follow link above to one of the recipes I use.
- Prepare royal icing to 20 second icing stage and color in coordinating colors
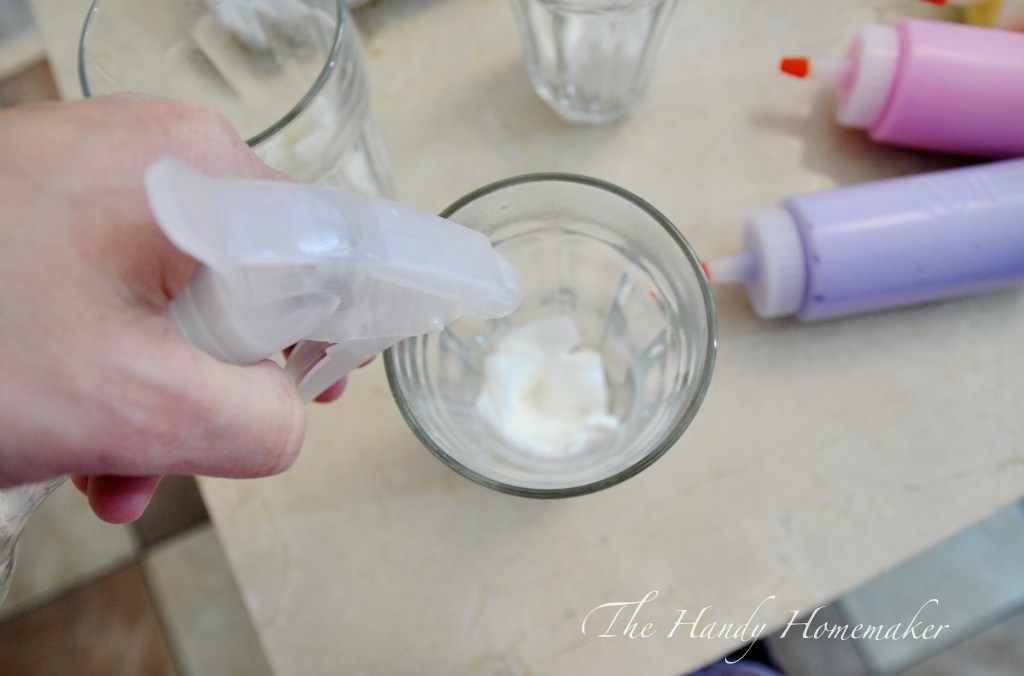
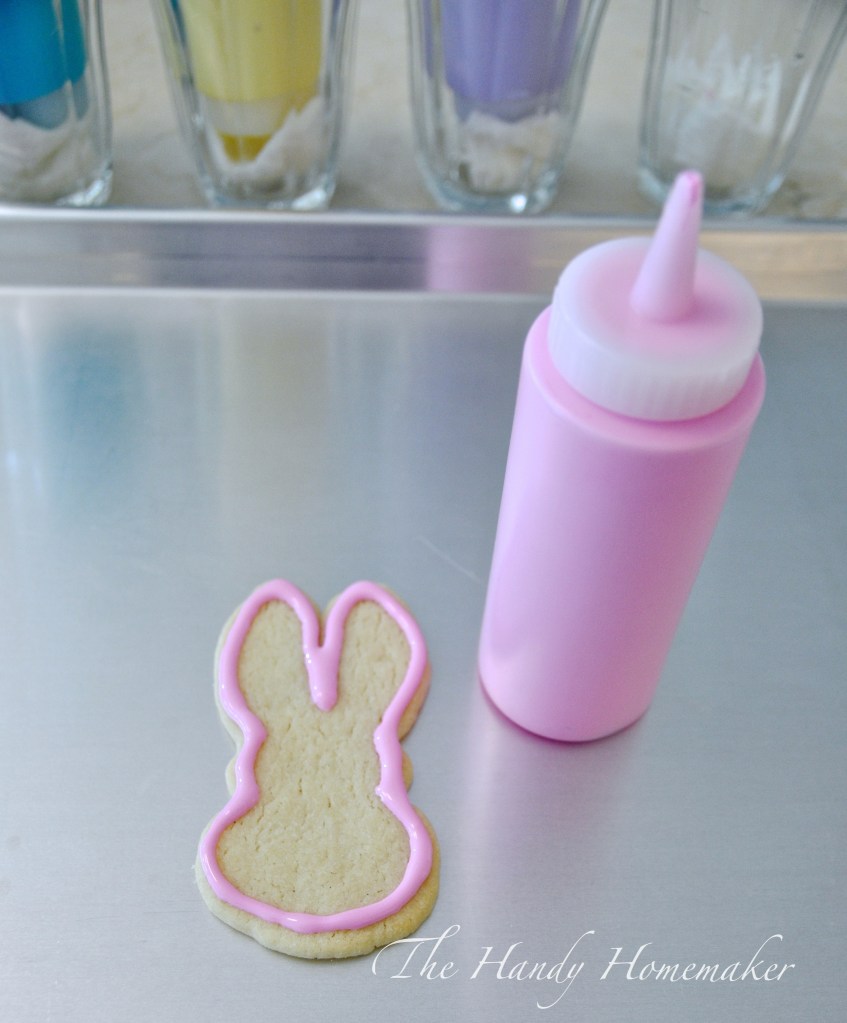
- I like to use these squeeze bottles when I am working with 20 minute icing. As you use it for both the piped edge and filling in the cookie.
- Place the squeeze bottles upside down in a glass that has a small piece of paper towel that is dampened with water. This will keep the tip from drying out, as well as leaking out of the bottle.
- Begin by icing each cookie (follow the instructions as pictured above or in the video linked below)
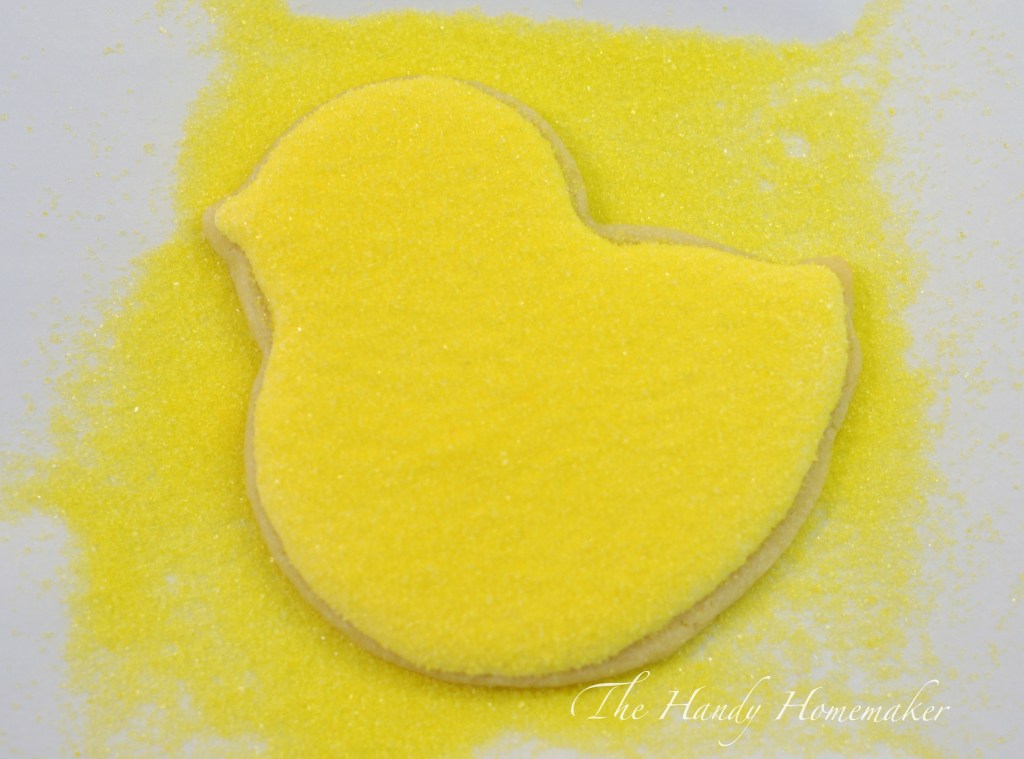
- Let the surface of the icing dry for about 10 minutes. Sprinkle gently with the coordinating colored sugar until all the icing is covered but not too thick or heavily applied.
- Gently shake off excess sugar. Not too hard or your icing may start to move as it’s not completely dry yet. Set aside to dry while you finish the rest of the cookies
- In a double boiler set over low/medium heat (or a glass bowl set over and inch of water in a small pot) place a small handful of dark chocolate chips to melt. Once half of the chips are melted remove from heat and continue to stir until completely melted. Careful not to get water splashed on the chocolate or it will seize up. (dry the pot or bowl with a towel to make sure this doesn’t happen)
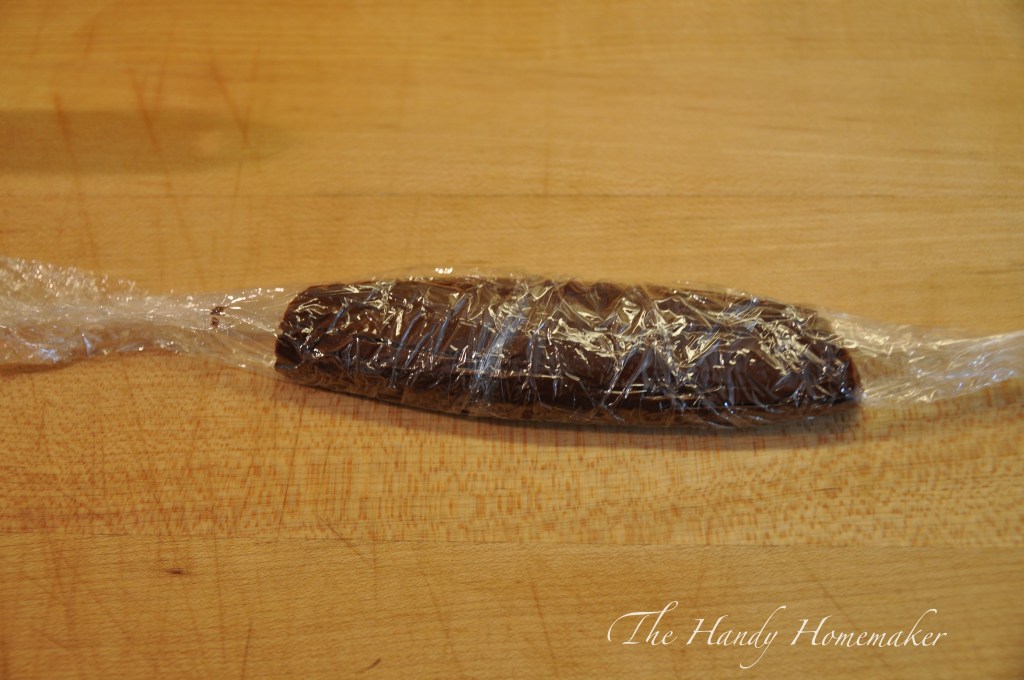
- Place a sheet of plastic wrap on the counter and pour the chocolate in the center. Flip the plastic wrap over the chocolate and roll to a log shape and twist the ends. Place in a piping bag and pull until the chocolate is securely in the bag. Snip off the excess plastic wrap sticking out of the end of the piping bag. Add the metal Wilton tip # 1 and secure in place on coupler.
- Pipe small dots of chocolate where the eyes and nose are placed like that on the marshmallow peeps. Let dry overnight.
- Share and Enjoy!

I had a special guest here visiting while I worked on these cookies. My sister Monica, was my photography assistant. It was nice not to stop to set up the frames for some of the steps! Thank you xo. As per a request from Sarah a “Handy Homemaker fan” here is my first instructional video on how to pipe the edge and flood (fill in with icing) the cookies with the 20 Second Royal Icing. Thanks for the suggestion Sarah. I promise videos will get better soon.


Leave a comment