 The door lever on the garage entrance had broken on a Saturday morning and the project was added to the to do list. As this particular Saturday was sunny and hot, it was an ‘enjoy the weather’ kind of day. Sunday morning came early as I woke to the sound of someone knocking on the door. It’s 5:30 am, who could this be, I jumped up to go to answer the front door, and I noticed my husband looking in, shivering and knocking on the dining room window. Shocked I went to the kitchen patio door to let him in. I said “What in the world are you doing out there”? He said around 1:00am he woke feeling stuffy from his allergies and decided to go outside to get some fresh air. He laid down on our deck sofa and fell asleep. The next thing he knew he woke up shivering as the temperature had dropped through the night. He went to the door to come back to bed but it was locked and he tried knocking for about a half hour, but no one heard him. I replied, “WHAT! Why didn’t you come and knock on the bedroom window”? He didn’t want to frighten me, how sweet. I can guarantee that I would have pounded until someone got up to let me in.
Once inside, we laughed hysterically as he warmed up. Good thing it was the middle of summer. Later that morning the mystery was solved on who locked the patio door. Saturday morning my husband woke to half of the lights on and two doors unlocked. He lectured my son about going to bed late at night and in the future he was not leave lights on and the doors unlocked. At 1:30 am that very night when our son went to bed, he locked the doors and turned off all the lights. At least he paid attention. Sunday morning I drove to Home Depot and decided to splurge by installing a keyless entry deadbolt and lever. I figured he wouldn’t mind the extra expense 😉
 This is the style I picked out as it matched the existing style and color of the other door hardware.
 The instructions that came with this particular brand are easy. Just follow the instructions step by step. I removed all the pieces of the existing door handle hardware. Then I said to myself “Houston, we have a problem” sigh….
I didn’t take pictures of this project at this point as I “assumed” it was going to be straight forward. However, once the hardware was removed I saw that the door had two different sized holes. What!!! No!!! I asked myself if it would be easier it to place the broken hardware back on the door and return the new door kit or figure this out and get that new deadbolt and lever on. My plan was to do it as a surprise while my hubby was warming up on the golf course. With that in mind, I sucked it up and put my brain to work. Now I know there may be one hundred better ideas but this is what I came up with.
Tools Needed:
- 6-8″ piece of 2×2 wood
- chisel
- hammer
- pencil
- drill
- 2 – 1/8″ hole saw bit
Plus you will need the pattern from your new deadbolt and lever kit.
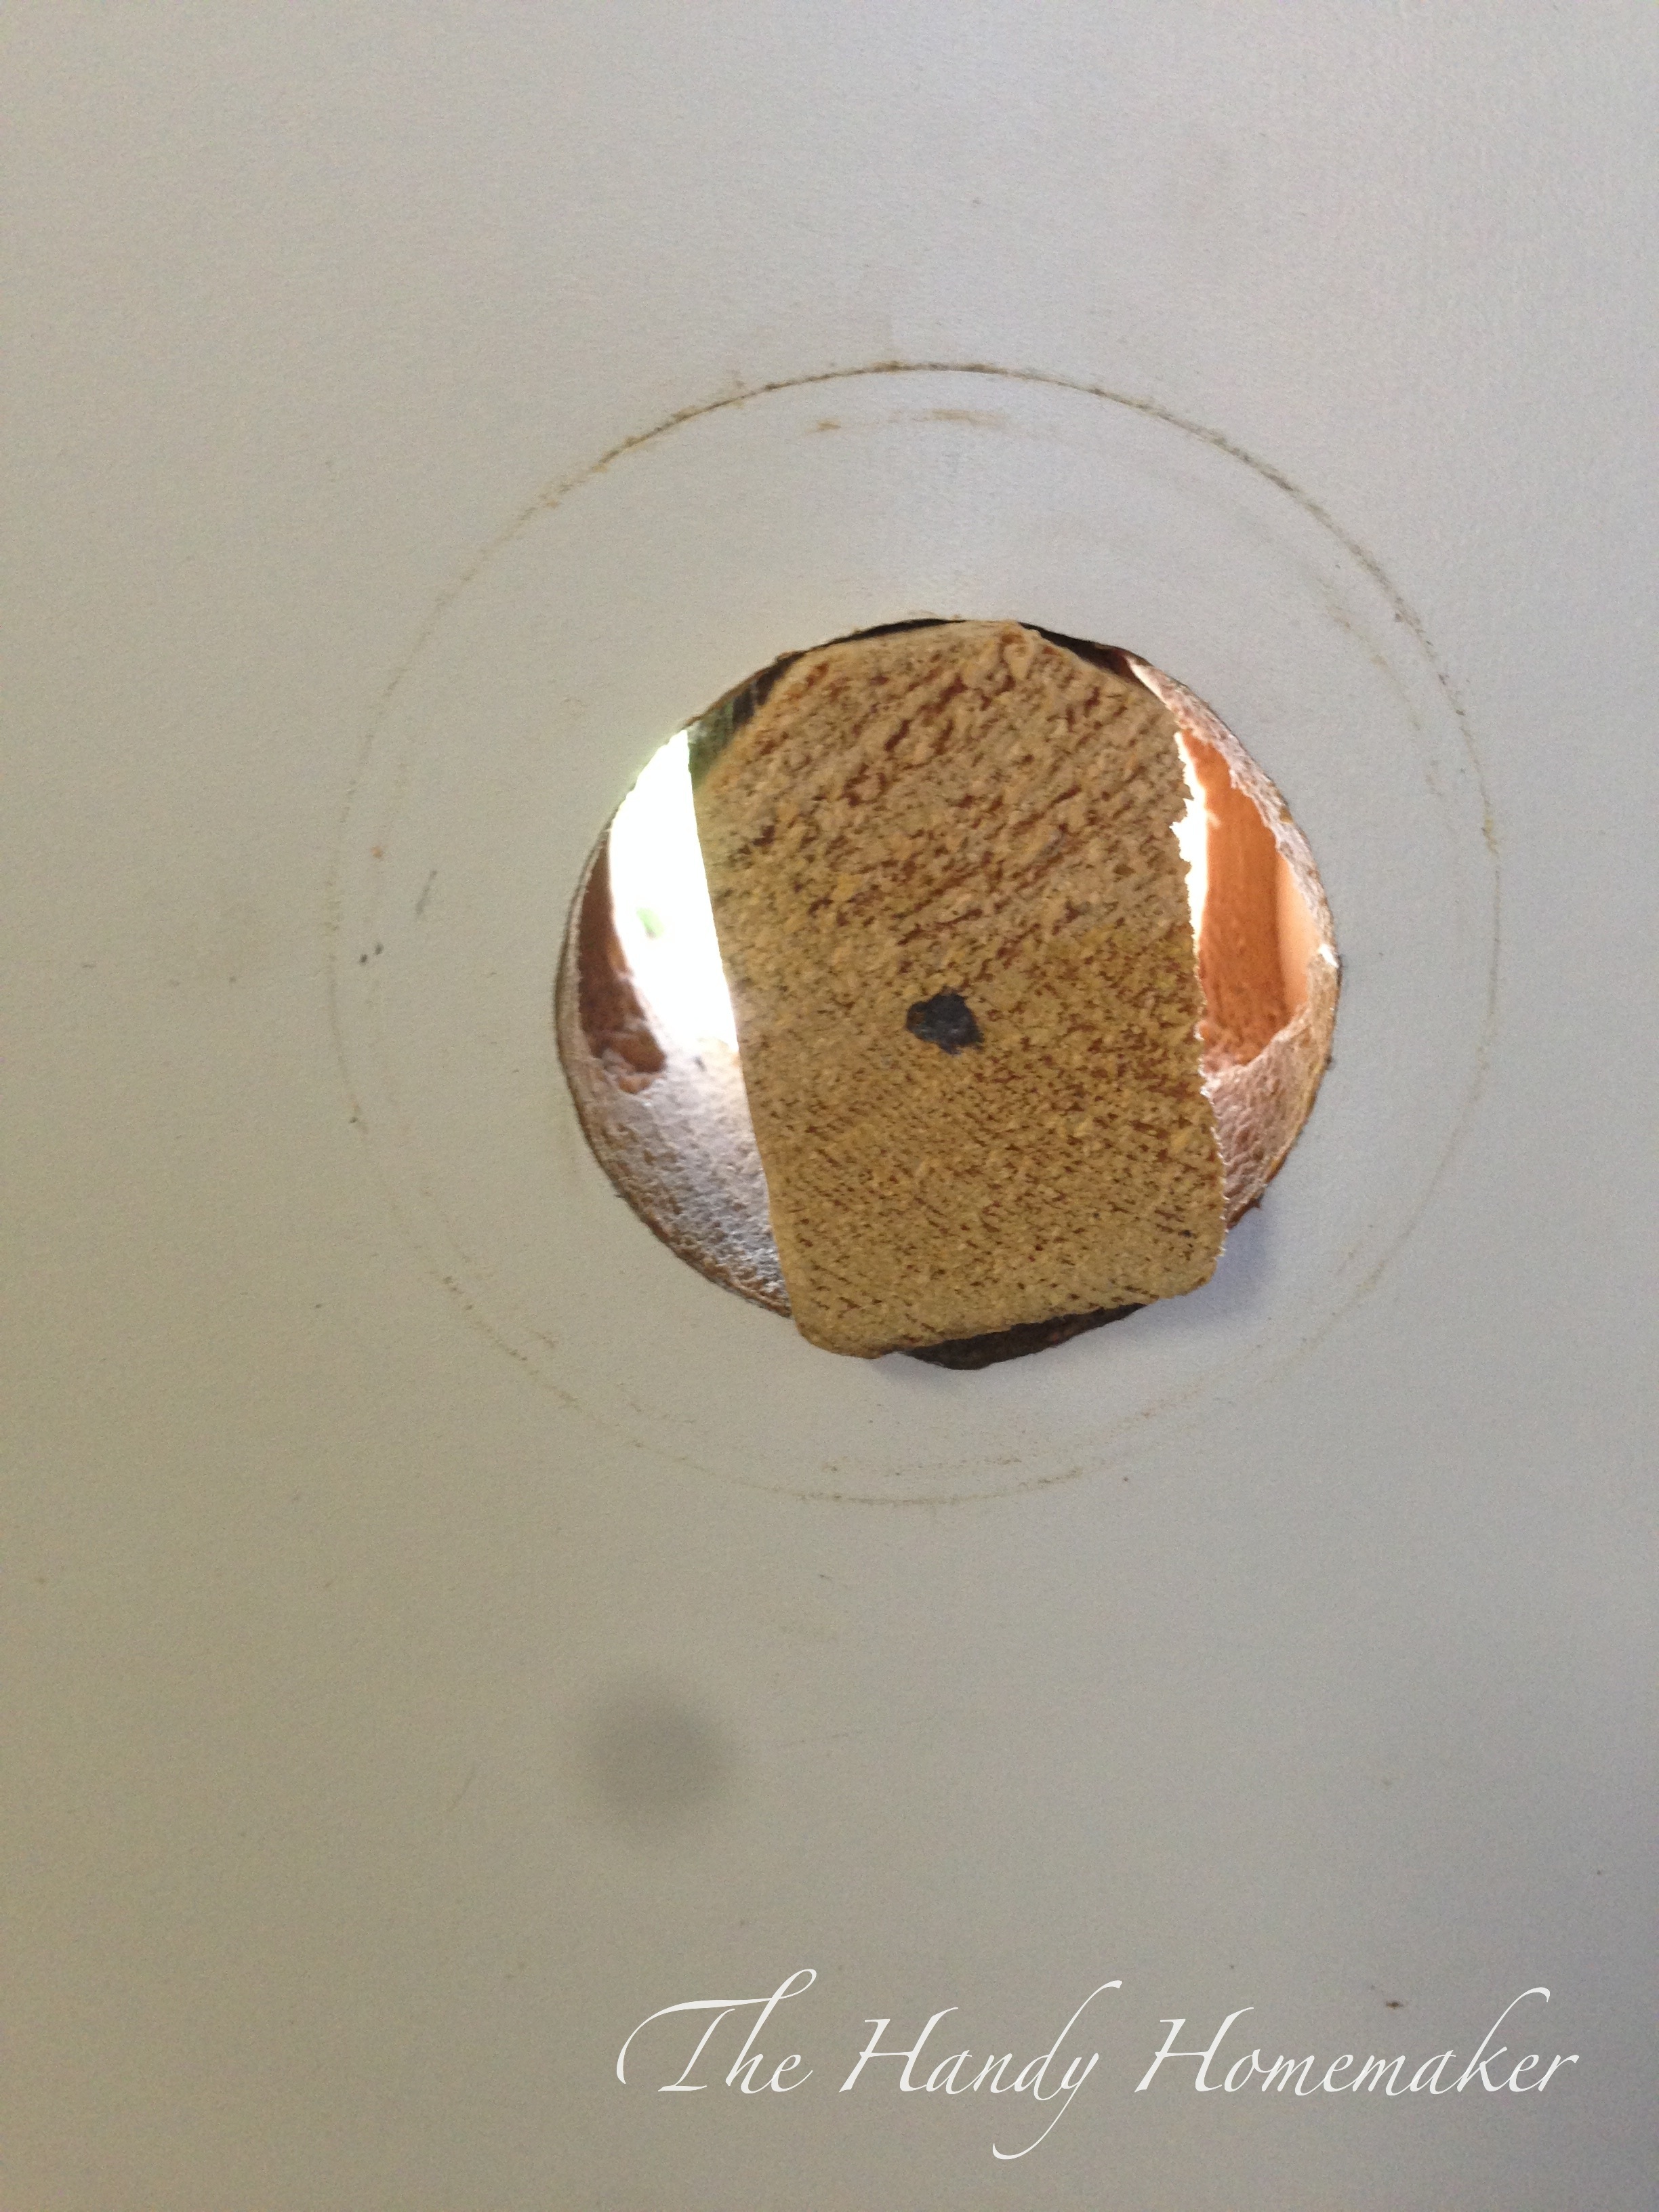
 As you can see here the bottom hole is the standard 2 – 1/8″ hole drilled in place with a 2 – 1/8″ hole saw. However the top is the smaller 1-1/2″.
 After a minute of pouting I grabbed a piece of 2×2 I had leftover from a project. Placed the wood piece up to the existing hole and with a pencil place through the other side of the hole did a rough circle mark on the wood. I then used a chisel and hammer to remove the excess of wood. You want this to fit snuggly into the 1-1/2″deadbolt hole.
 Using the hammer I hammered the wood into the existing 1-1/2″ deadbolt hole until it was tightly in place and flush with other side the door.
 Just like this 🙂 Okay.. I am starting to feel like I can fix this.

Now take the pattern that comes with the new lock instructions and tape in place and then mark with a pencil the center point of the new hole as per the guide. Double check your mark before drilling.
 Once you have your mark on the wooden insert, prepare your drill by attaching a 2-1/2″ hole saw bit as per the instructions. I happen to have one of these, but an inexpensive one can be purchased at your local hardware store.
 Place the small drill bit that is in the center of the hole saw on the pencil mark and start drilling. Now if your door is a metal/wood-filled door drilling through the metal is no walk in the park. It takes a little effort and patience. But don’t worry it will cut through the metal.
 Keep drilling. You are almost there.
 I stopped to remove the wooden core that goes in the hole saw while drilling before I finished the last of the door drilling. TA! DA!
Your now ready to finish installing the door hardware. Follow the INSTRUCTIONS STEP BY STEP to install the door hardware.
 Now to do a little paint touch up and I can remove it from the project list. We love this deadbolt, no longer will someone be locked out all night 😉 No more giving the kids their keys and then needing to get new ones made because they lost their key again. Go for a walk and no need to take keys or the garage door opener. Yay..
I have since taken the time and googled this to see how others fix this problem. There is a few tools to purchase for this project ie: a door jig, however they don’t have great reviews, and someone recommended placing a piece of plywood over the hole and drilling through that. However I am quite satisfied with the ease of this handy homemaker project.


Leave a comment