
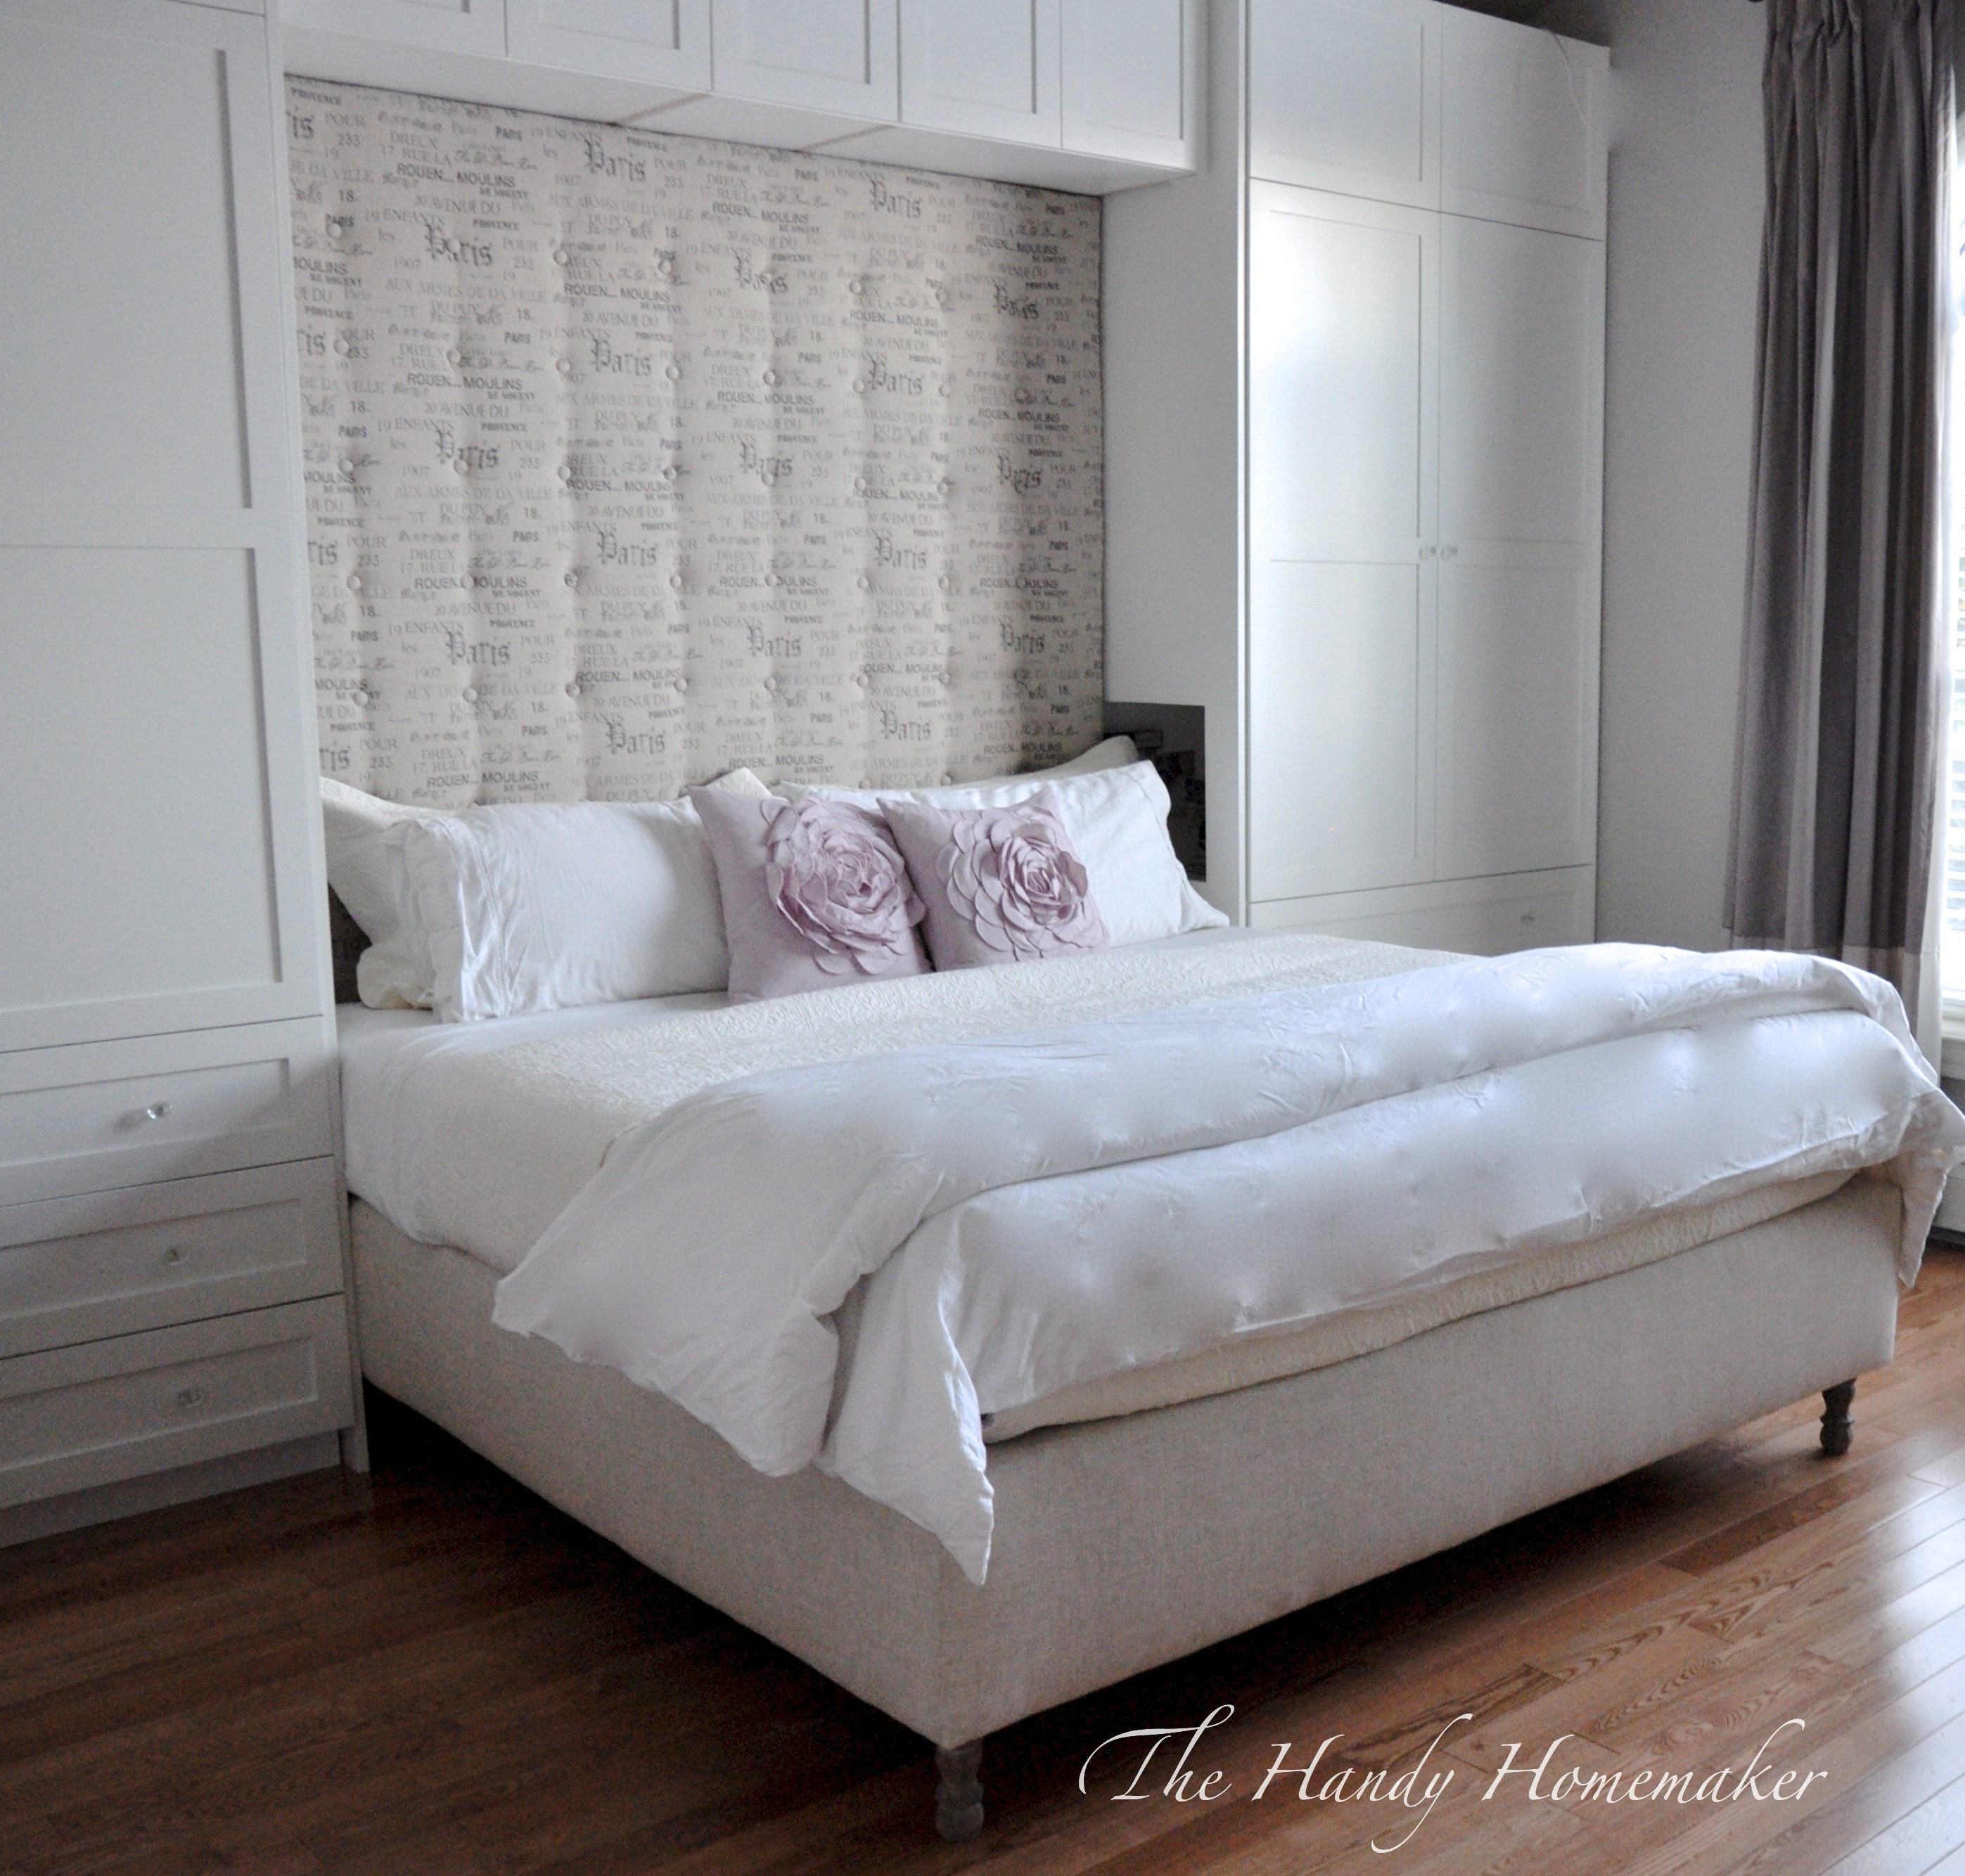
Trying to find a headboard to fit a space or in the style or color you want can be challenging. Usually you need to go to a professional to have one made, which can lead to a huge expense. I want to show you how making your own is not as challenging as you might think. Use these instructions as a guide to help you design and build an upholstered headboard of your dreams.
Materials Needed:
- Plywood Cut to fit the width of your bed. (I was filling a space so sizes will vary)
- 1-1x8x6 wooden board cut in half (along the length) at a 45 degree angle
- 3- 1x3x6 wooden boards
- 1 1/4” wood screws
- 2-3” foam to fit the size of the headboard
- Quilt batting to cut to fit the size of headboard plus 12” per width and 12” per height
- Fabric of your choosing cut to fit the size of the headboard plus 12” per width and height
- Buttons covered with matching fabric (Many fabric stores sell kits to do this yourself, as well as an option to have them covered for you)
- 12” per button of polyester cording to attach button
- Scissors
- Upholstery needles (found at most fabric stores)
- Marker
- Measuring tape
- Knife for cutting foam
- Drill with a small wooden bit (add Size)
- Sewing machine with coordinating thread- This is only needed if you are making a larger headboard as per the one that I am doing and/or your fabric is not wide or high enough.


- Lay plywood out on a raised platform. If you are making a large headboard you may need to join two sections of plywood together.
- Cut the two halves of 1x8x6 eight inches shorter than the plywood width. Measure and place one of the boards 3” down from the top of the plywood sheet and evenly centre 4” from each edge. Screw in place as per the picture shown. Set the other board aside until it is time to attach headboard to the wall.
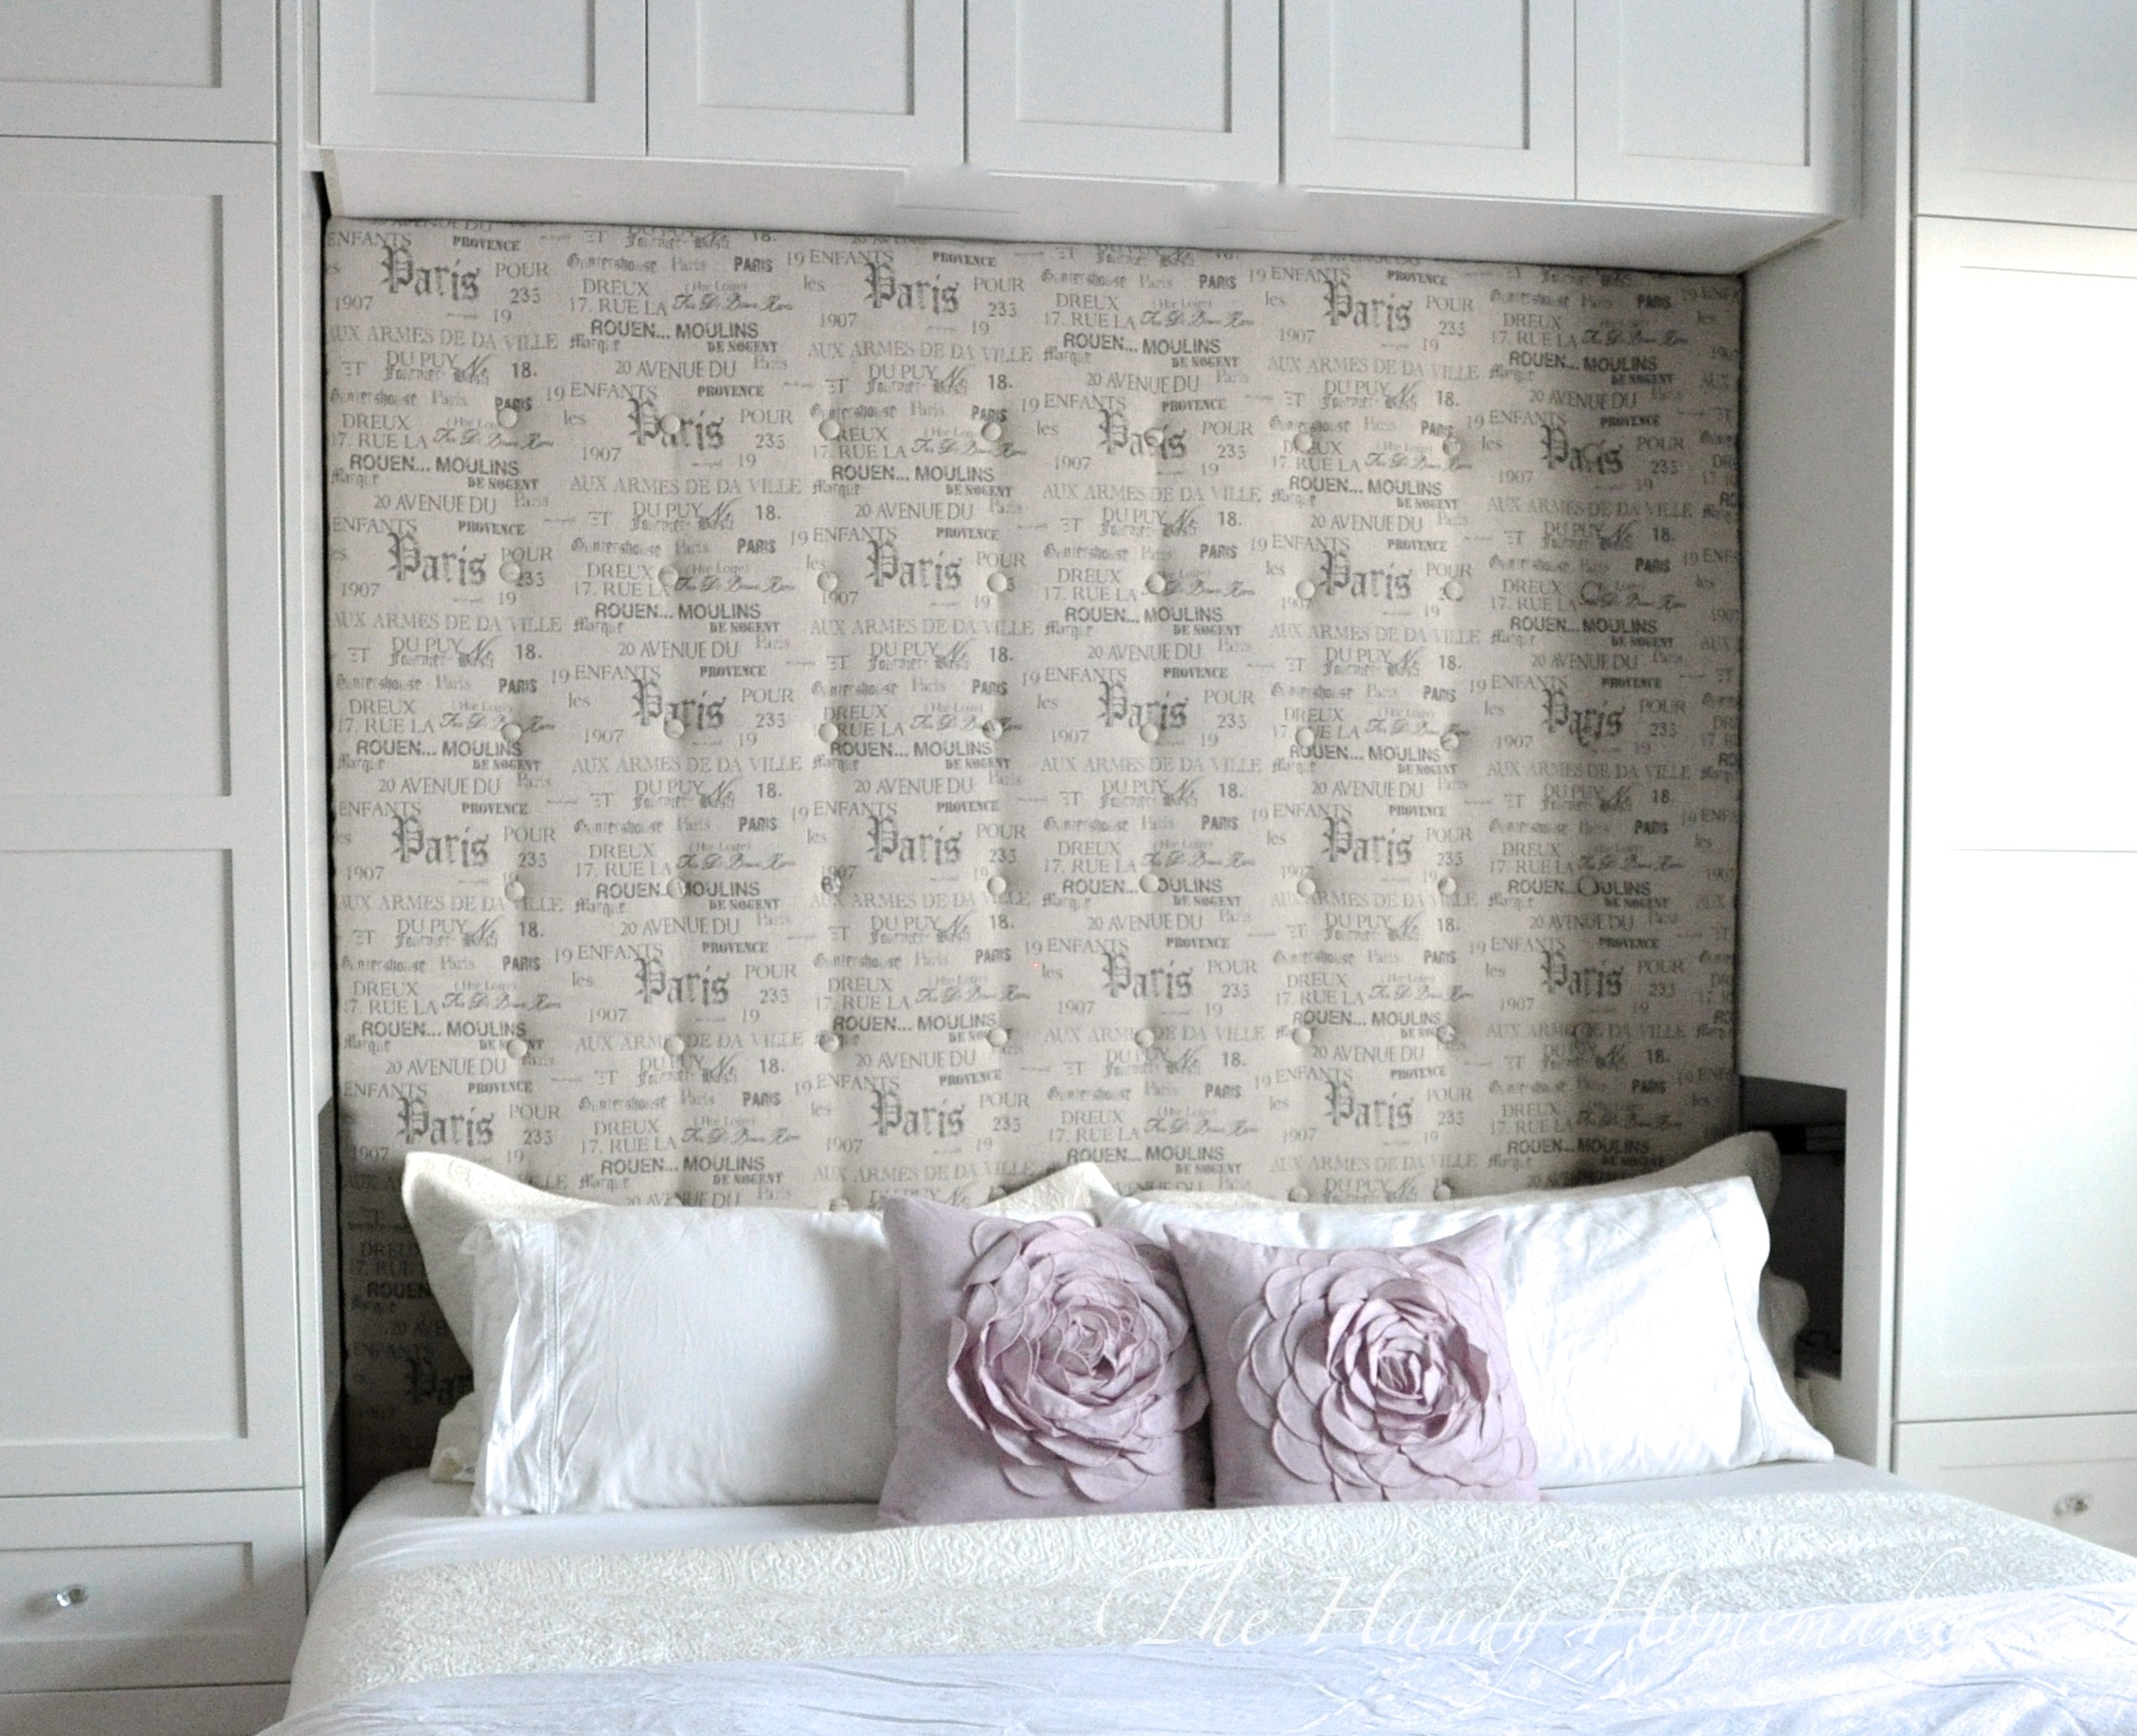
- Decide how many buttons you want and mark out evenly divided on the plywood.
- *Cut the three 1x3x6’s 8 inches shorter than the width of the plywood. Attach one to the bottom, then attach the other two boards at the 1/4 and 3/4 height on the back of the plywood. Take notice of where your marks for the button holes are and place so they will not cover these areas. *(Use this step only if you are joining two pieces of plywood together.)
- With proper bit attached drill the marked spots for the button placement
- Flip the plywood over and lay the foam on top. You may need to trim this foam. If so use a large bread cutting knife or electric knife, cut to fit.
- *If you are attaching the headboard to an area as I have done here you will need to set the foam in place with a 1-1/2- 2” overhang on the top of the headboard to push and attach the headboard in place on the wall. Otherwise place the foam to the edge of the plywood board.
- Cover the foam with the quilt batting cut in to the proper dimensions, tack in place.
- Evenly lay the fabric over the batting and foam.
- *For plans that two pieces of fabric are needed use this step. For prints or patterned fabric lay out then carefully line up your fabric before pinning right sides together. Sew together and trim excess fabric from the seam.
- Place the fabric back over the foam and batting. I used a board as a guide to make sure that the wording on the fabric was evenly placed.
- To make sure that the fabric doesn’t slip or pull out-of-place two or three of the upholstery needles through all layers and into the button holes in the plywood backing.
- Starting at the top center of the headboard, tuck 1/2″ of fabric under and staple to the backside of the plywood working toward the edge. Stop stapling 5-6″inches from the corner edge. You will fold, tuck under, and staple the corners once all the edges are stapled in place.
- Staple the outside edges, starting from 5-6″ from the top of the headboard, stopping at the bottom. Staple the bottom edge in place starting from the center working towards each edge.
- Once all edges are stapled in place cut the excess foam from the corners as shown tuck the excess corner fabric under and staple in place neatly.
- Cut a 12″ strip of cording for each button. Thread the cording through each button and tie.
- You can now thread the upholstery needle with the button and then push through the front, but this can be challenging to find the pre-drilled hole. I found it easier to push the upholstery needle through the backside of the headboard and then thread the needle with the button.
- Pull the cord through to the back of the plywood and pull tautly as you staple in place. Staple in a zig zag pattern to keep the cording from slipping.
- Attach the other half the board with the angle to the wall making sure it is attached securely to the studs for support.
- Lift and place the headboard on the wall attaching the two boards together.
To see how I made the upholstered bed frame in these photos follow these links to the posts. Upholstered Bedframe Part 1 & Upholstered Bedframe Part 2


Leave a comment