Fall has arrived and my calendar reminds me that I need to get started on a few projects and recipes that take curing time in order to be ready for gift giving. One of course is my handmade soap which I cure for 5-6 weeks before packaging up and labeling and the next is this homemade fragrant and sweet scented vanilla extract.
With Christmas around the corner, now is the time to start the extract. Vanilla extract is an easy gift to make. It takes a little forethought, but very little time to prepare once you have your ingredients. I like to give these out at holiday time as a hostess gift when we have been invited to home, for that friend who loves to bake, or as a small gift along with fresh-baked goodies. I’ve been making my own vanilla for years and it really has a notable difference in baking.
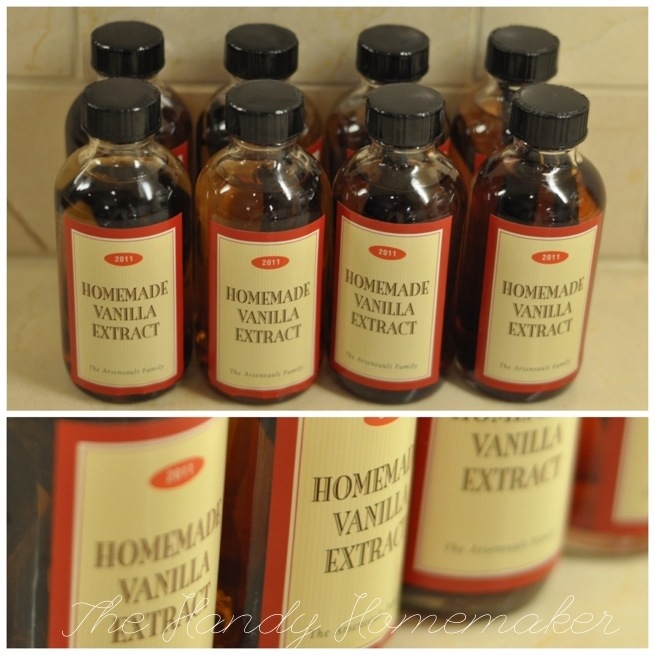
For the labels, whether you are printing or buying labels that it might be wise that you make or purchase extra. Labels get less expensive the more you buy if purchasing, but also if you want to make this again in the future, it will be one less step to take.
Tip * Do not put the date on the label. I made vanilla and these labels in 2011 for personal use and gifts. However, when I made this batch, I realized that I made a rookie mistake by adding a date to my labels. So, if you happen to be a lucky recipient of 2013’s batch of vanilla it is dated 2011. If you want the date somewhere on the bottle I suggest you use a black sharpie and write it on the bottom of the jar. I like to use Avery print to the edge labels which I purchased at Staples. I do know that Walmart makes carries these also. Just be prepared that the ink may run with wet hands from baking or vanilla dripping down the side of the label so if your looking for something waterproof and smudge proof ordering online from a company like Vista print may be a great option for you.
In the above picture you can see that the color of the vodka has started to caramelize after just a few days, but the flavour will take more time, approximately 6-8 weeks.
Ingredients:
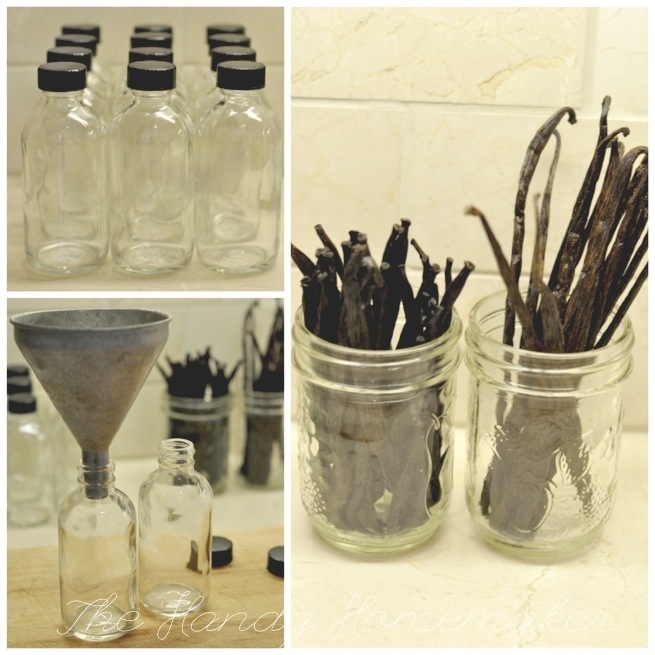
- Bottle of vodka
- Vanilla beans* – 2 per jar 4 oz jar
- 4oz jars glass (Boston Round * Specialty Bottle Company)
- Funnel that fits in small jars
- Sharp knife for cutting vanilla beans
- Optional * 1 quart size canning jar or large container with cover of your choice
- Labels and printer

1. Sterlize all equipment. (I boil everything in a big pot for 10 min then let air dry and cool on the counter) Just to be on the safe side
2. Cut vanilla beans in half. Slice each half down the middle to expose the vanilla bean seeds.
3. Place the pieces of the vanilla bean in the jar.
4. Repeat for all remaining jars that you will be filling with vodka.
5. If you are choosing to make in a large glass container that has a cover place 1- 2 vanilla been for every 4 oz of vodka.
6. Fill each jar with vodka.
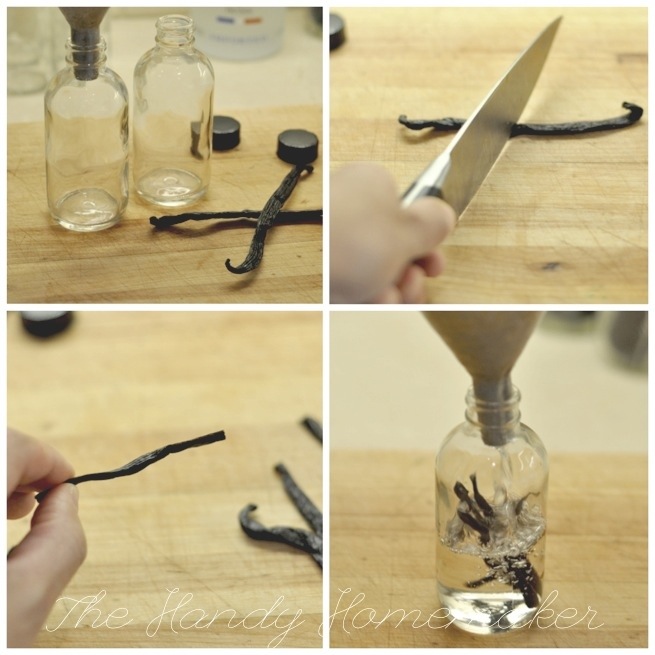
7. Place the cap on each jar.
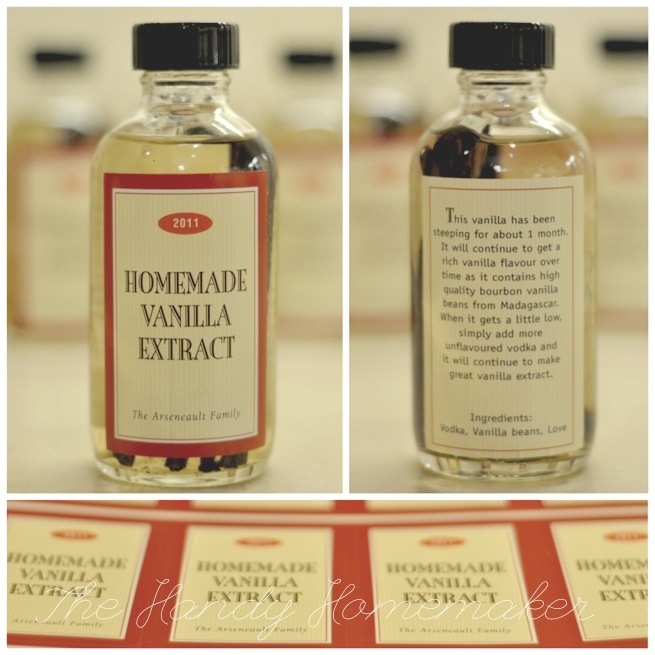
8. If you are labelling the jars add the label now. I think the jars would look great with a small homemade tag attached to the neck of the jar with a ribbon.
9. Place in a dark place for approximately 8 weeks for optimal flavour.

The front and back of the jars.

Here is what the vanilla looks like after just 5 days.

Tips*
If you’ve used most of your vanilla, you can top up with vodka as long as the vanilla bean is still inside the jar. Please allow 8 weeks for optimal colour and flavour.
The vanilla bean pod seeds can be used as well. Remove the bean from the bottle, use a knife to scrape the beans out and use in any recipe that calls for vanilla. Just be aware that if it is a light batter, cream etc. you will see the tiny black specs of seed.
Vanilla beans may not be inexpensive in your local grocery store. I purchased mine on eBay, Vanilla Products USA
Specialty Bottle Company ships to Canada, There may be extra fees by way of duties, broker fees, and taxes, upon delivery. Make sure you search for your coupon codes. sometimes Specialty bottle offers coupons.
Hope you Enjoy making these as much as I did.


Leave a comment